Build Vue 後將 dist 放到 .NetCore 專案的 wwwroot 再 Publish
1. 簽出 Vue Repo
這邊 Vue Repo 是放在 Azure Devops Git Repo
然後 Pipeline 是以此 Repo 起始
所以語法為 checkout: self
預設簽出會放在 $(System.DefaultWorkingDirectory)
並且 Git 預設會用 Repo 名稱當作資料夾名稱來放 source code
所以實際上的路徑如下
$(System.DefaultWorkingDirectory)/Vue2. NPM Install
建置 Vue 之前需要先 install 來安裝 vue 專案所需的 lib
- task: Npm@1
      inputs:
        command: 'install'
        workingDir: 'Vue'
這邊 workingDir 是相對路徑,實際上也可以打完整路徑 $(System.DefaultWorkingDirectory)/Vue 以下不贅述
3. NPM run build
建置 Vue 預設輸出到 dist 資料夾
- task: Npm@1
      inputs:
        command: 'custom'
        customCommand: 'run build'
        workingDir: 'Vue'
至此 Vue 部分基本已結束,我們得到以下 Output
$(System.DefaultWorkingDirectory)/Vue/dist/*
4. Checkout .Net Project
Devops 簽出同一個 Project 的另一個 Repo 語法如下
- checkout: git://MyProject/DotNetRepo
範例:- checkout: git://JakeujCICD/JakeujCICD
此時工作目錄結構如下
$(System.DefaultWorkingDirectory)
- Vue
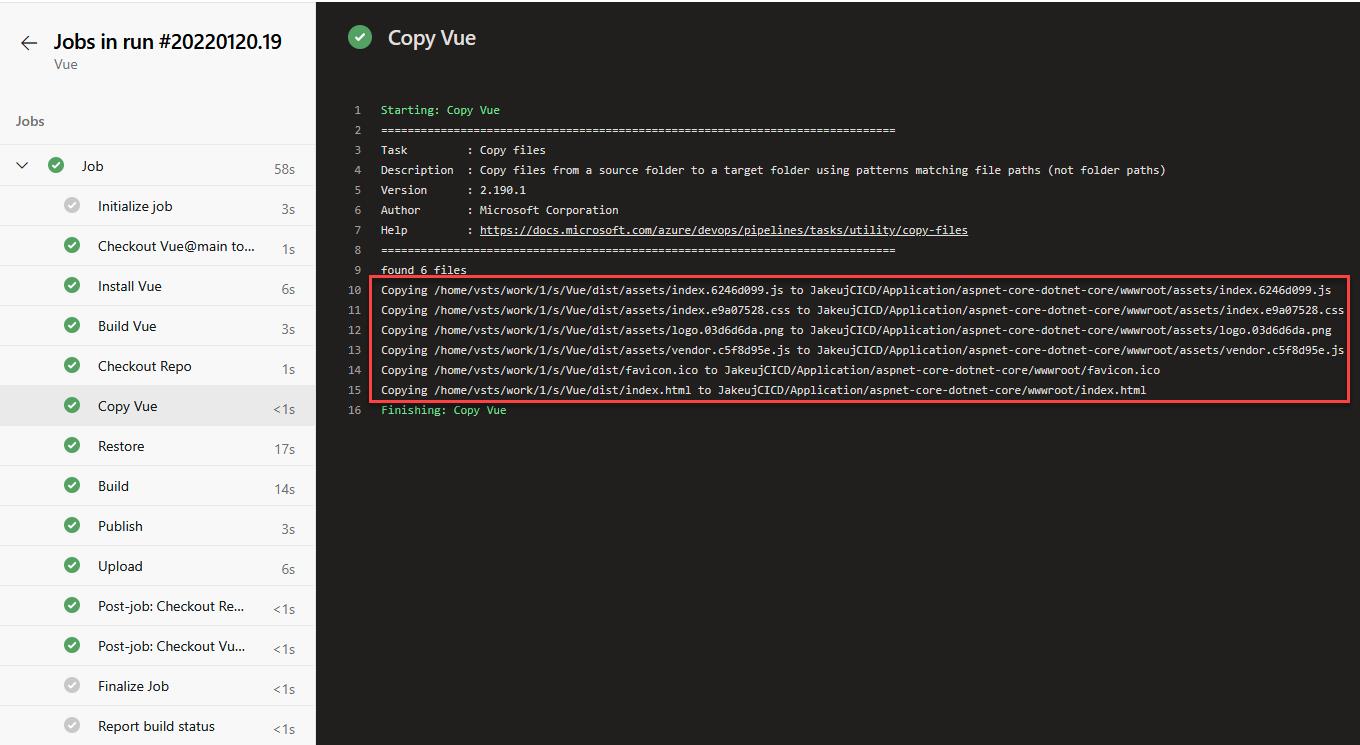
- JakeujCICD5. Copy
將先前建置出來的 dist 內東西放到剛剛簽出的 .Net 專案內的 wwwroot
- task: CopyFiles@2
  inputs:
    SourceFolder: Vue/dist
    targetFolder: JakeujCICD/Application/aspnet-core-dotnet-core/wwwroot
    OverWrite: true
或是用 mv -f 指令,效果一樣
- bash: mv $(System.DefaultWorkingDirectory)/Vue/dist/* $(System.DefaultWorkingDirectory)/JakeujCICD/Application/aspnet-core-dotnet-core/wwwroot/ -f
至此已完成 Vue 與 .Net 專案合併
6. Restore
.Net 還原 Nuget 套件
- task: DotNetCoreCLI@2
displayName: Restore
inputs:
command: restore
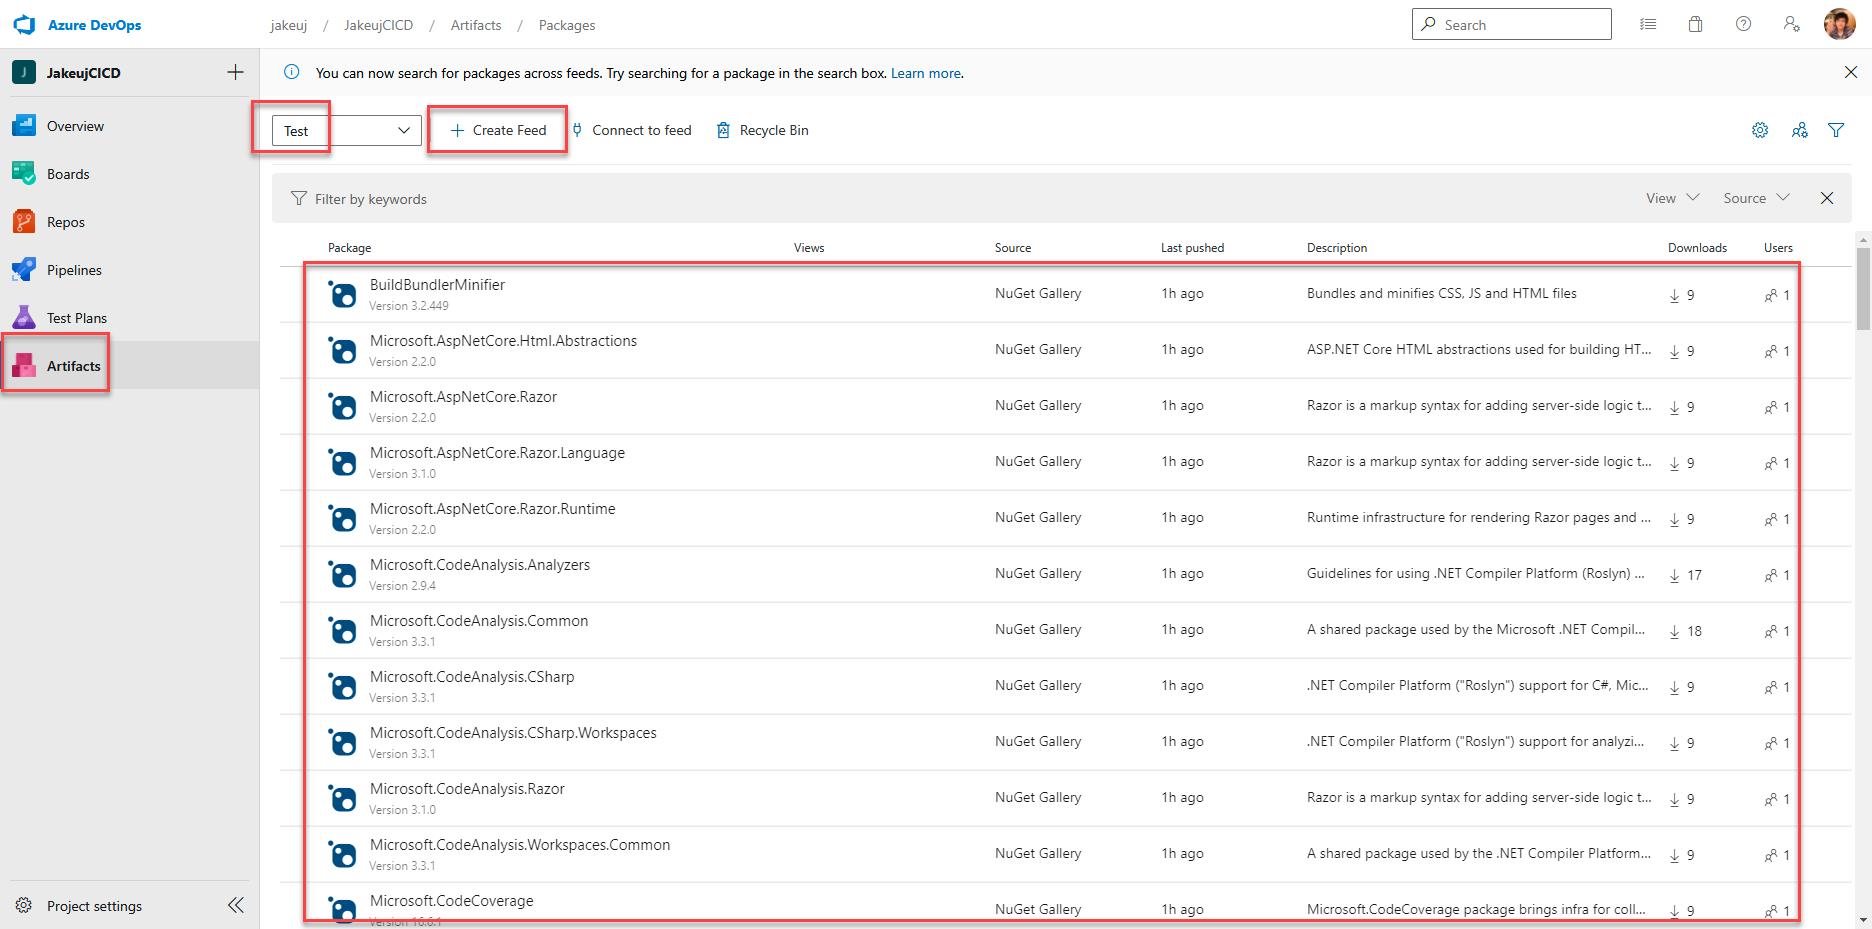
feedsToUse: 'select'
feedRestore: 'JakeujCICD/Test'
projects: '**/*.csproj'
includeNuGetOrg: true這邊 feedRestore: 'JakeujCICD/Test' 是用來將 Nuget Packages 暫存到 DevOps
這樣以後就不用重新從 Nuget 下載 Pakages ,可以加速以後 CI 速度
value 的格式為 專案名/feed名,首先要先到 Artifacts 裡面去新建 Feed,選擇你的專案並取個名字,然後回填到 feedRestore
7. Build
建置 .Net 專案
- task: DotNetCoreCLI@2
  displayName: Build
  inputs:
    projects: '**/*.csproj'
    arguments: '-c $(BuildConfiguration)'
8. Publish
發布 .Net 專案發布
- task: DotNetCoreCLI@2
  displayName: 'Publish'
  inputs:
    command: publish
    publishWebProjects: True
    arguments: '--no-build -c Release -o Output'
    zipAfterPublish: True
因為前面已經 Restore & Build 了,所以這邊直接下 --no-build
然後這邊會得到一個編譯好的 zip
$(System.DefaultWorkingDirectory)/Output/aspnet-core-dotnet-core.zip
9. Upload1
這一步主要是將要發布的東西 aspnet-core-dotnet-core.zip
上傳到 Artifacts 來讓之後的 Release 可以下載並佈署到 Azure Web App Service
- publish: Output
  artifact: WebApp
這會在 Release 時期自動下載到 $(System.DefaultWorkingDirectory)/Drop/WebApp/aspnet-core-dotnet-core.zip
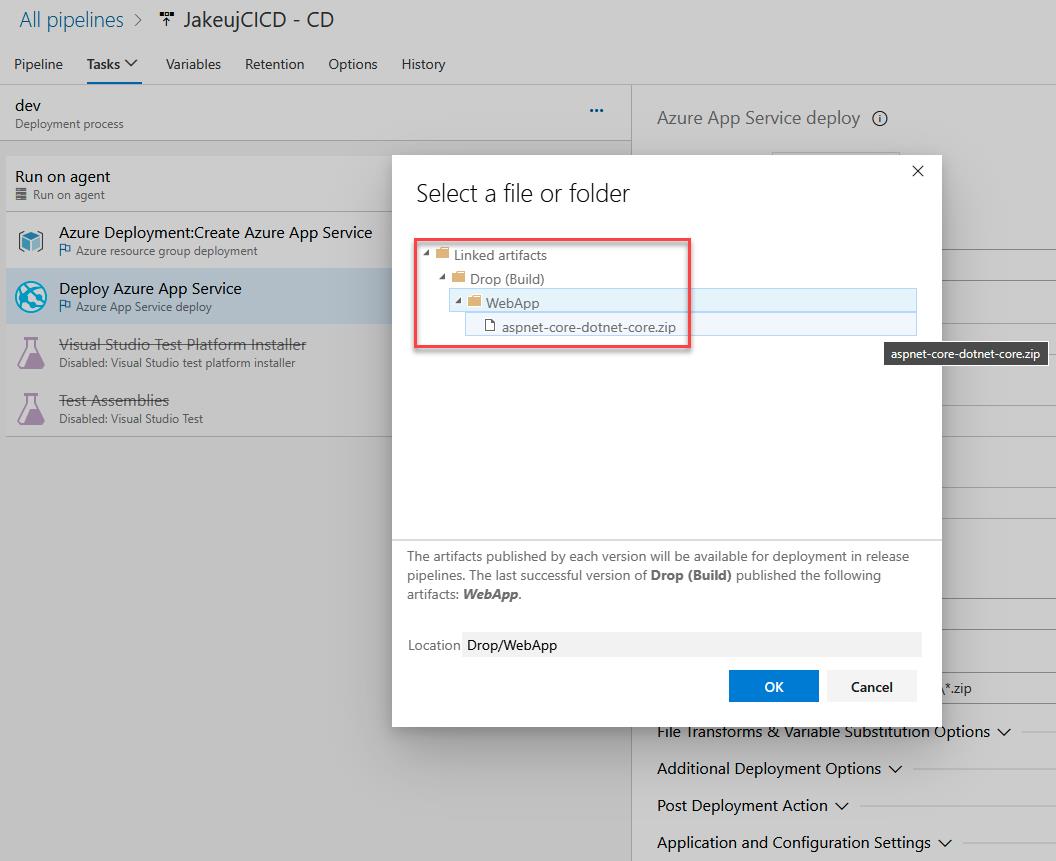
其中 "Drop" 是 Release 時指定的 Artifacts 別名 Drop
10. Yaml
trigger:
- main
pool:
vmImage: 'ubuntu-latest'
steps:
- checkout: self
- task: Npm@1
inputs:
command: 'install'
workingDir: 'Vue'
displayName: 'Install Vue'
- task: Npm@1
displayName: 'Build Vue'
inputs:
command: 'custom'
customCommand: 'run build'
workingDir: 'Vue'
- checkout: git://JakeujCICD/JakeujCICD
displayName: Checkout Repo
- task: CopyFiles@2
displayName: 'Copy Vue'
inputs:
SourceFolder: Vue/dist
targetFolder: JakeujCICD/Application/aspnet-core-dotnet-core/wwwroot
OverWrite: true
- task: DotNetCoreCLI@2
displayName: Restore
inputs:
command: restore
feedsToUse: 'select'
feedRestore: 'JakeujCICD/Test'
projects: '**/*.csproj'
includeNuGetOrg: true
- task: DotNetCoreCLI@2
displayName: Build
inputs:
projects: '**/*.csproj'
arguments: '-c $(BuildConfiguration)'
- task: DotNetCoreCLI@2
displayName: 'Publish'
inputs:
command: publish
publishWebProjects: True
arguments: '--no-build -c Release -o Output'
zipAfterPublish: True
modifyOutputPath: true
- publish: Output
displayName: Upload
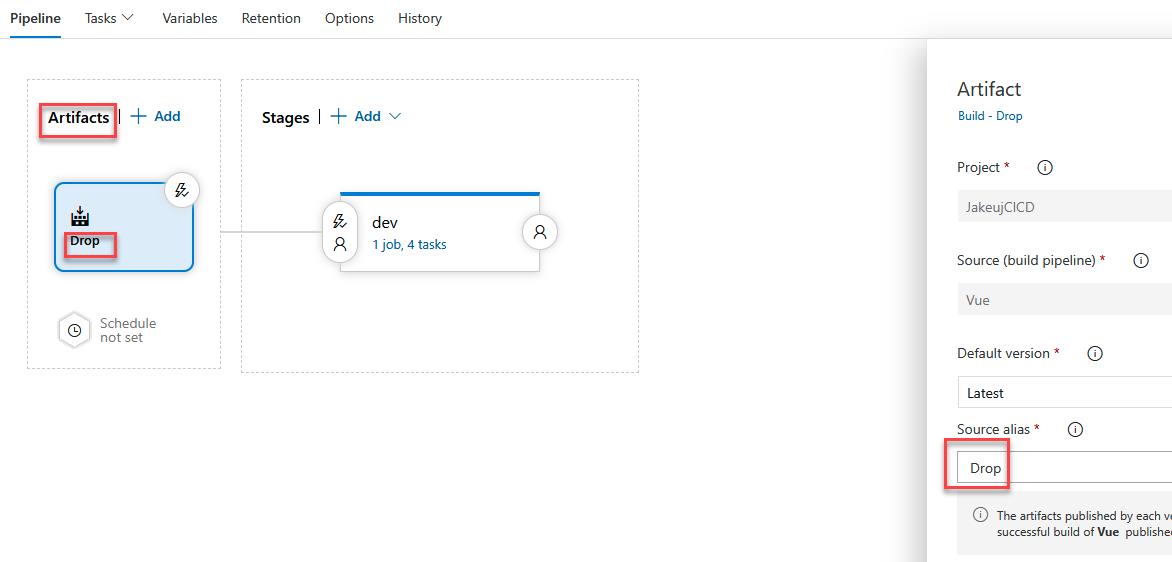
artifact: WebApp11. Release
Release 的時候會需要指定要發布的 zip 在 Artifacts 的相對路徑
$(build.artifactstagingdirectory)/**/*.zip
如果因為種種原因造成 $(build.artifactstagingdirectory) 裡面有不只一個 zip
因為這樣不知道要發布哪一個包,所以就會報錯
此時需要調整該 Path
$(build.artifactstagingdirectory)/**/aspnet-core-dotnet-core.zip
$(build.artifactstagingdirectory)/Drop/**/*.zip
總之就是讓他在該路徑能夠找到唯一的 zip 來部屬

