[Silverlight]如何限制InkPresenter在畫布上的範圍?
Beer朋友在 [Silverlight]拿畫布來畫圖 ----- Day16.1 這篇文章中問到要怎樣限制畫圖範圍。
關於這個問題,您可以參考下列步驟:
1. 首先,我們先來了解 InkPresenter 物件中的Clip屬性,MSDN說明如下:
取得或設定用來定義 UIElement 內容外框的 Geometry
因此,我們可以透過這個屬性來設定筆觸的範圍。
2. 您可以在 XAML 程式碼中設定:
   <InkPresenter  x:Name="inkPresenter"   Height="100" Width="300"  Cursor="Stylus" Canvas.Top="10" Canvas.Left="10"
                       Background="Yellow" MouseLeftButtonDown="inkPresenter_MouseLeftButtonDown"
                       MouseLeftButtonUp="inkPresenter_MouseLeftButtonUp" MouseMove="inkPresenter_MouseMove" >
            <InkPresenter.Clip>
                <RectangleGeometry Rect="0,0,300,100" />
            </InkPresenter.Clip>
   </InkPresenter>
3. 也可以在程式碼中設定:
//限定筆觸的範圍
RectangleGeometry rectGeo = new RectangleGeometry();
rectGeo.Rect = new Rect(0, 0, 300, 100);
inkPresenter.Clip = rectGeo;
結果就會像這樣:

當然,限制的範圍不侷限矩形,您也可以用橢圓、線條的方式來限定。
20090830補充:
如果要變換筆的顏色,可以參考下列作法:
1. 我在畫面上放了三個變換顏色按鈕,但是是在InkPresenter所限制的範圍之外:
01 <UserControl x:Class="SilverlightTest.MainPage"
02 xmlns="http://schemas.microsoft.com/winfx/2006/xaml/presentation"
03 xmlns:x="http://schemas.microsoft.com/winfx/2006/xaml"
04 xmlns:d="http://schemas.microsoft.com/expression/blend/2008" xmlns:mc="http://schemas.openxmlformats.org/markup-compatibility/2006"
05 mc:Ignorable="d" Width="800" Height="600">
06 <Grid x:Name="LayoutRoot">
07 <InkPresenter x:Name="inkPresenter" Height="100" Width="300" Cursor="Stylus" Canvas.Top="10" Canvas.Left="10"
08 Background="Yellow" MouseLeftButtonDown="inkPresenter_MouseLeftButtonDown"
09 MouseLeftButtonUp="inkPresenter_MouseLeftButtonUp" MouseMove="inkPresenter_MouseMove" Margin="92,126,0,0" HorizontalAlignment="Left" VerticalAlignment="Top" d:LayoutOverrides="Width, Height" >
10 <InkPresenter.Clip>
11 <RectangleGeometry x:Name="uxRect" Rect="0,0,300,100" />
12 </InkPresenter.Clip>
13 </InkPresenter>
14 <Button x:Name="uxRed" Click="uxRed_Click" Width="30" Height="30" HorizontalAlignment="Left" Margin="92,245,0,0" VerticalAlignment="Top" d:LayoutOverrides="Width, Height">
15 <Rectangle Fill="Red" Width="30" Height="30" />
16 </Button>
17 <Button x:Name="uxBlack" Click="uxBlack_Click" Width="30" Height="30" HorizontalAlignment="Left" Margin="135,245,0,0" VerticalAlignment="Top" d:LayoutOverrides="Width, Height">
18 <Rectangle Fill="Black" Width="30" Height="30" />
19 </Button>
20 <Button x:Name="uxGreen" Click="uxGreen_Click" Width="30" Height="30" HorizontalAlignment="Left" Margin="178,245,0,0" VerticalAlignment="Top" d:LayoutOverrides="Width, Height">
21 <Rectangle Fill="Green" Width="30" Height="30" />
22 </Button>
23 </Grid>
24 </UserControl>
25
2. 然後後端可以這樣寫:


 using System.Collections.Generic;
 using System.Windows.Shapes;


 }
}3. 結果:
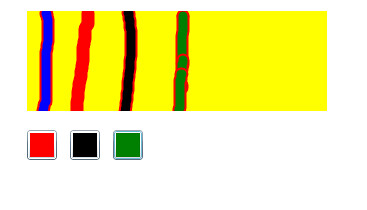

如果筆觸顏色控制項無法顯示,可能是您的Geometry物件遮蔽住,建議您透過Expression Blend3去調整.
您可以參考的網頁:
1. InkPresenter 類別 - http://msdn.microsoft.com/zh-tw/library/system.windows.controls.inkpresenter%28VS.95%29.aspx
2. UIElement..::.Clip 屬性 - http://msdn.microsoft.com/zh-tw/library/system.windows.uielement.clip%28VS.95%29.aspx
如果您有微軟技術開發的問題,可以到MSDN Forum發問。
如果您有微軟IT管理的問題,可以到TechNet Forum發問喔。