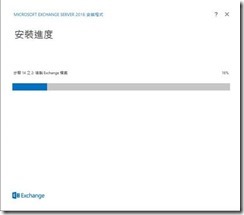
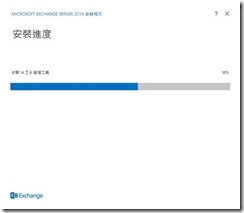
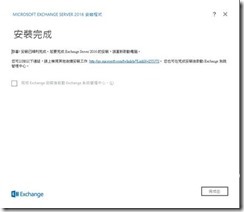
Microsoft Exchange Server 2016–Preview Install
紀錄一下新版的安裝過程(2015/8/4 )
************************************************************************************************************
Active Directory preparation
The computer you want to use to prepare Active Directory for Exchange 2016 has specific prerequisites that must be met.
First, install .NET Framework 4.5.2 on the computer that will be used to prepare Active Directory.
After you've installed the software listed above, complete the following steps to install the Remote Tools Administration Pack. After you've installed the Remote Tools Administration Pack you'll be able to use the computer to prepare Active Directory. For more information about preparing Active Directory, see Prepare Active Directory and domains.
- Open Windows PowerShell.
- Install the Remote Tools Administration Pack using the following command.
Install-WindowsFeature RSAT-ADDS
Prepare Active Directory and domains
1. Extend the Active Directory schema
The first step in getting your organization ready for Exchange 2016 is to extend the Active Directory schema. Exchange stores a lot of information in Active Directory but before it can do that, it needs to add and update classes, attributes, and other items. If you're curious about what's changed when your schema is extended, check out Exchange 2016 Active Directory schema changes.
Before you extend your schema, there are a few things to keep in mind:
- The account you're logged in as needs to be a member of the Schema Admins and Enterprise Admins security groups.
- The computer where you'll run the command to extend the schema needs to be in the same Active Directory domain and site as the schema master.
- If you use the DomainController parameter, make sure to use the name of the domain controller that's the schema master.
- The only way to extend the schema for Exchange is to use the steps in this topic or use Exchange 2016 Setup. Other ways of extending the schema aren't supported.
|
If you don't have a separate team that manages your Active Directory schema, you can skip this step and go directly to Step 2. Prepare Active Directory. If the schema isn't extended in step 1, the commands in step 2 will extend the schema for you. If you decide to skip step 1, the information you need to keep in mind above still applies. |
When you're ready, do the following to extend your Active Directory schema. If you have multiple Active Directory forests, make sure you're logged into the right one.
- Make sure the computer is ready to run Exchange 2016 Setup. To see what you need to run Setup, check out the Active Directory preparation section inExchange 2016 prerequisites.
- Open a Windows Command Prompt window and go to where you downloaded the Exchange installation files.
- Run the following command to extend the schema.
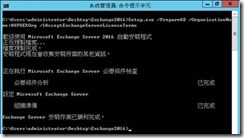
- Setup.exe /PrepareSchema /IAcceptExchangeServerLicenseTerms
After Setup finishes extending the schema, you'll need to wait while Active Directory replicates the changes to all of your domain controllers. If you want to check on how replication is going, you can use the repadmin tool. Repadmin is included as part of the Active Directory Domain Services Tools feature in Windows Server 2012 R2 and Windows Server 2012. For more information about how to use it, see Repadmin.
2. Prepare Active Directory
Now that the Active Directory schema has been extended, you can prepare other parts of Active Directory for Exchange 2016. During this step, Exchange will create containers, objects, and other items in Active Directory that it'll use to store information. The collection of all of the Exchange containers, objects, attributes, and so on, is called the Exchange organization.
Before you prepare Active Directory for Exchange, there are a few things to keep in mind:
- The account you're logged in as needs to be a member of the Enterprise Admins security group. If you skipped step 1 because you want the PrepareADcommand to extend the schema, the account you use also needs to be a member of the Schema Admins security group.
- The computer where you'll run the command needs to be in the same Active Directory domain and site as the schema master. It'll also need to contact all of the domains in the forest on TCP port 389.
- Wait until Active Directory has replicated the changes made in step 1 to all of your domain controllers before you do this step.
When you run the command below to prepare Active Directory for Exchange, you'll need to name the Exchange organization. This name is used internally by Exchange and isn't normally seen by users. The name of the company where Exchange is being installed is often used for the organization name. The name you use won't affect the functionality of Exchange or determine what you can use for email addresses. You can name it anything you want, as long as you keep the following in mind:
- You can use any uppercase or lowercase letters from A to Z.
- You can use numbers 0 to 9.
- The name can contain spaces as long as they're not at the beginning or end of the name.
- You can use a hyphen or dash in the name.
- The name can be up to 64 characters but can't be blank.
- The name can't be changed after it's set.
When you're ready, do the following to prepare Active Directory for Exchange. If the organization name you want to use has spaces, enclose the name in quotation marks (").
- Open a Windows Command Prompt window and go to where you downloaded the Exchange installation files.
- Run the following command:
- Setup.exe /PrepareAD /OrganizationName:"<organization name>" /IAcceptExchangeServerLicenseTerms
After Setup finishes preparing Active Directory for Exchange, you'll need to wait while Active Directory replicates the changes to all of your domain controllers. If you want to check on how replication is going, you can use the repadmin tool. repadmin is included as part of the Active Directory Domain Services Tools feature in Windows Server 2012 R2 and Windows Server 2012. For more information about how to use the tool, see Repadmin.
3. Prepare Active Directory domains
The final step to get Active Directory ready for Exchange is to prepare each of the Active Directory domains where Exchange will be installed or where mail-enabled users will be located. This step creates additional containers and security groups, and sets permissions so that Exchange can access them.
If you have multiple domains in your Active Directory forest, you have a couple of choices in how you prepare them. Select the option that matches what you want to do. If you only have one domain, you can skip this step because the PrepareAD command in step 2 already prepared the domain for you.
Prepare all of the domains in my Active Directory forest
To prepare all of your Active Directory domains, you can use the PrepareAllDomains parameter when you run Setup. Setup will prepare every domain for Exchange in your Active Directory forest for you.
Before you prepare all of the domains in your Active Directory forest, keep the following in mind:
- The account you use needs to be a member of the Enterprise Admins security group.
- Wait until Active Directory has replicated the changes made in step 2 to all of your domain controllers. If you don't, you might get an error when you try to prepare the domain.
When you're ready, do the following to prepare all of the domains in your Active Directory forest for Exchange.
- Open a Windows Command Prompt window and go to where you downloaded the Exchange installation files.
- Run the following command:
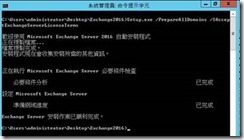
Setup.exe /PrepareAllDomains /IAcceptExchangeServerLicenseTerms
How do you know this worked?
Once you've done all the steps above, you can check to make sure everything's gone smoothly. To do so, you'll use a tool called Active Directory Service Interfaces Editor (ADSI Edit). ADSI Edit is included as part of the Active Directory Domain Services Tools feature in Windows Server 2012 R2 and Windows Server 2012. If you want to know more about it, check out ADSI Edit (adsiedit.msc).
|
Never change values in ADSI Edit unless you're told to do so by Microsoft support. Changing values in ADSI Edit can cause irreparable harm to your Exchange organization and Active Directory. |
After Exchange extends your Active Directory schema and prepares Active Directory for Exchange, several properties are updated to show that preparation is complete. Use the information in the following list to make sure these properties have the right values. Each property needs to match the value in the table below for the release of Exchange 2016 that you're installing.
- In the Schema naming context, verify that the rangeUpper property on ms-Exch-Schema-Verision-Pt is set to the value shown for your version of Exchange 2013 in the Exchange 2016 Active Directory versions table.
- In the Configuration naming context, verify that the objectVersion property in the CN=<your organization>,CN=Microsoft Exchange,CN=Services,CN=Configuration,DC=<domain> container is set to the value shown for your version of Exchange 2016 in the Exchange 2016 Active Directory versions table.
- In the Default naming context, verify that the objectVersion property in the Microsoft Exchange System Objects container under DC=<root domain is set to the value shown for your version of Exchange 2016 in the Exchange 2016 Active Directory versions table.
You can also check the Exchange setup log to verify that Active Directory preparation has completed successfully. For more information, see Verify an Exchange 2016 installation. You won't be able to use the Get-ExchangeServer cmdlet mentioned in the Verify an Exchange 2016 installation topic until you've completed the installation of at least one Mailbox server role in an Active Directory site.
Windows Server 2012 R2 prerequisites
The prerequisites that are needed to install Exchange 2016 on a Windows Server 2012 R2 computer depends on which Exchange role you want to install. Read the section below that matches the role you want to install.
Mailbox server role
Follow the instructions in this section to install the prerequisites on Windows Server 2012 R2 computers where you want to install the Mailbox server role.
Do the following to install the required Windows roles and features:
- Open Windows PowerShell.
- Run the following command to install the required Windows components.
- Install-WindowsFeature AS-HTTP-Activation, Desktop-Experience, NET-Framework-45-Features, RPC-over-HTTP-proxy, RSAT-Clustering, RSAT-Clustering-CmdInterface, RSAT-Clustering-Mgmt, RSAT-Clustering-PowerShell, Web-Mgmt-Console, WAS-Process-Model, Web-Asp-Net45, Web-Basic-Auth, Web-Client-Auth, Web-Digest-Auth, Web-Dir-Browsing, Web-Dyn-Compression, Web-Http-Errors, Web-Http-Logging, Web-Http-Redirect, Web-Http-Tracing, Web-ISAPI-Ext, Web-ISAPI-Filter, Web-Lgcy-Mgmt-Console, Web-Metabase, Web-Mgmt-Console, Web-Mgmt-Service, Web-Net-Ext45, Web-Request-Monitor, Web-Server, Web-Stat-Compression, Web-Static-Content, Web-Windows-Auth, Web-WMI, Windows-Identity-Foundation
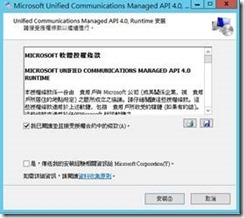
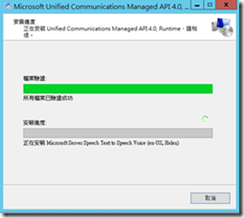
After you've installed the operating system roles and features, install the following software in the order shown:
Exchange 2016 system requirements
Supported coexistence scenarios
The following table lists the scenarios in which coexistence between Exchange 2016 and earlier versions of Exchange is supported.
Coexistence of Exchange 2016 and earlier versions of Exchange Server
|
Exchange version |
Exchange organization coexistence |
|
Exchange 2007 and earlier versions |
Not supported |
|
Exchange 2010 |
Supported with Update Rollup 9 for Exchange 2010 SP3 or later on all Exchange 2010 servers in the organization, including Edge Transport servers. |
|
Exchange 2013 |
Supported with Exchange 2013 Cumulative Update 8 or later on all Exchange 2013 servers in the organization, including Edge Transport servers. |
|
Mixed Exchange 2010 and Exchange 2013 organization |
Supported with the following minimum versions of Exchange:
|
Install the Exchange 2016 Mailbox role
Install Exchange Server 2016
-
Log on to the computer on which you want to install Exchange 2016.
-
Navigate to the network location of the Exchange 2016 installation files.
-
Start Exchange 2016 Setup by double-clicking Setup.exe
-
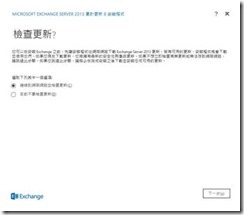
On the Check for Updates? page, choose whether you want Setup to connect to the Internet and download product and security updates for Exchange 2016. If you select Connect to the Internet and check for updates, Setup will download updates and apply them prior to continuing. If you select Don't check for updates right now, you can download and install updates manually later. We recommend that you download and install updates now. Click Next to continue.
|
Important: |
|
If you have User Access Control (UAC) enabled, you need to right-click Setup.exe and select Run as administrator. |
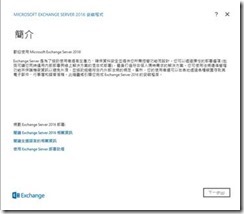
- The Introduction page begins the process of installing Exchange into your organization. Several links to helpful deployment content are listed. We recommend that you visit these links prior to continuing setup. Click Next to continue.
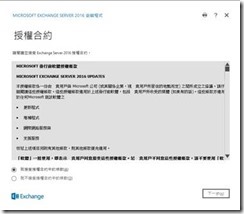
- On the License Agreement page, review the software license terms. If you agree to the terms, select I accept the terms in the license agreement, and then click Next.
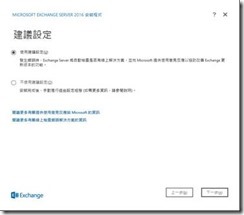
- On the Recommended settings page, select whether you want to use the recommended settings. If you select Use recommended settings, Exchange will automatically send error reports and information about your computer hardware and how you use Exchange to Microsoft. If you select Don't use recommended settings, these settings remain disabled but you can enable them at any time after Setup completes. For more information about these settings and how information sent to Microsoft is used, click ?.
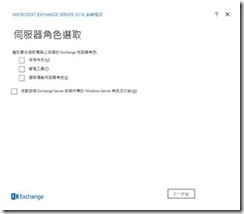
- On the Server Role Selection page, choose whether you want to install the Mailbox role or just the Management Tools on this computer. The management tools are installed automatically if you install the Mailbox server role.
Select Automatically install Windows Server roles and features that are required to install Exchange Server to have the Setup wizard install required Windows prerequisites. You may need to reboot the computer to complete the installation of some Windows features. If you don't select this option, you need to install the Windows features manually.
|
Note: |
|
This option installs only the Windows features required by Exchange. You need to manually install other prerequisites manually. For more information, see Exchange 2016 prerequisites. |
Click Next to continue.
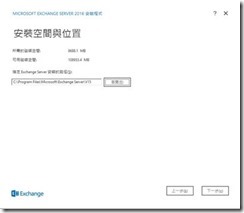
- On the Installation Space and Location page, either accept the default installation location or click Browse to choose a new location. Make sure that you have enough disk space available in the location where you want to install Exchange. Click Next to continue.
-
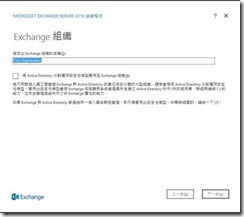
If this is the first Exchange server in your organization, on the Exchange Organization page, type a name for your Exchange organization. The Exchange organization name can contain only the following characters:
- A through Z
- a through z
- 0 through 9
- Space (not leading or trailing)
- Hyphen or dash
|
Note: |
|
The organization name can't contain more than 64 characters. The organization name can't be blank. |
- If you want to use the Active Directory split permissions model, select Apply Active Directory split permission security model to the Exchange organization.
|
Caution: |
|
Most organizations don't need to apply the Active Directory split permissions model. If you need to separate management of Active Directory security principals and Exchange configuration, Role Based Access Control (RBAC) split permissions might work for you. For more information, click ?. |
- Click Next to continue.
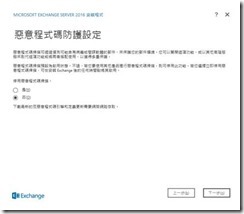
- If you're installing the Mailbox role, on the Malware Protection Settings page, choose whether you want to enable or disable malware scanning. If you disable malware scanning, it can be enabled in the future. Click Next to continue.
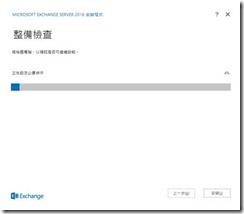
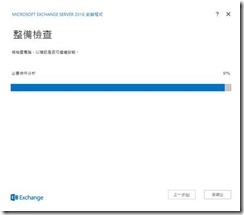
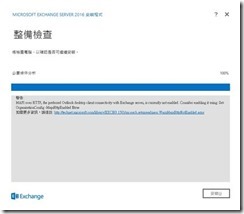
- On the Readiness Checks page, view the status to determine if the organization and server role prerequisite checks completed successfully. If they haven't completed successfully, you need to resolve any reported errors before you can install Exchange 2016. You don't need to exit Setup when resolving some of the prerequisite errors. After resolving a reported error, click back and then click Next to run the prerequisite check again. Be sure to also review any warnings that are reported. If all readiness checks have completed successfully, click Next to install Exchange 2016.
- On the Completion page, click Finish.
- Restart the computer after Exchange 2016 has completed.
- Complete your deployment by performing the tasks provided in Exchange 2016 post-Installation tasks.
Reference:
https://technet.microsoft.com/en-us/library/mt170645(v=exchg.160).aspx


