當我們完成上傳圖片的功能時
使用者使用後表示"可不可以像mail一樣複製貼上或者直接拖拉圖片,上傳張圖片就要按一次很麻煩"
因此我們來看看怎麼修正之前的ashx並且如何達成此效果
引用及修改dropler
最新的 ckeditor4.5 以後版本已經開始支援html5的拖曳事件,因此我們引用這個dropler 來達成目的
GitHub : https://github.com/chriskiehl/Dropler
這個插件提供了三種拖曳上傳的方式:imgur、AW3、自定義,這邊介紹自定義
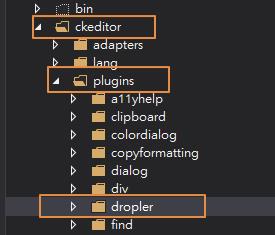
- 下載整個資料夾後,放入ckeditor plugin 目錄下
- ckeditor config 添加內容
(a) 我們增加了dropler的plugins
(b)Upload.ashx 為我們上傳檔案的程式CKEDITOR.editorConfig = function (config) { // rest of config config.extraPlugins = 'dropler'; // configure the backend service and credentials config.droplerConfig = { backend: 'basic', settings: { uploadUrl: '../Upload.ashx' } } }; -
修改 dropler 在 plugins 中的 plugin.js,找到 post 這個function 把xhttp.send修改成:
function post(url, data, headers) {
     .... //上方不動
     //old code
     //xhttp.send(data);
     //new
     var formData = new FormData();
     formData.append('upload', data);
     xhttp.send(formData);

}
修改 upload.ashx
- 當是透過原本的上傳圖片功能會發現 string CKEditorFuncNum = context.Request["CKEditorFuncNum"]; 會等於0
為了保有功能因此我們改寫成if - else 去判斷public void ProcessRequest(HttpContext context) { HttpPostedFile uploads = context.Request.Files["upload"]; string CKEditorFuncNum = context.Request["CKEditorFuncNum"]; string file = System.IO.Path.GetFileName(uploads.FileName); var filename = DateTime.Now.ToString("yyyyMMdd_hhmmss") + file; var filePath = context.Server.MapPath(".") + "\\upload\\" + filename; uploads.SaveAs(filePath); string imgUrl = "/upload/" + filename; string message = ""; if(CKEditorFuncNum == "0") { message = "window.parent.CKEDITOR.tools.callFunction('" + CKEditorFuncNum + "', '" + imgUrl + "')"; context.Response.Write("<script>" + message + " </script> "); } else { context.Response.ContentType = "text/html"; message = imgUrl; context.Response.Write(imgUrl); } context.Response.End(); } - 改完後我們試著拖拉會發現,圖片有上傳上去但畫面卻沒有顯示任何的圖片檔案,原始碼中也是空白
仔細的去F12慢慢摸 發現 原來在post的時後他最終回傳需要改一下回傳的型態
這邊不是轉成JSON格式,因此把JSON.parse取消掉function post(url, data, headers) { return new Promise(function(resolve, reject) { var xhttp = new XMLHttpRequest(); xhttp.open('POST', url); addHeaders(xhttp, headers); xhttp.onreadystatechange = function () { if (xhttp.readyState === 4) { if (xhttp.status === 200) { //resolve(JSON.parse(xhttp.responseText).data.link); //不可以用json.parse resolve(xhttp.responseText); } else { reject(JSON.parse(xhttp.responseText)); } } }; //xhttp.send(data); var formData = new FormData(); formData.append('upload', data); xhttp.send(formData); }); }再次測試發現成功囉~
參考資料