UWP可以支援串流安裝啊!
今年MSFT在Build上介紹了Streaming install的功能,這個功能是為了降低安裝APP時大量的資源檔案需要下載所等待的時間,基本上很多遊戲都有這樣的功能!當然最佳化(全部資源下載並安裝完成)依舊需要看網路的流量狀況。
在Windows developer day中就有展示這個功能的特性,不論是原生UWP的App還是使用Desktop bridge或是iOS converter的App漸漸的App的大小都在成長!在Android以及iOS上還沒有這樣的特性所以在安裝App的時候依舊會需要較長的安裝、下載時間並且需要等完成後才能啟動App來進行App的操作。
概觀
使用Streaming install主要有個概念就是會把App分類成 Require以及 optional的類別。所以本身App的主要核心使用檔案都會是在Require的群組中~當你需要使用到那類群組的內容時在進行串流下載!
接者要說明如何讓App內的檔案被區分為Require或是Automatic,這邊會在UWP的專案結構下使用一檔案名為 " AppxContentGroupMap.xml " ,這個檔案就是來標記那些檔案分別屬於那些類別。這個XML的範本格式如下
<?xml version="1.0" encoding="utf-8" ?>
<ContentGroupMap xmlns="http://schemas.microsoft.com/appx/2016/sourcecontentgroupmap" xmlns:s="http://schemas.microsoft.com/appx/2016/sourcecontentgroupmap">
  <Required>
    <ContentGroup Name="Required">
      <File Name="*"/>
      <File Name="WinMetadata\*"/>
      <File Name="Properties\*"/>
      <File Name="Assets\*scale*"/>
      <File Name="Assets\*Logo*"/>
    </ContentGroup>
  </Required>
  <Automatic>
    <ContentGroup Name="Group1">
      <File Name="Assets\Fish1.png"/>
      <File Name="Assets\Fish2.png"/>
    </ContentGroup>

    <ContentGroup Name="Group2">
      <File Name="Assets\Folder1\Pig1.png"/>
      <File Name="Assets\Folder1\Pig2.png"/>
    </ContentGroup>

    <ContentGroup Name="Group3">
      <File Name="Assets\Folder2\Rat.png"/>
    </ContentGroup>

  </Automatic>
</ContentGroupMap>
這邊就會看到區分為兩大類的ContentGroup,只要是ContentGroup的名稱設定成Required的就會被歸類在必要安裝的資源群組中!在ContentGroup的Node中可以放入多個File的Node;而在File的屬性會有個Name就是代表檔案的路徑。這時候就會出現一個問題....如果檔案有幾百個難道需要手動修改這個XML嗎?其實並不需要(當然也可以自己手動加入)這時候就會出現另外一個檔案來輔助這個情況這個檔案將會必須命名為" SourceAppxContentGroupMap.xml "使用SourceAppxContentGroup.xml的方法非常簡單!而且在基本的Schema跟 AppxContentGroup.xml是完全一樣的,但是還支援了檔案的篩選語法!使用 * (星號)的方式來使用檔案篩選的。所以上面使用到的XML就可以修改如下
<?xml version="1.0" encoding="utf-8" ?>
<ContentGroupMap xmlns="http://schemas.microsoft.com/appx/2016/sourcecontentgroupmap" xmlns:s="http://schemas.microsoft.com/appx/2016/sourcecontentgroupmap">
  <Required>
    <ContentGroup Name="Required">
      <File Name="*"/>
      <File Name="WinMetadata\*"/>
      <File Name="Properties\*"/>
      <File Name="Assets\*scale*"/>
      <File Name="Assets\*Logo*"/>
    </ContentGroup>
  </Required>
  <Automatic>
    <ContentGroup Name="Group1">
      <File Name="Assets\*Fish*"/>
    </ContentGroup>

    <ContentGroup Name="Group2">
      <File Name="Assets\Folder1\*"/>
    </ContentGroup>

    <ContentGroup Name="Group3">
      <File Name="Assets\Folder2\*Rat*"/>
    </ContentGroup>

  </Automatic>
</ContentGroupMap>
Group2使用的就是所有在Folder1下的所有檔案。
Group3就是把上面兩個規則合併使用。
Map檔案的使用限制
接者這邊還要說到ContentGroupMap的限制不論是在AppxContentGroupMap或是SourceAppxContentGroupMap上都適用。
- 檔案路徑都是對應到App package的根目錄
- 設定檔案(AppxBlockMap.xml, AppxContentGroupMapxml, AppxManifest.xml, AppxSignature.p7x, CodeIdetegrity.cat, resources.pri)不須加入,系統會自動幫這些檔案歸類在Reqired。
- SplashScreen和Suqare44x44Logo的圖片檔案已經被宣告在manifest中。
- 同一檔案可以被歸類在不同的ContentGroup中
- 所有在Map中的檔案都必須是在封裝檔中。
- 可以有多組ContentGroup。
- ContentGroup的名稱是獨一無二的而且具有大小寫區分。
- 在automatice下的ContentGroup不能被命名為Required。
而在AppxContentGroupMap.xml還有附加一下限制
- 沒有*(星號)模式的支援
- 不能有Required的Node。
而在SourceAppxContentGroupMap.xml還有附加以下限制
- Required的Node下的ContentGroup只能有一個。
- Required下的ContentGroup必須命名為Required。
- 檔案無法同時在Required以及automatic的ContentGroup內。
- Visual assets(視覺資產)是必須定義在required的ContentGroup內。
- 所有檔案在package中必須出現在map中一次,也就是所有檔案在封裝檔中至少會被對應到一次。
- * (星號)的模式支援。
在SourceAppxContentGroupMap.xml的 * (星號)規則如下
| CGM Entry | File Layout (relative to project root) | Result |
| * | Assets\… Extra.content\… System.Core.dll System.Runtime.dll Microsoft.CSharp.dll App.exe |
Succeed conversion with System.Core.dll, System.Runtime.dll, Microsoft.CSharp.dll, and App.exe in the content group |
| ** | N/A | Fail conversion, cannot double wildcard at the root of the project to include every file in the project. |
| *CSharp* | Assets\… Extra.content\… System.CSharp\… System.Core.dll System.Runtime.dll Microsoft.CSharp.dll RandomCSharpfile.txt App.exe |
Succeed conversion with Microsoft.CSharp.dll and RandomCSharpfile.txt in the content group |
| Assets\*Level2* | Assets\Level2title.png Level2StartMusic.mp3 |
Succeed conversion with Assets\Level2title.png in the content group |
| Assets\* | Assets\Hammer.png Assets\Items\Gun.png App.exe |
Succeed conversion with Hammer.png in the content group |
| Assets\** | Assets\Hammer.png Assets\Items\Gun.png App.exe |
Succeed conversion with Hammer.png and Gun.png in the content group |
| *.dll | Assets\… Something.dll\… System.Core.dll System.Runtime.dll App.exe |
Succeed conversion with System.Core.dll and System.Runtime.dll in the content group |
| *.dll | Assets\… App.exe |
Conversion succeeds but warning will appear alerting that no file matched the wildcard specification |
| System.*.dll | Assets\… System.something.something.dll\… System.Core.dll System.Runtime.dll Microsoft.CSharp.dll App.exe |
Succeed conversion with System.Core.dll and System.Runtime.dll in the content group |
| System.Core.dll* | System.Core.dll | Succeed conversion with System.Core.dll in the content group |
實際Demo
Demo的操作環境如下
- Visual Studio 2017 lastest update with 15063 SDK
- Windows 10 Creator Update lastest build
直接建立一Blank專案,並且調整Mininal和Target的版本為15063 Creator Update,然後DEMO專案的檔案結構如下圖所示
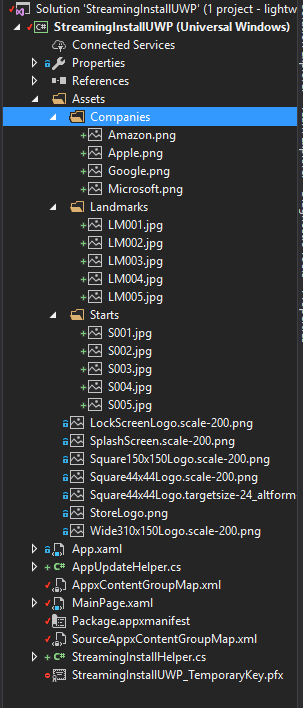
這邊我在Assets下加入Folder名為Companies、Landmarks、Starts
然後再SourceAppxContentGroupMap.xml修改成如下XML code
<?xml version="1.0" encoding="utf-8" ?>
<ContentGroupMap xmlns="http://schemas.microsoft.com/appx/2016/sourcecontentgroupmap" xmlns:s="http://schemas.microsoft.com/appx/2016/sourcecontentgroupmap">
  <Required>
    <ContentGroup Name="Required">
      <File Name="*"/>
      <File Name="WinMetadata\*"/>
      <File Name="Properties\*"/>
      <File Name="Assets\*scale*"/>
      <File Name="Assets\*Logo*"/>
      <!-- Company logos as required -->
      <File Name="Assets\Companies\*"/>
    </ContentGroup>
  </Required>
  <Automatic>
    <ContentGroup Name="Landmarks">
      <File Name="Assets\Landmarks\*"/>
    </ContentGroup>
    <ContentGroup Name="Starts">
      <File Name="Assets\Starts\*"/>
    </ContentGroup>
  </Automatic>
</ContentGroupMap>
這邊我只有定一個automatic content group。然後再把這個XML的建置屬性調整成 " AppxSourceContentGroupMap "。
然後再對專案的市集選項中的轉換選項,如下圖所示
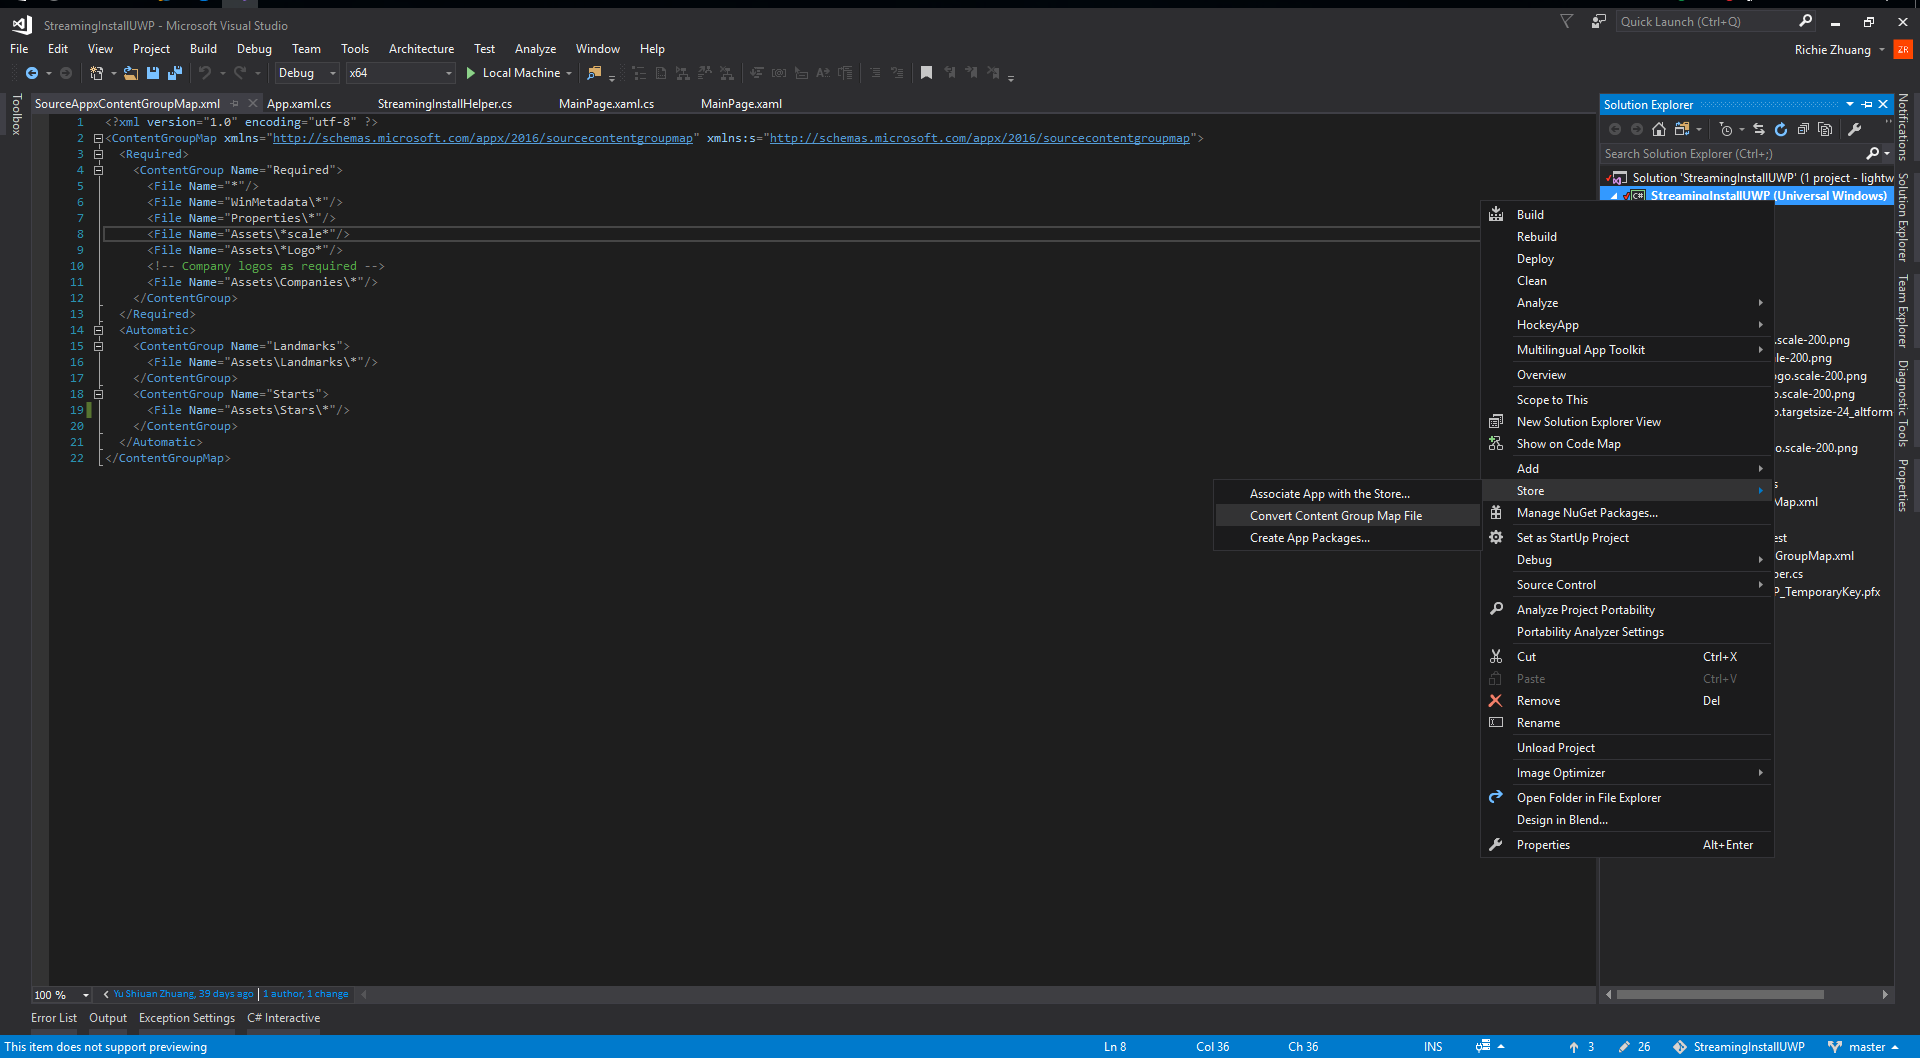
轉換成功後會直接產生AppxContentGroupMap.xml的檔案!
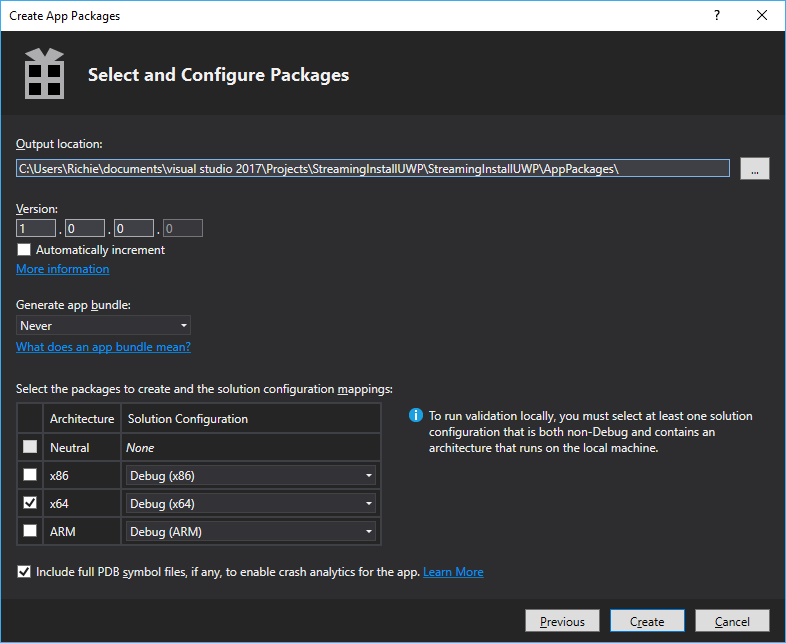
這樣就是在專案設定上支援Streaming install了~~接下來來看看更加詳細的資訊。我們直接把App打包起來然後變更成Zip壓縮檔後再解壓縮看看檔案結構
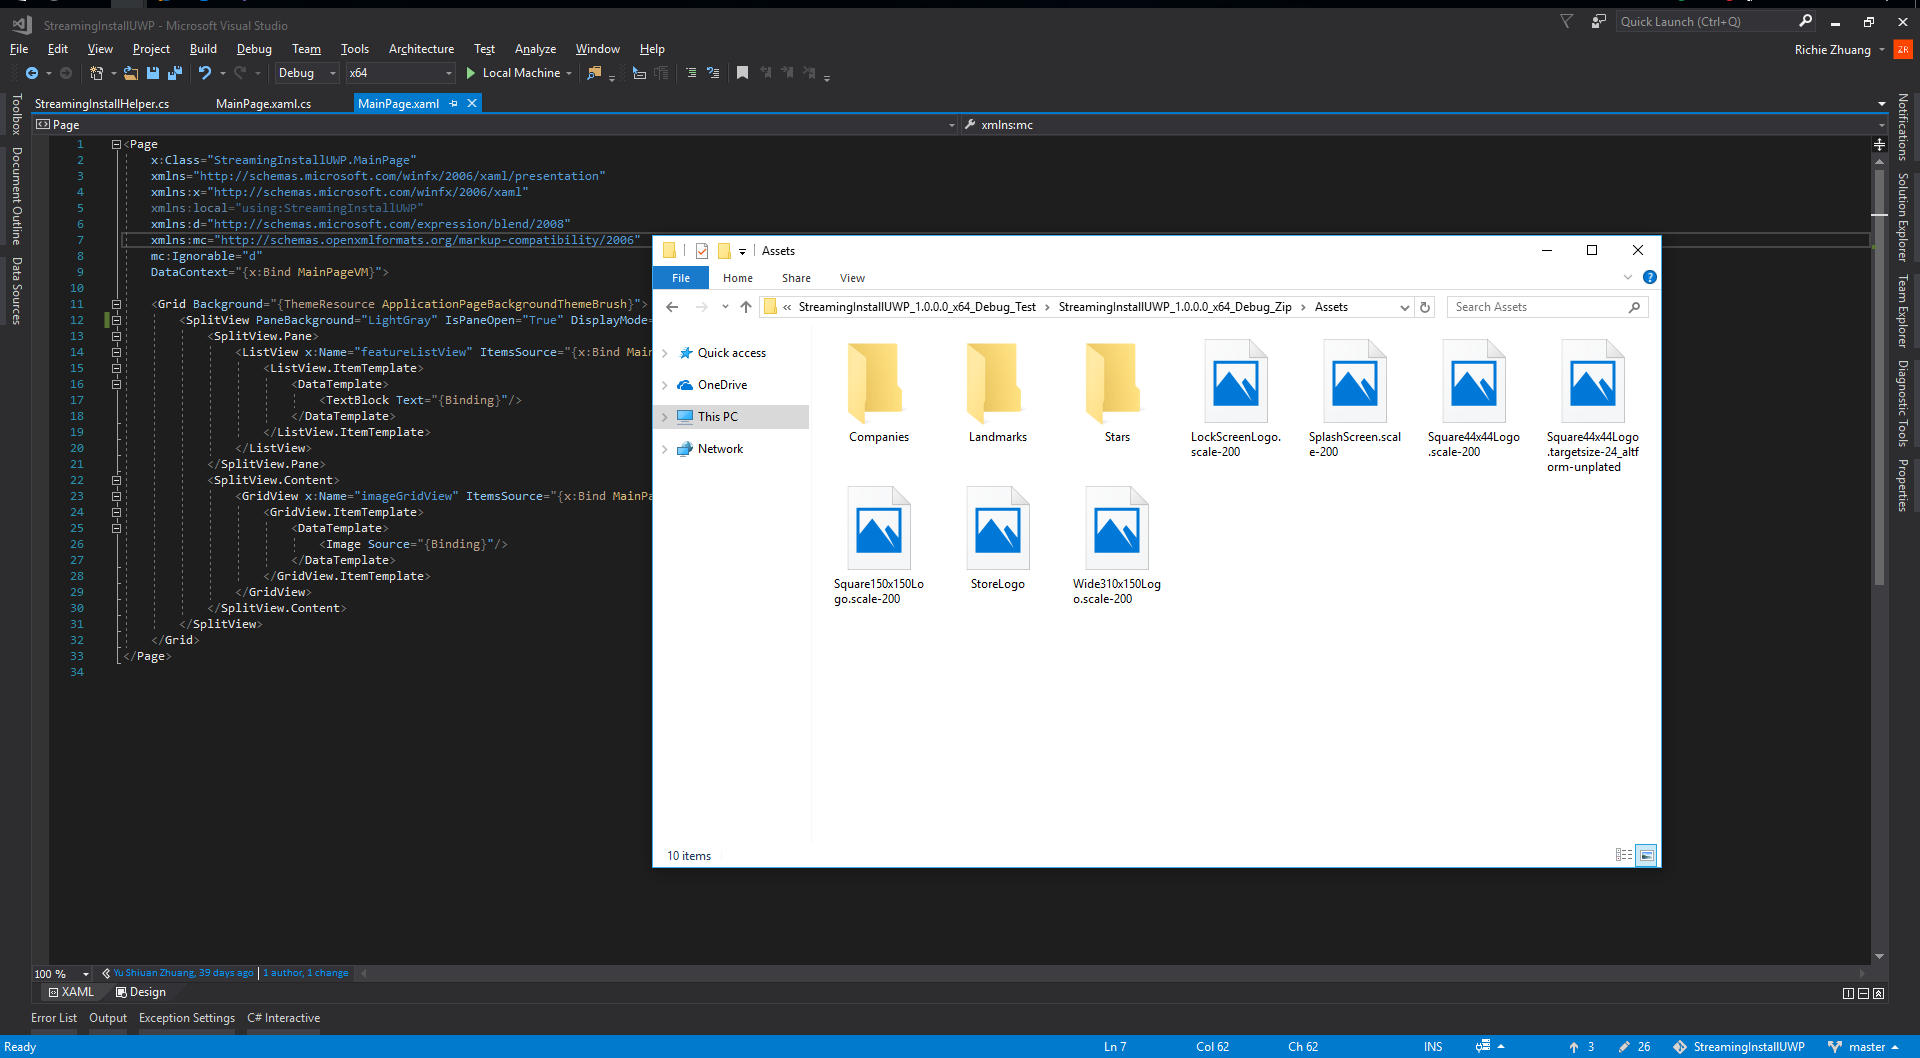
這邊會發現定義到automatice content group的檔案還是會被封裝進去App!
接者來看看在C# Code當中如何使用Streaming install的功能八
public StreamingInstallHelper()
        {
            if (!Windows.Foundation.Metadata.ApiInformation.IsApiContractPresent("Windows.Foundation.UniversalApiContract", 3, 0))
            {
                throw new NotSupportedException("This helper need 14393 or later");
            }

            catalog = PackageCatalog.OpenForCurrentPackage();

            catalog.PackageContentGroupStaging += Catalog_PackageContentGroupStaging;
            catalog.PackageStaging += Catalog_PackageStaging;
            catalog.PackageUpdating += Catalog_PackageUpdating;
            catalog.PackageInstalling += Catalog_PackageInstalling;
            catalog.PackageUninstalling += Catalog_PackageUninstalling;
            catalog.PackageStatusChanged += Catalog_PackageStatusChanged;
        }
這邊需要先Check是否有Anniversary update的Windows 10才能先抓取到Package的詳細資訊。 在PackageCatalog這個Class裡面有以下幾個重點的event
| 事件名稱 | 說明 |
| PackageContentGroupStaging | 當Package中的ContentGroup正在部屬。 |
| PackageStaging | 當Optional Package正在部屬。 |
| PackageUpdating | 當Optional Package正在更新。 |
| PackageInstalling | 當Optional Package正在安裝。 |
| PackageUninstalling | 當Optional Package正在解除安裝。 |
| PackageStatusChanged | 當Optional Package狀態改變。 |
這邊會使用到的是PackageContentGroup的事件、而抓取Streaming install的安裝的進度可以參考如下的Code
private void Catalog_PackageContentGroupStaging(PackageCatalog sender, PackageContentGroupStagingEventArgs args)
        {
            var message = $"{args.ContentGroupName}\t{args.Progress*100}";
            System.Diagnostics.Debug.WriteLine(message);
        }
取得App package中所有的ContentGroup的Sample Code如下
public async Task<IEnumerable<PackageContentGroup>> GetAllContentGroupAsync(bool isIncludeRequiredGroup = false)
        {
            if (!Windows.Foundation.Metadata.ApiInformation.IsApiContractPresent("Windows.Foundation.UniversalApiContract", 4, 0))
            {
                throw new NotSupportedException("This function need 15063 or later");
            }

            var contentGroups = await Package.Current.GetContentGroupsAsync();
            if (isIncludeRequiredGroup)
            {
                return contentGroups;
            }
            else
            {
                return contentGroups.Where(cg => cg.IsRequired.Equals(isIncludeRequiredGroup));
            }
        }
透過Package來抓取當下既有的Content,並且可以透過Linq來塞選ContentGroup~這邊我選擇塞選是否為Require或是Automatic的ContentGroup。
然後如果要優先下載ContentGroup(s)的Sample如下
public async Task PrioritizeCotentGroupAsync(IEnumerable<string> groupNames)
        {
            if (!Windows.Foundation.Metadata.ApiInformation.IsApiContractPresent("Windows.Foundation.UniversalApiContract", 4, 0))
            {
                throw new NotSupportedException("This function need 15063 or later");
            }

            if (groupNames == null)
            {
                throw new ArgumentNullException(nameof(groupNames));
            }

            await Package.Current.StageContentGroupsAsync(groupNames, true);
        }
透過StageContentGroupAsync並且帶上true 讓這些contentgroup name的列舉提升到柱列的最前端。
接者來說明如何Debug和Test streaming install的功能八
目前MSFT提供兩個方式來做Deubg\Test
1. Powershell
2. Debugging API
在UWP的安裝會是使用Powershell的方式,預設的指令如下
Add-AppxPackage <package>
基本上這個指令和double click一樣喔。在15063之後的支援了RequiredContentGroupOnly的指令,這個語法會讓Streaming install的UWP app只安裝Require的ContentGroup。PowserShell指令會變成如下
Add-AppxPackage -RequiredContentGroupOnly <package>
實際操作畫面
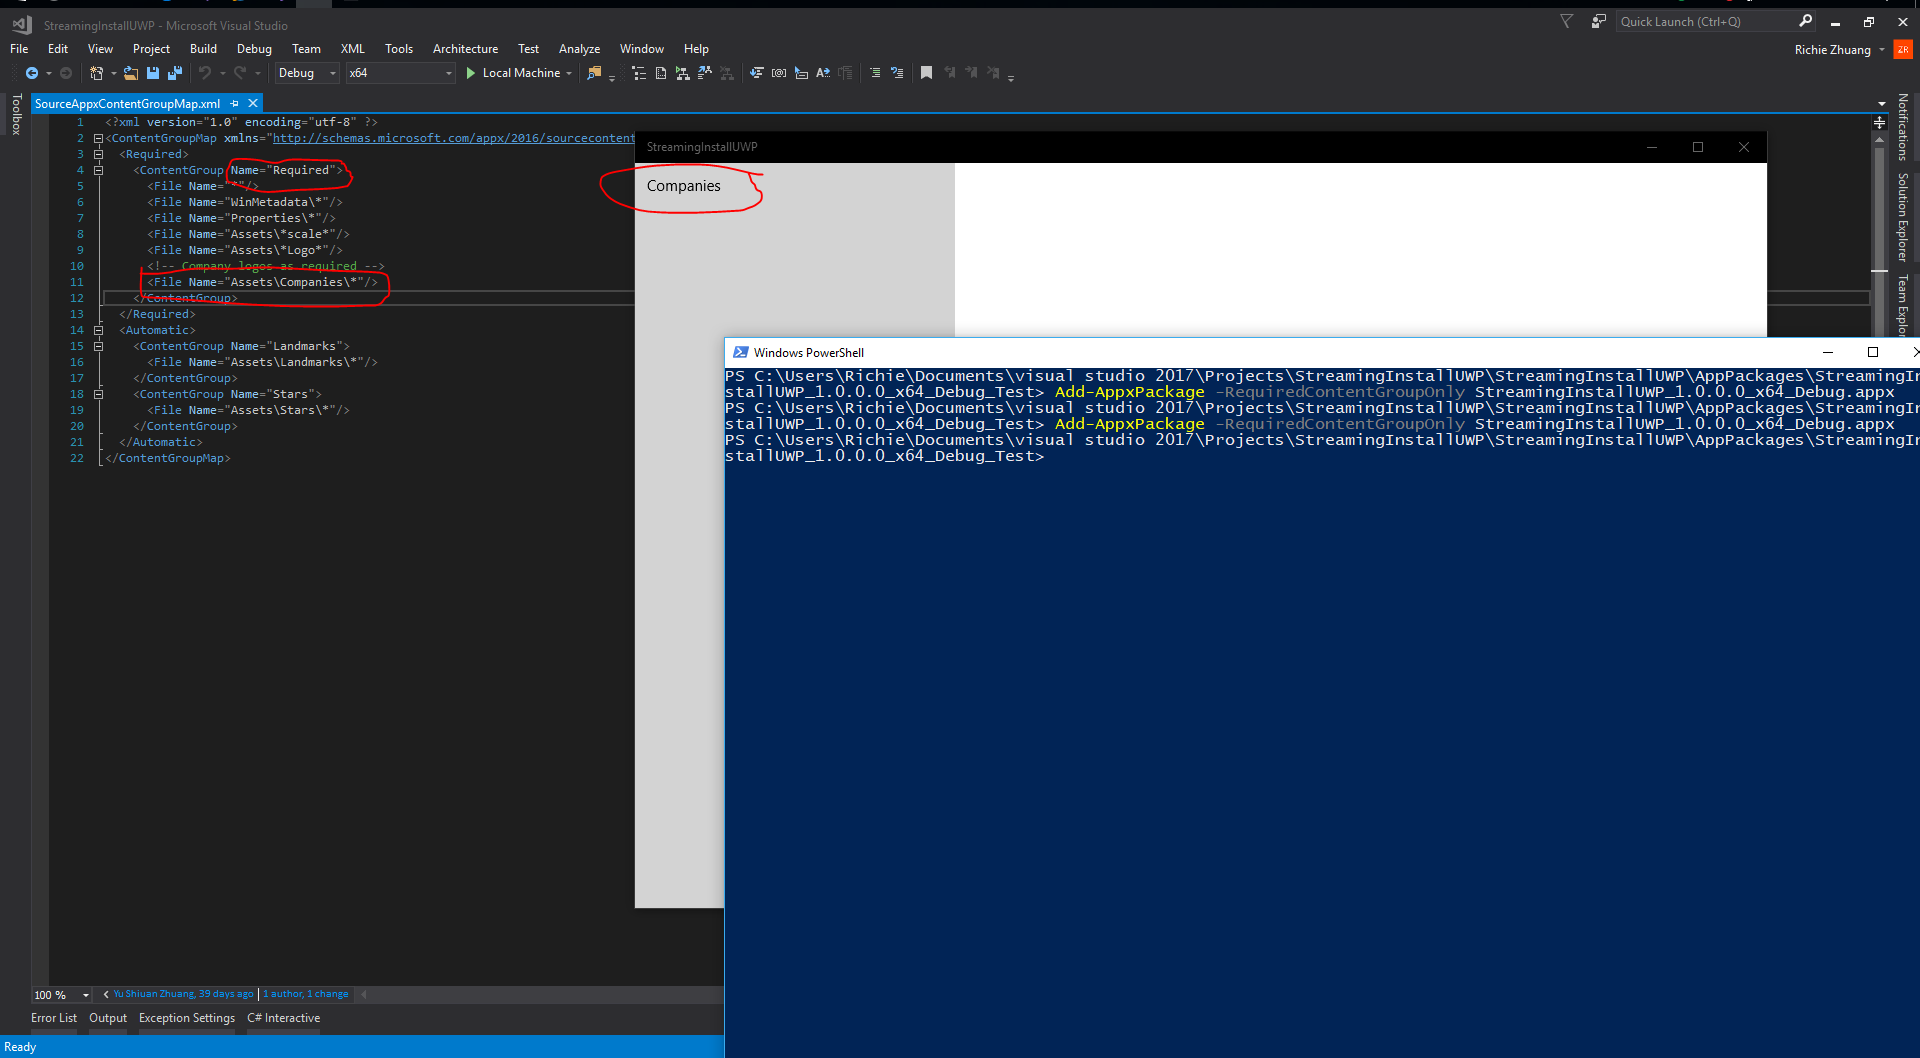 透過指令安裝Required的ContentGroup只會有Companies的選項在左邊的選項。
 透過ForceApplicationShutdown 的語法讓Appx取得Automatic 的ContentGroup,這邊有趣的是需要下兩次的Powershell指令才會讓App取得完整的Automatic contentgroups!只要下ForeceApplicationShutdown就會強制UWP的APP重新開啟但是只進行一次的指令並不會讓Automatic ContentGroup做刷新的動作,目前不知道是否為Bug。
上述有提到可以使用Debugg API,這邊可以直接使用MSFT 提供的Github link ( https://github.com/AppInstaller/StreamingInstallDebuggingApp )抓下來後直接使用或是可以自己寫一隻拉~需要使用Debugging package api的流程如下
在package.appxmanifest加入 restrict capabilities的宣告如下所示
<?xml version="1.0" encoding="utf-8"?>

<Package
  xmlns="http://schemas.microsoft.com/appx/manifest/foundation/windows10"
  xmlns:mp="http://schemas.microsoft.com/appx/2014/phone/manifest"
  xmlns:uap="http://schemas.microsoft.com/appx/manifest/uap/windows10"
  xmlns:rescap="http://schemas.microsoft.com/appx/manifest/foundation/windows10/restrictedcapabilities"
  IgnorableNamespaces="rescap uap mp">

<中間略過不需修改>

  <Capabilities>
    <Capability Name="internetClient" />

    <rescap:Capability Name="packageManagement"/>
  </Capabilities>
</Package>
然後就可以透過PackageManager的Class來做Debug的動作!如下的C# sample code就可以設定ContentGroup的狀態。
public async Task SetContentGroupStateAsync(string groupName, PackageContentGroupState state, double percentage)
        {
            if (!Windows.Foundation.Metadata.ApiInformation.IsApiContractPresent("Windows.Foundation.UniversalApiContract", 4, 0))
            {
                throw new NotSupportedException("This helper need 14393 or later");
            }

            if (string.IsNullOrEmpty(groupName) || string.IsNullOrWhiteSpace(groupName))
            {
                throw new ArgumentNullException(nameof(groupName));
            }

            if (percentage < 0)
            {
                throw new ArgumentOutOfRangeException(nameof(percentage));
            }

            try
            {
                var pm = new PackageManager();
                await pm.DebugSettings.SetContentGroupStateAsync(Package.Current, groupName, state, percentage);
            }
            catch (Exception ex)
            {
                System.Diagnostics.Debug.WriteLine(ex.Message);
            }
        }
總結
Streaming install可以讓App的檔案資源較為有效率的調整且讓使用者優先體驗App主要的功能,其餘資源可以後續下載並安裝。
***以上Code以及說明都有可能隨著Windows 10 的版本以及Visual Studio 版本有所調整!***
參考資料 MSDN, UWP Windows app deployment, B8093_Building extensible, stream-able, componentized apps
下次再分享Windows 10 的新技術拉~