當想針對 github 上 repository 的某一個 branch 進行修改與 push 時,或是想要在本機切換 local git repository 的 branch 時,也可以直接在 Visual Studio 2015 設定。
前言
上一篇文章 Visual Studio 2015 Connect Github Repository 介紹如何透過 VS2015 從 github remote repo 建立 local git repository 的方式,而這都是 focus 在 default branch (通常是 master )。
這篇文章則介紹,當需要針對 remote repo 其他的 branch 進行異動與 push 時,該怎麼進行 local repo branch 的切換。
Step 0 - Choose Some Commit You Want to Create New Branch
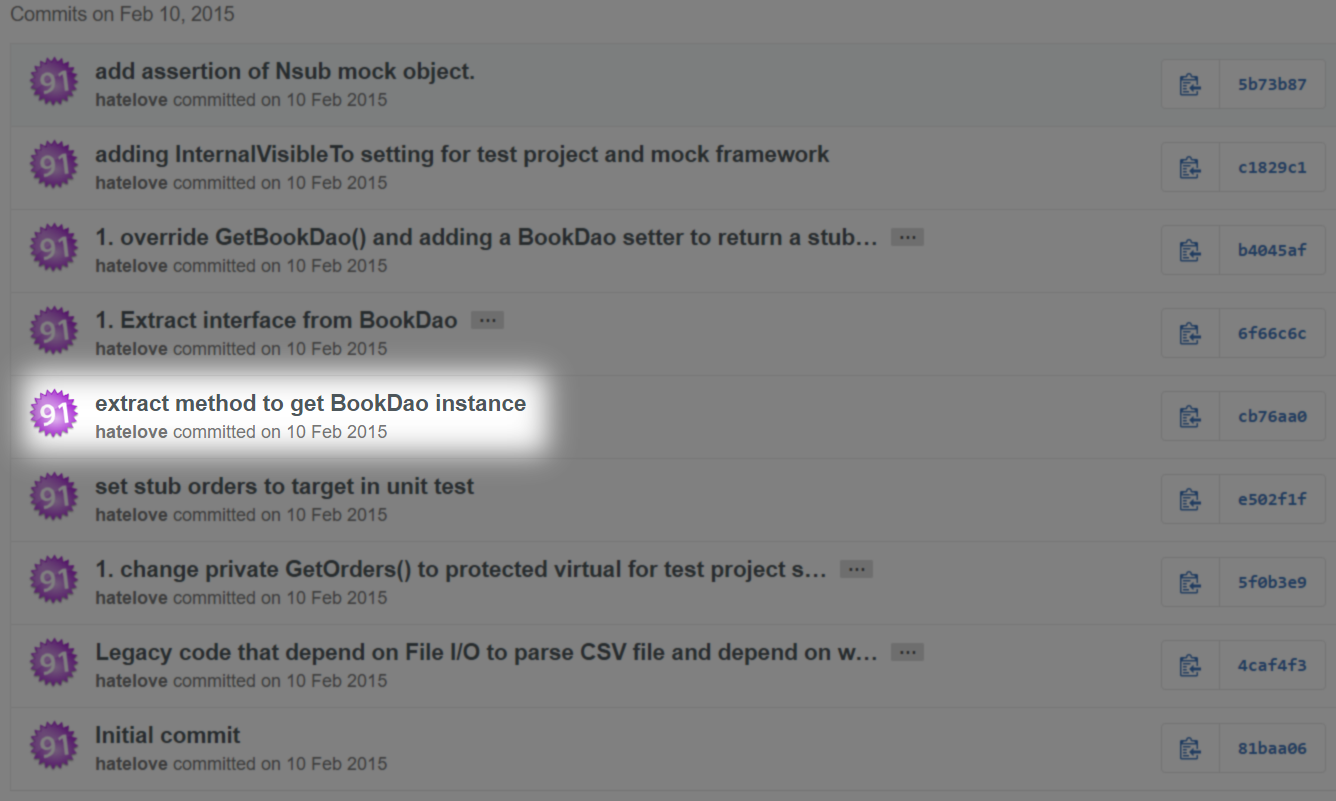
先在 github 的 repository commit history 上,選擇要從哪一個 commit 版本來建立新的 branch 。Double click 後,如下圖所示。
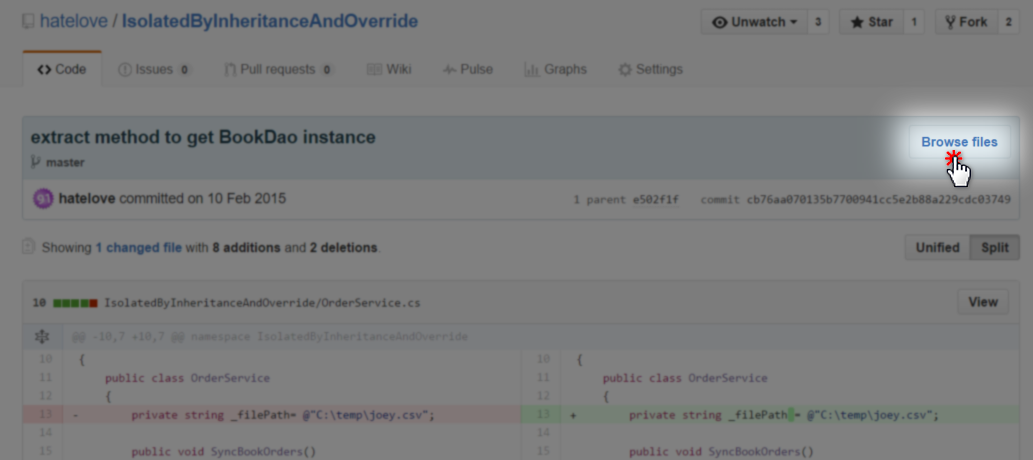
點選 Browse files 後,就會看到該 commit 版本完整的 snapsnot repo 內容。
Step 1 - Create New Branch on Github Repository
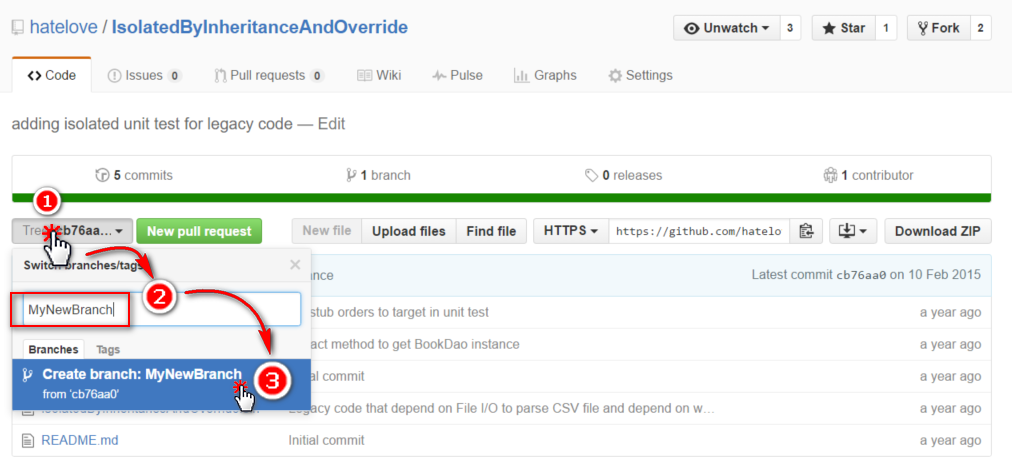
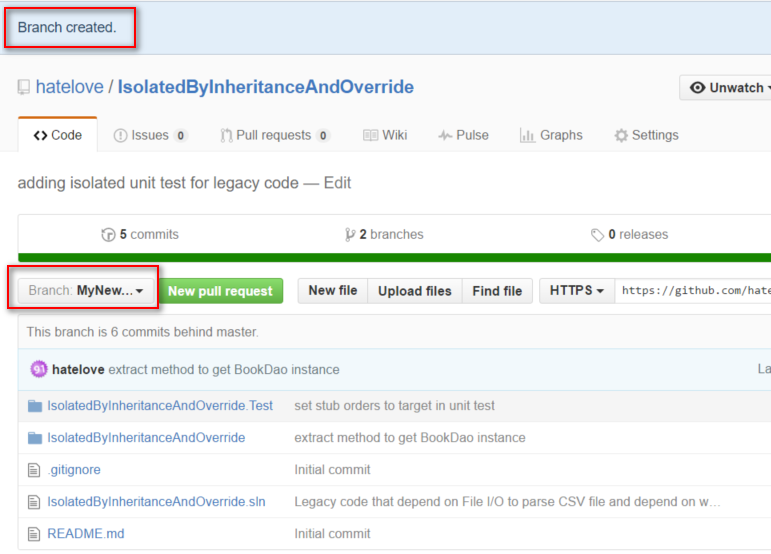
點選 branch 的下拉選單,輸入 new branch 的名稱,點選 Create branch 就可以從這個 commit 順利建立一條新分支,如下圖所示。
Step 3 - Clone to Local Repository
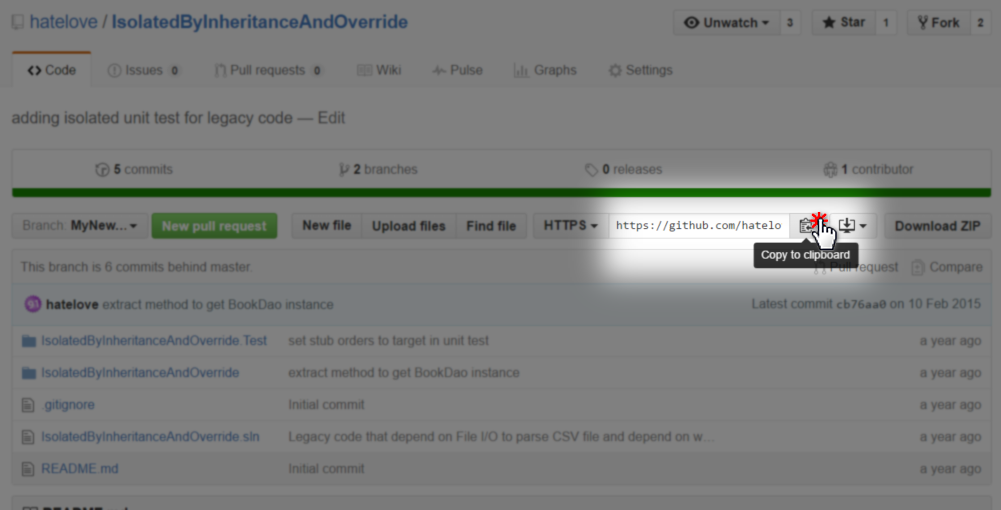
先將 git url 複製到剪貼簿上。接著打開 Visual Studio Team Explorer 的視窗。
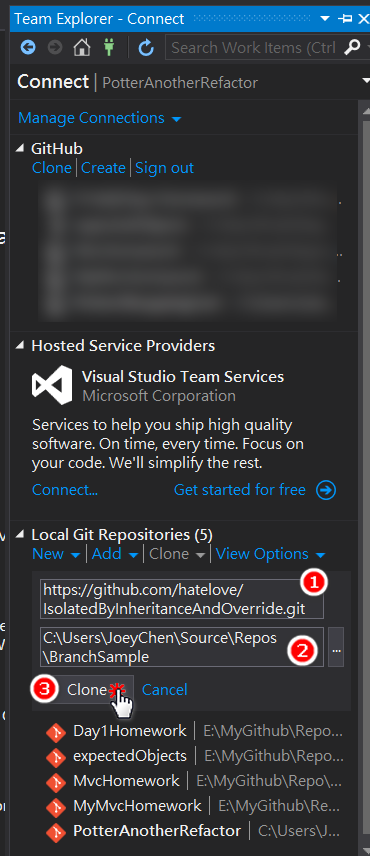
在 Local Git Repositoryies 的功能區塊中,貼上 git url 並指定 local repo 的目錄位置,按下 Clone 後就會出現一個新增的 local git repo ,此時 branch 仍是預設的 master 。
Step 4 - Switch Branch from "master" to New Branch
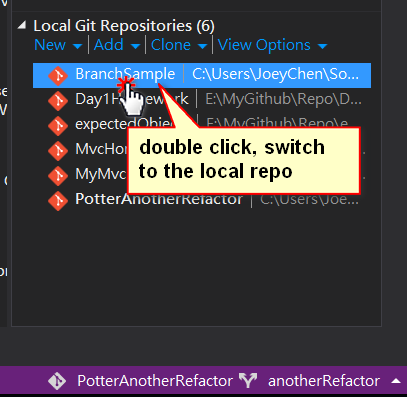

Double click 剛剛新增的 local git repo 後,點選 master branch ,選擇 Manage Branches 。
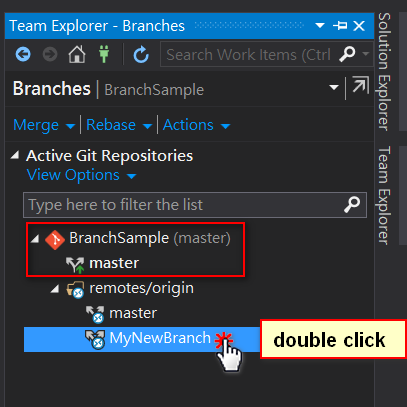
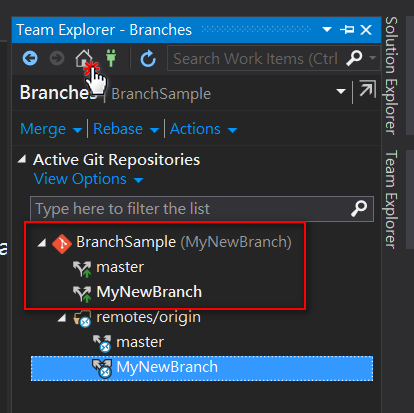
在 Branches 的區塊,可以看到 remotes/origin 就是 github 上的 repository ,同時也可以看到剛剛新增的 branch 。Double click remotes 的 new branch ,就會在 local repo 上加入對應的 new branch ,且自動把 work space 切到 new branch 上,如下圖所示。
按下 home 的 icon 後,就可以在 Solutions 的區塊中,看到 new branch 的 solution 檔了。如下圖所示。

而且可以從 Visual Studio 下方看到,目前 local git repository 是哪一個,以及你正在哪一條 branch 上作業。如下圖所示。

結論
Branch 的應用在實務上相當常見,尤其是 git flow 之類的 branch strategy 。搞懂 local, remote, upstream 以及 commit, push, pull, pull request 等基礎知識,在一般的 git 操作上,就不會有所迷惑。
常見的 git 操作以及將 github 當作 remote repository 的操作,也都可以直接透過 VS2015 的整合介面進行,希望這樣可以讓大家更容易上手與 github 之間的互動。
blog 與課程更新內容,請前往新站位置:http://tdd.best/
