[Python+Django]初心者筆記10(加入登入機制,驗證機制,authentication,authorization)
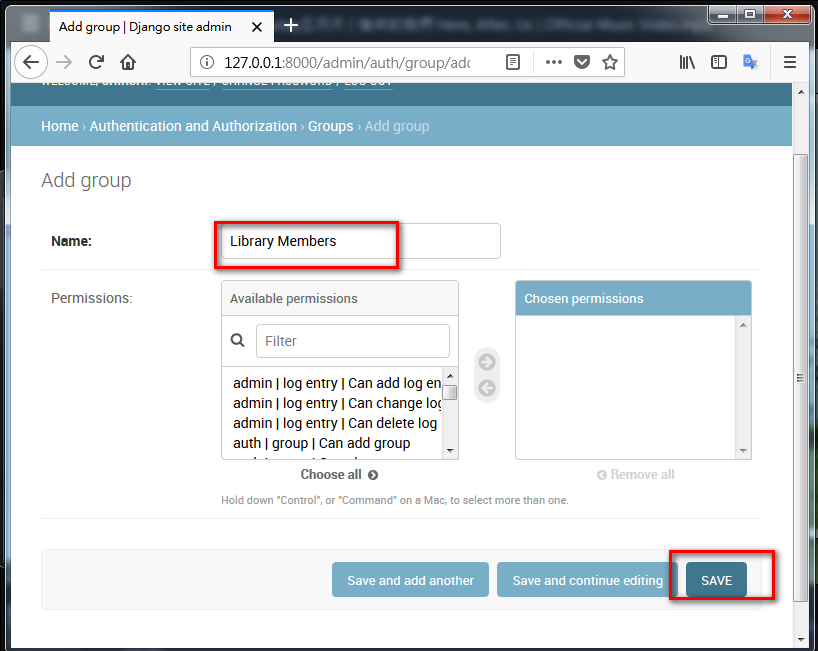
使用admin管理介面新增一個group叫做Library Members,此group的權限都先還不用動他,直接SAVE新增就好:
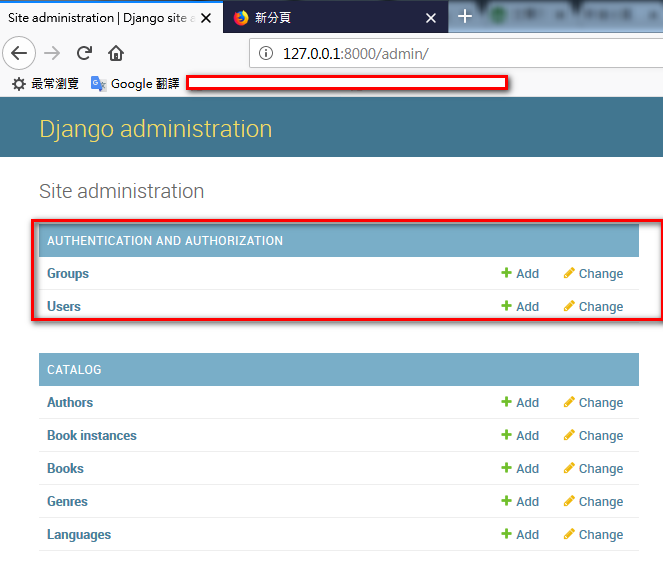
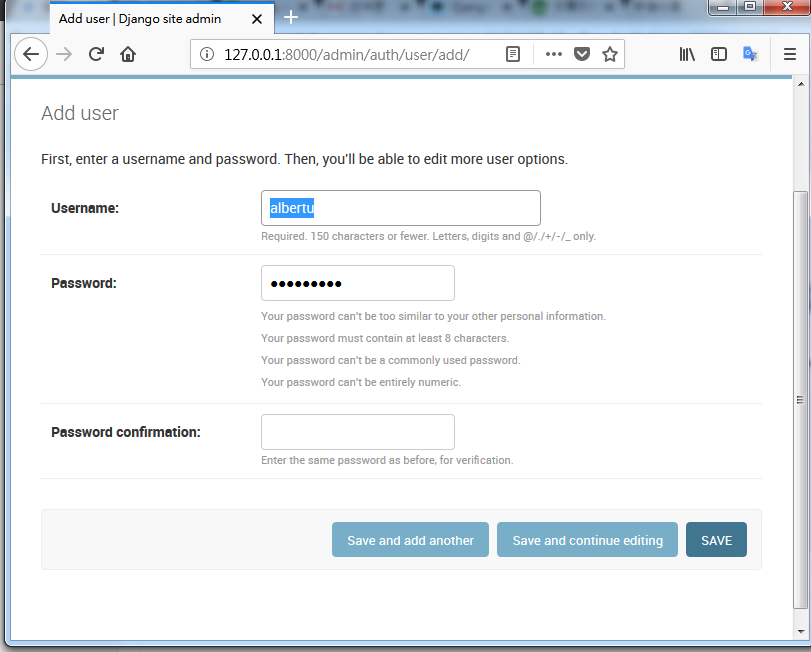
同樣的,新增一個User,直接Save新增就好,其他的都還不用動他
接著在locallibrary/locallibrary/urls.py加入下面程式碼:
算是新增另外一個應用程式叫做Account的url mapping,專門用來登入用的
#開始建立網站的登入用的url mapping
#Add Django site authentication urls (for login, logout, password management)
urlpatterns += [
    path('accounts/', include('django.contrib.auth.urls')),
]
後續的動作很多都是在locallibrary根目錄底下進行,因此需在/locallibrary/locallibrary/settings.py設定:
修改TEMPLATES這個變數裡面的DIR變數如下,這樣為了要在網站根目錄下面的templates資料夾可以讀取的到
TEMPLATES = [
    {
        ...
        'DIRS': ['./templates',],
        'APP_DIRS': True,
        ...
然後建立此檔案/locallibrary/templates/registration/login.html(路徑的新資料夾請自行建立):
請注意!templates資料夾是建立在網站根目錄locallibrary下喔!.html檔的內容如下
{% extends "base_generic.html" %}

{% block content %}

{% if form.errors %}
<p>Your username and password didn't match. Please try again.</p>
{% endif %}

{% if next %}
    {% if user.is_authenticated %}
    <p>Your account doesn't have access to this page. To proceed,
    please login with an account that has access.</p>
    {% else %}
    <p>Please login to see this page.</p>
    {% endif %}
{% endif %}

<form method="post" action="{% url 'login' %}">
<!-- 防止csrf攻擊 -->
{% csrf_token %}

<div>
  <td>{{ form.username.label_tag }}</td>
  <td>{{ form.username }}</td>
</div>
<div>
  <td>{{ form.password.label_tag }}</td>
  <td>{{ form.password }}</td>
</div>

<div>
  <input type="submit" value="login" />
  <input type="hidden" name="next" value="{{ next }}" />
</div>
</form>

{# Assumes you setup the password_reset view in your URLconf #}
<p><a href="{% url 'password_reset' %}">Lost password?</a></p>

{% endblock %}
接著設定/locallibrary/locallibrary/settings.py,並加入下列程式碼到最後:
這樣可以讓登入成功之後,自動導向到網站的home page
# Redirect to home URL after login (Default redirects to /accounts/profile/)
LOGIN_REDIRECT_URL = '/'
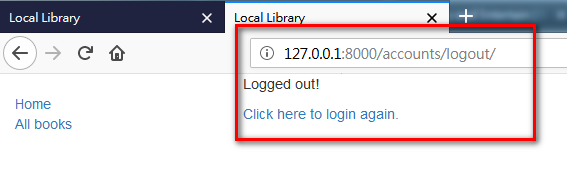
接著新增此檔案/locallibrary/templates/registration/logged_out.html,用途是登出:
這個一定要加入,沒加入的話,user的登出將會導向到admin用的logout網頁,但是user是不應該到admin用的網頁才是
.html檔內容如下
{% extends "base_generic.html" %}

{% block content %}
<p>Logged out!</p>

<a href="{% url 'login'%}">Click here to login again.</a>
{% endblock %}
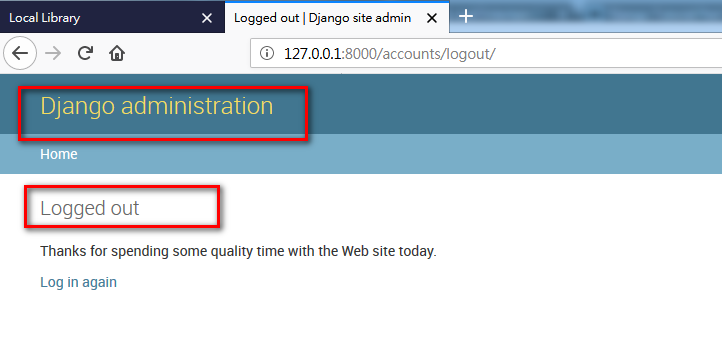
然後你就可以打開網址:http://127.0.0.1:8000/accounts/logout/
確認是否有登出的網頁
ps.喜歡多方面測試的人,也可以刪除這個登出的.html檔,然後同樣打開這個登出的網址試試看,你將會被導向到下面的admin用的登出網頁,這並不是我們要的結果
接著加入"忘記密碼"的機制,請加入一個.html檔/locallibrary/templates/registration/password_reset_form.html,用處就是password_reset_form,內容如下:
{% extends "base_generic.html" %}
{% block content %}

<form action="" method="post">{% csrf_token %}
    {% if form.email.errors %} {{ form.email.errors }} {% endif %}
        <p>{{ form.email }}</p>
    <input type="submit" class="btn btn-default btn-lg" value="Reset password" />
</form>

{% endblock %}
接著加入/locallibrary/templates/registration/password_reset_done.html,用處就是password_reset_done,內容如下:
{% extends "base_generic.html" %}
{% block content %}
<p>We've emailed you instructions for setting your password. If they haven't arrived in a few minutes, check your spam folder.</p>
{% endblock %}
接著加入/locallibrary/templates/registration/password_reset_email.html,用處是password_reset_email,內容如下:
Someone asked for password reset for email {{ email }}. Follow the link below:
{{ protocol}}://{{ domain }}{% url 'password_reset_confirm' uidb64=uid token=token %}
接著加入/locallibrary/templates/registration/password_reset_confirm.html,用處是password_reset_confirm,內容如下:
{% extends "base_generic.html" %}

{% block content %}

    {% if validlink %}
        <p>Please enter (and confirm) your new password.</p>
        <form action="" method="post">
            <div style="display:none">
                <input type="hidden" value="{{ csrf_token }}" name="csrfmiddlewaretoken">
            </div>
            <table>
                <tr>
                    <td>{{ form.new_password1.errors }}
                        <label for="id_new_password1">New password:</label></td>
                    <td>{{ form.new_password1 }}</td>
                </tr>
                <tr>
                    <td>{{ form.new_password2.errors }}
                        <label for="id_new_password2">Confirm password:</label></td>
                    <td>{{ form.new_password2 }}</td>
                </tr>
                <tr>
                    <td></td>
                    <td><input type="submit" value="Change my password" /></td>
                </tr>
            </table>
        </form>
    {% else %}
        <h1>Password reset failed</h1>
        <p>The password reset link was invalid, possibly because it has already been used. Please request a new password reset.</p>
    {% endif %}

{% endblock %}
最後加入/locallibrary/templates/registration/password_reset_complete.html,用處是password_reset_complete,內容如下:
{% extends "base_generic.html" %}
{% block content %}

<h1>The password has been changed!</h1>
<p><a href="{% url 'login' %}">log in again?</a></p>

{% endblock %}
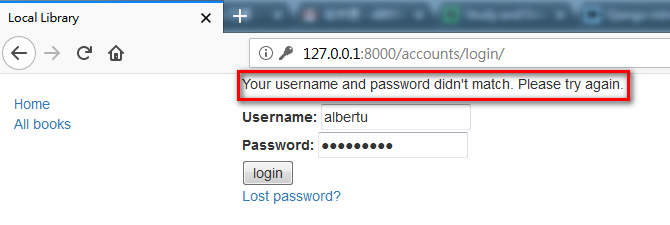
這時候測試登入的網址http://127.0.0.1:8000/accounts/login/,已經可以檢查帳號密碼是否符合了:
密碼打錯的時候,會出現錯誤訊息
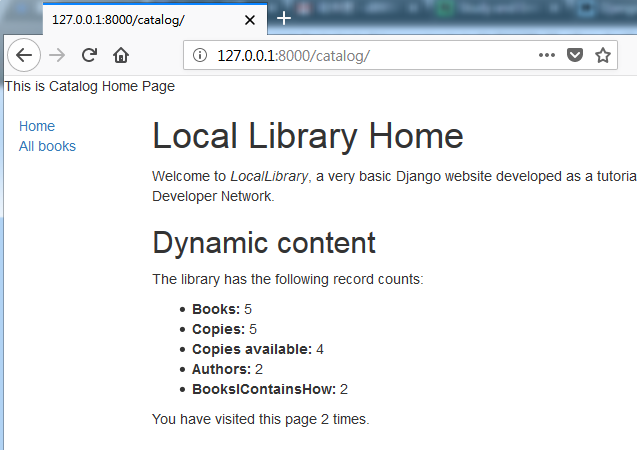
帳號密碼正確的話會導向到home page:
不過~現在還沒有在base_generic.html這個base template加入帳號密碼的session檢查機制,所以要是使用者直接記錄下網址http://127.0.0.1:8000/catalog/,其實是可以直接進來系統看資料的,之後教學文章的作者應該會加入吧!
然後我們希望在catalog應用程式的home page左方能有個登入的選項,因此請在/locallibrary/catalog/templates/base_generic.html的<ul class="sidebar-nav">裡面加入一段html,讓使用者未登入的狀態下時,可以有個登入的選項可按:
<ul class="sidebar-nav">
  <li><a href="{% url 'index' %}">Home</a></li>
  <li><a href="{% url 'books' %}">All books</a></li>
  {% comment %} <li><a href="{% url 'authors' %}">All authors</a></li>           {% endcomment %}

  <!-- 讓使用者在未登入的狀態下,有個登入的選項可以按 -->
  {% if user.is_authenticated %}
	<li>User: {{ user.get_username }}</li>
	<!-- next={{request.path}可以讓使用者在登出之後,回到當初同一個畫面 -->
	<li><a href="{% url 'logout'%}?next={{request.path}}">Logout</a></li>
  {% else %}
  <!-- next={{request.path}可以讓使用者在登入成功之後,回到當初同一個畫面 -->
	 <li><a href="{% url 'login'%}?next={{request.path}}">Login</a></li>
  {% endif %}
</ul>
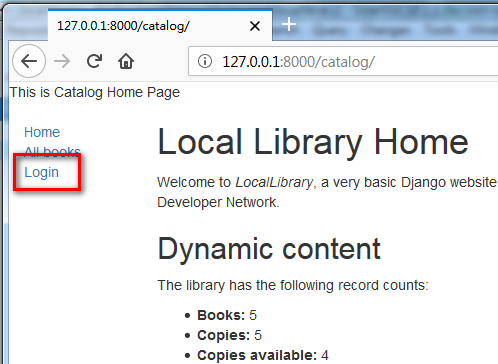
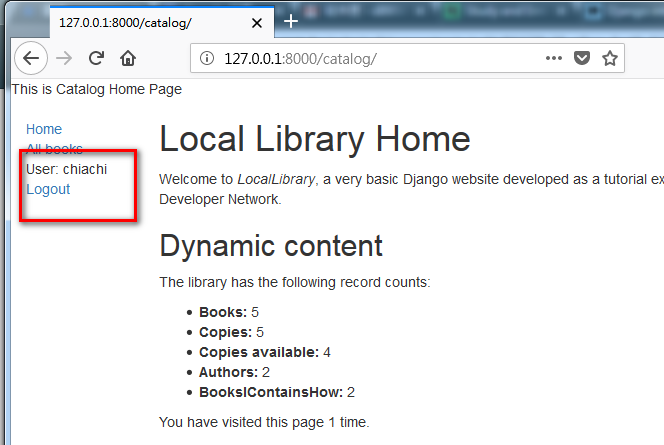
如此一來,進入home page http://127.0.0.1:8000/catalog/的時候,便可以有登入或是登出的選項:
並且登入完畢或是登出完畢之後,能自動回到上一頁(即home page),能夠自動回到上一頁是因為上面的程式碼有next={{request.path}的功勞!
限制網頁必須登入才能使用的機制,在Django裡面有兩種作法,一種是針對function-based views,一種是針對class-based views,都是針對單一系統功能,加上必須登入的限制,現階段沒看到作者介紹如何一口氣讓整個網站可以加上此登入機制的方式。
首先來先介紹function-based views的限制登入的作法:
很簡單,以catalog應用程式的index()這個home page為例子,只要在/locallibrary/catalog/views.py加上關鍵字@login_required即可,如下:
#def index()是function-based view,因此需利用@login_required decorator來做網頁驗證
from django.contrib.auth.decorators import login_required

@login_required
def index(request):
以往在網址直接打入http://127.0.0.1:8000/catalog/,可以直接開啟網頁看資料,現在都必須登入了!而且登入完畢之後,還會自動幫你跳回上一頁(即http://127.0.0.1:8000/catalog/),這個自動跳回的功能可以說是自動幫programmer包裝進去了。
接下來的class-based view的限制必須登入的作法也差不多,在/locallibrary/catalog/views.py加入關鍵字LoginRequiredMixin即可,如下:
#建立Book資料的List清單網頁
from django.views import generic

#這是class-based views的限制網頁必須登入的作法
from django.contrib.auth.mixins import LoginRequiredMixin
class BookListView(LoginRequiredMixin, generic.ListView):
在登入成功之後,同樣有自動跳回上一頁的效果喔!
參考資料:
[Python+Django]初心者筆記9(如何使用session)
https://dotblogs.com.tw/kevinya/2018/07/11/160934
Django Tutorial Part 8: User authentication and permissions
https://developer.mozilla.org/en-US/docs/Learn/Server-side/Django/Authentication