在前篇文章[Bot] 使用Microsoft Bot Framework,建立自動回覆訊息的機器人 (Bot Framework v1.0)中
說明了如何透過Microsoft Bot Framework建立機器人,不過微軟在2016/07/08左右,更新了Bot Framework的版本至3.0
若是要建立新的機器人,已經無法使用1.0的版本了,3.0的建立方式與1.0相同,不過多了幾個步驟,程式也梢有改變
本篇文章會說明,如何建立3.0的機器人
首先建立3.0的機器人,一樣必須先連上Microsoft Bot Framework的網頁https://dev.botframework.com/,並點選[Register a bot]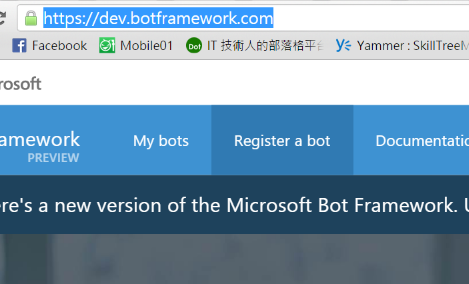
接著,在機器人的[Name]與[Bot handle]欄位中,填入機器人的名字唯一名,其中[Bot handle]欄位請先記下來,等一下會用到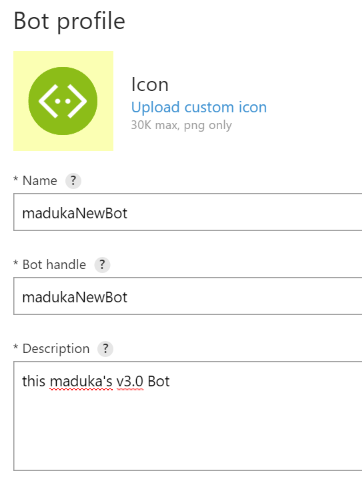
在[Configuration]區塊中,[Messaging endpoint]欄位先隨便輸入一個網址,這裡的步驟與v1.0相同,接著點選下方[Create Microsoft App ID and password]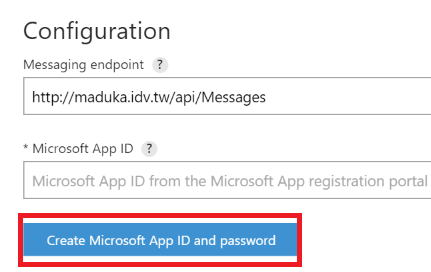
此時畫面會跳至建立app ID的畫面,這裡會將機器人的[App Name]以及[App ID]顯示出來,在這裡先將[App ID]記下來,並點選下方的[Generate a password and continue]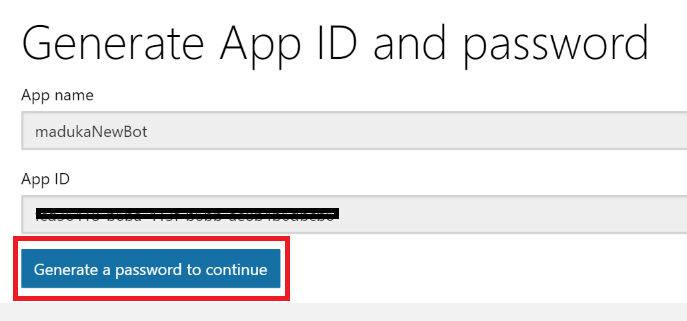
建立出來的密碼,請先記下來,因為它只會顯示一次而已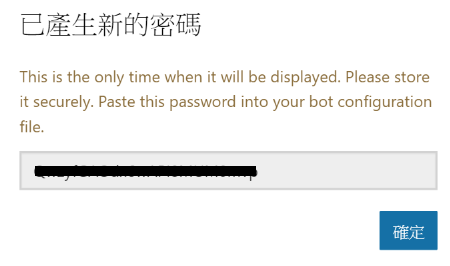
完成後,點選下方的[Finish and go back to Bot Framework]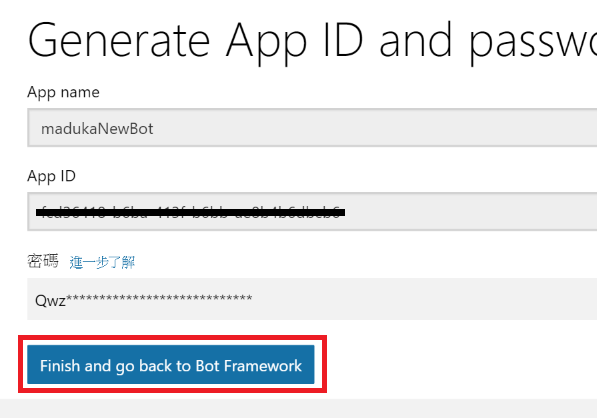
建立完成後,開啟Visual Studio,並在專案中建立一個Controllers/MessagesController.cs的類別庫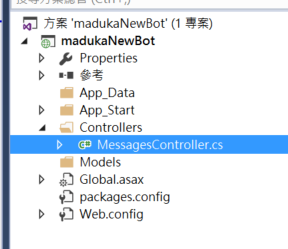
在MessagesController.cs中,加入下方的程式碼
using Microsoft.Bot.Connector;

[BotAuthentication]
public class MessagesController : ApiController
{
    /// <summary>
    /// POST: api/Messages
    /// Receive a message from a user and reply to it
    /// </summary>
    public async Task<HttpResponseMessage> Post([FromBody]Activity activity)
    {
        if (activity.Type == ActivityTypes.Message)
        {
            ConnectorClient connector = new ConnectorClient(new Uri(activity.ServiceUrl));
            // calculate something for us to return
            int length = (activity.Text ?? string.Empty).Length;

            // return our reply to the user
            Activity reply = activity.CreateReply($"你送入的文字是 {activity.Text} 這段文字長 {length} 個字元");
            await connector.Conversations.ReplyToActivityAsync(reply);
        }
        else
        {
            HandleSystemMessage(activity);
        }
        var response = Request.CreateResponse(HttpStatusCode.OK);
        return response;
    }

    private Activity HandleSystemMessage(Activity message)
    {
        if (message.Type == ActivityTypes.DeleteUserData)
        {
            // Implement user deletion here
            // If we handle user deletion, return a real message
        }
        else if (message.Type == ActivityTypes.ConversationUpdate)
        {
            // Handle conversation state changes, like members being added and removed
            // Use Activity.MembersAdded and Activity.MembersRemoved and Activity.Action for info
            // Not available in all channels
        }
        else if (message.Type == ActivityTypes.ContactRelationUpdate)
        {
            // Handle add/remove from contact lists
            // Activity.From + Activity.Action represent what happened
        }
        else if (message.Type == ActivityTypes.Typing)
        {
            // Handle knowing tha the user is typing
        }
        else if (message.Type == ActivityTypes.Ping)
        {
        }

        return null;
    }
}
這段程式碼與v1.0的很接近,主要是將Message更改為Activity的物件,以便未來除了文字的回覆外,還可以回覆其他的物件,如圖片等等的
接著在專案中,加入[Microsoft.Bot.Builder]的Nuget套件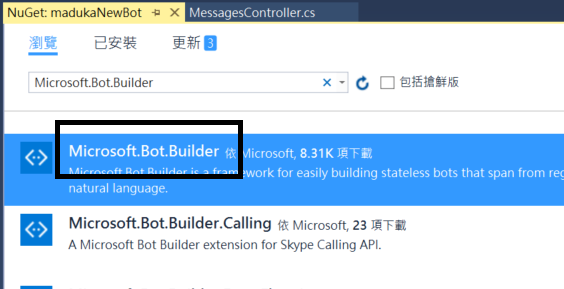
程式的部份,最後再開啟Web.Config,將下面的三個設定值,放入至appSettings區塊中
<add key="BotId" value="[這是放上Bot handle]" />
<add key="MicrosoftAppId" value="[這裡放上App ID]" />
<add key="MicrosoftAppPassword" value="[這裡放上App password]" />
到這裡,程式的部份完成了,最後只要發布至網路上,再回過頭去更改Message Endpoint的URL,v3.0 Bot Framework機器人的建立動作就完成了。
在機器人主畫面中,左下角的Test,點選後也會出現成功連線的資訊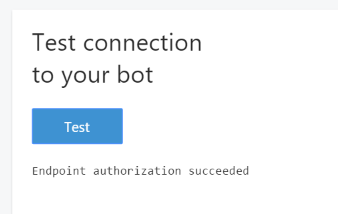
加上Web Chat的部份也可以使用了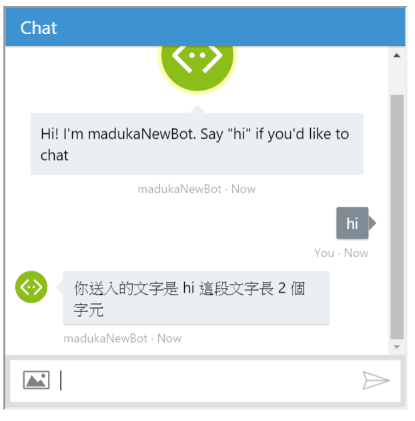
參考資料:
https://github.com/Microsoft/BotBuilder
Upgrade your bot to V3