環境: iOS,Xamarin
有時候可能要依不同的通知來產生不同的Actions來讓使用者選擇,要怎麼做呢?
我們可以先產生不同的 UIMutableUserNotificationCategory ,然後指定Action給它,
再將這些 UIMutableUserNotificationCategory 都加到 NSMutableSet 之中。
然後在設定 UIUserNotificationSettings 時加這些 UIMutableUserNotificationCategory 。
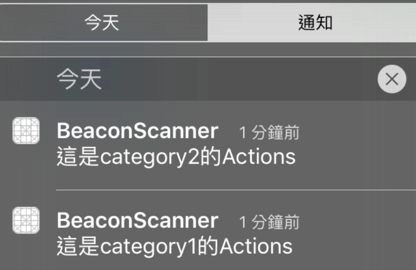
再來就是在發通知時指定使用的 Category ,這些通知就會顯示對應的 Actions 哦!
以下我們建立2個 UIMutableUserNotificationCategory 各有 2 個 Action 。
在 AppDelegate 中先定義好,如下,
public override bool FinishedLaunching(UIApplication application, NSDictionary launchOptions)
{
//設定通知的Categories
RegisterNotificationCategories();
return true;
}
void RegisterNotificationCategories()
{
//記錄所有
var categories = new NSMutableSet();
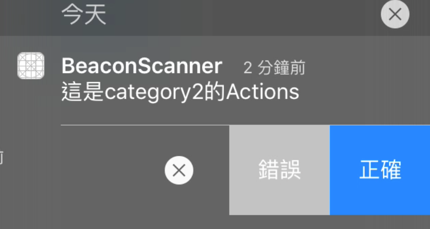
//建立第一個Category
var category = new UIMutableUserNotificationCategory();
category.Identifier = "category1";
var categoryActions = new List<UIMutableUserNotificationAction>();
//first action
var act = new UIMutableUserNotificationAction();
act.Identifier = "act1";
act.Title = "正確";
act.ActivationMode = UIUserNotificationActivationMode.Background;
act.Destructive = false;
act.AuthenticationRequired = false;
categoryActions.Add(act);
//second action
act = new UIMutableUserNotificationAction();
act.Identifier = "act2";
act.Title = "錯誤";
act.ActivationMode = UIUserNotificationActivationMode.Foreground;
act.Destructive = false;
act.AuthenticationRequired = false;
categoryActions.Add(act);
category.SetActions(categoryActions.ToArray(), UIUserNotificationActionContext.Default);
//加入第一個Category
categories.Add(category);
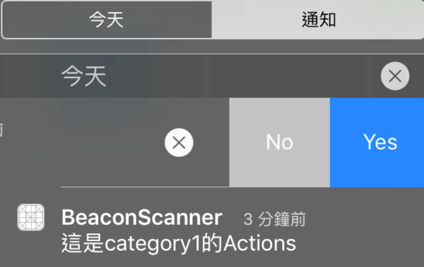
//建立第二個Category
category = new UIMutableUserNotificationCategory();
category.Identifier = "category2";
categoryActions = new List<UIMutableUserNotificationAction>();
//first action
act = new UIMutableUserNotificationAction();
act.Identifier = "act1";
act.Title = "Yes";
act.ActivationMode = UIUserNotificationActivationMode.Background;
act.Destructive = false;
act.AuthenticationRequired = false;
categoryActions.Add(act);
//second action
act = new UIMutableUserNotificationAction();
act.Identifier = "act2";
act.Title = "No";
act.ActivationMode = UIUserNotificationActivationMode.Foreground;
act.Destructive = false;
act.AuthenticationRequired = false;
categoryActions.Add(act);
category.SetActions(categoryActions.ToArray(), UIUserNotificationActionContext.Default);
//加入第2個Category
categories.Add(category);
UIUserNotificationType notificationTypes = UIUserNotificationType.Alert | UIUserNotificationType.Sound;
var categorySetting = UIUserNotificationSettings.GetSettingsForTypes(notificationTypes, categories);
UIApplication.SharedApplication.RegisterUserNotificationSettings(categorySetting);
}
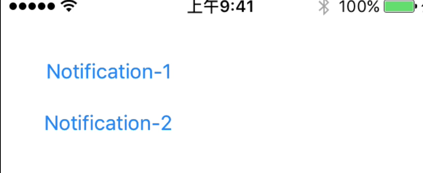
Button按下去時,發出通知,程式如下,
public override void ViewDidLoad()
{
	base.ViewDidLoad();
	btnNotify1.TouchUpInside += (sender, e) => {
		PerformLocalNotificationByCategory("category1");
	};

	btnNotify2.TouchUpInside += (sender, e) =>
	{
		PerformLocalNotificationByCategory("category2");
	};
}

void PerformLocalNotificationByCategory(string category)
{
	// create the notification
	var notification = new UILocalNotification();

	// set the fire date (the date time in which it will fire)
	notification.FireDate = NSDate.Now;

	// configure the alert
	notification.AlertAction = "View Alert";
	notification.AlertBody = $"這是{category}的Actions";

	// set the sound to be the default sound
	notification.SoundName = UILocalNotification.DefaultSoundName;

	//
	notification.Category = category;
	// schedule it
	UIApplication.SharedApplication.ScheduleLocalNotification(notification);
}
非常感謝同事Alice 的幫忙Survey
所以按下Button後,畫面就會像上面這樣,有這不同的Action可以使用。
Hi,
亂馬客Blog已移到了 「亂馬客 : Re:從零開始的軟體開發生活」
請大家繼續支持 ^_^
