Get Google User's Profile using People API and Javascript SDK
前言
取得Google用戶個資的程式碼,官方的Javascript範例資訊給得不太齊全,而且範例取的資料是用戶的連絡人
Browser Quickstart:https://developers.google.com/people/quickstart/js
以下分享公開我試了一整天的結果,希望減少後人鬼打牆的機會
至於為什麼選擇Javascript而不是Java、.Net、PHP這些後端語言
因為我發現後端程式碼版本改來改去,網路上很多範例文章都逾期,反倒是Javascript只要到Google官網複製貼上程式碼,幾乎馬上就能跑,工作效率比較快
本範例為Web環境,Android、iOS App應該不適用
2019-10-11追記:找到了官方Google API Client Library for JavaScript:https://github.com/google/google-api-javascript-client ,裡頭可以搭配的Google API包山包海
但至少可以參考Getting Started的Sample Code架構:https://github.com/google/google-api-javascript-client/blob/master/docs/start.md
本文開始
通常只要在Google Developer Console (https://console.developers.google.com/):建立好ClientID(用戶端ID)憑證,其實就可以透過Javascript整合你的網站和Google的登入系統
※管理ClientID也可以透過Google Cloud Platform:https://console.cloud.google.com/ ,兩者管理畫面&內容大同小異,究竟哪個網站誰先誰後我不知道,我也納悶為啥做相同事情的網站會有兩個XD
但是預設建立好的憑證(無須進一步啟用任何API),就只能整合Google登入功能,而且Google回傳的用戶資料少得可憐,只有姓名、email、user_id派得上用場
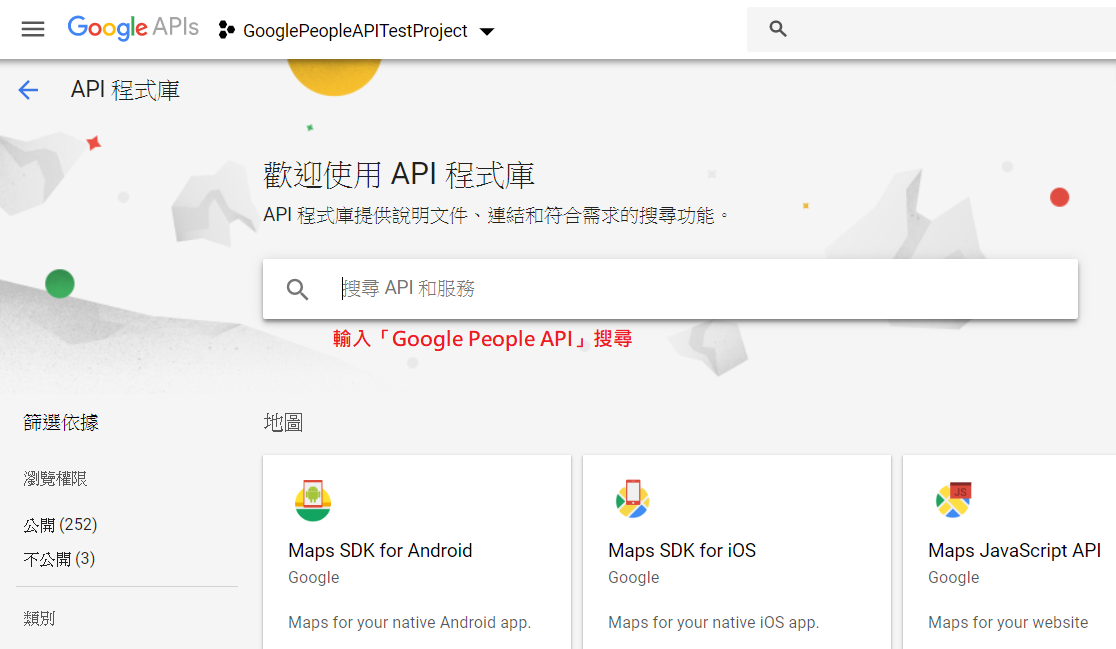
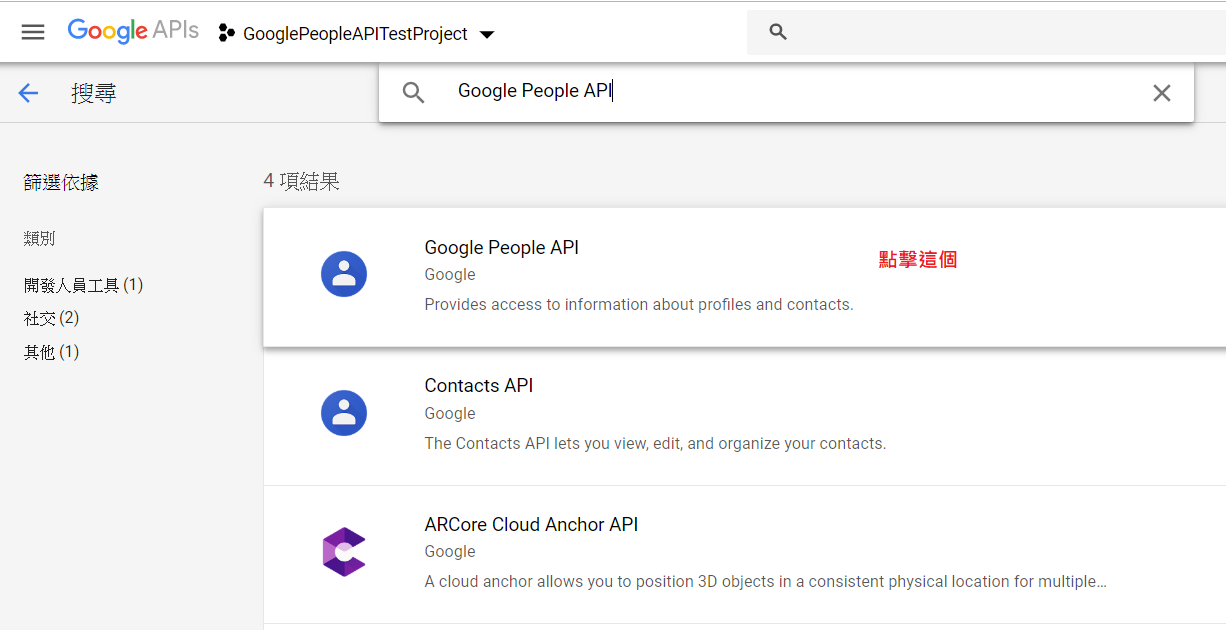
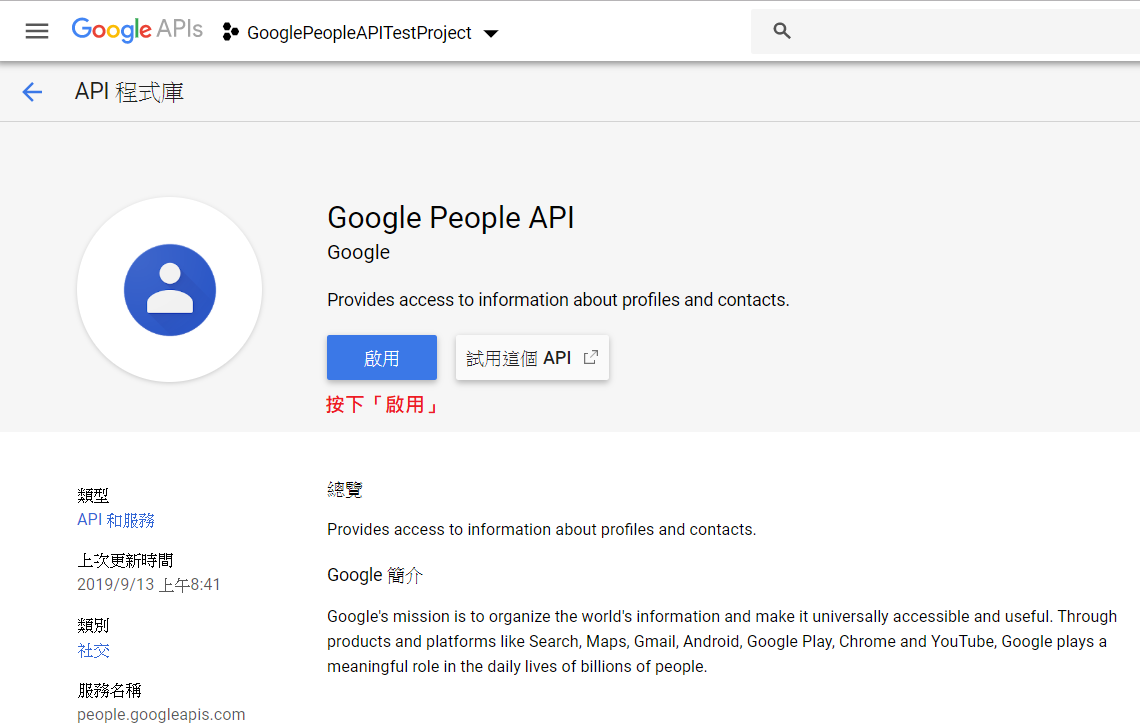
如果你的網站還想再進一步取得Google用戶其他個資,例如:生日、性別、職業、居住地、電話等等,那就要再額外啟用 People API
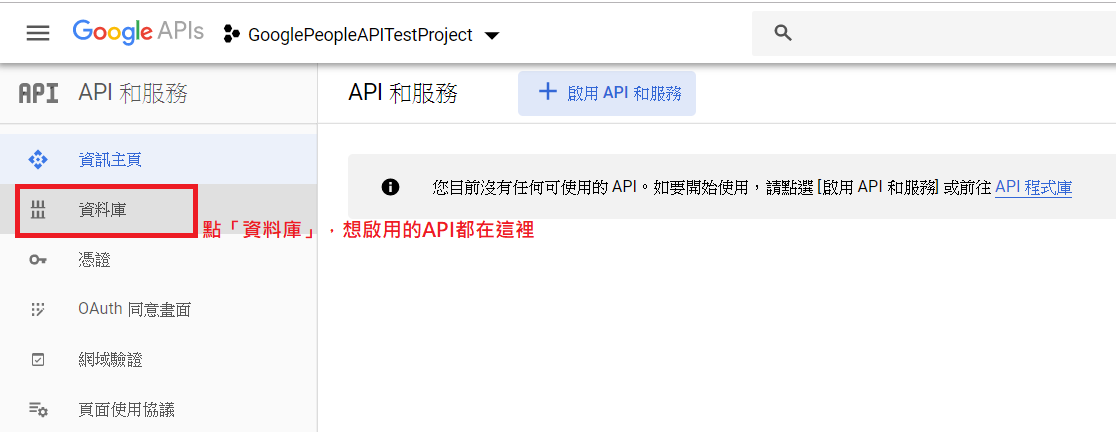
前置作業的設定
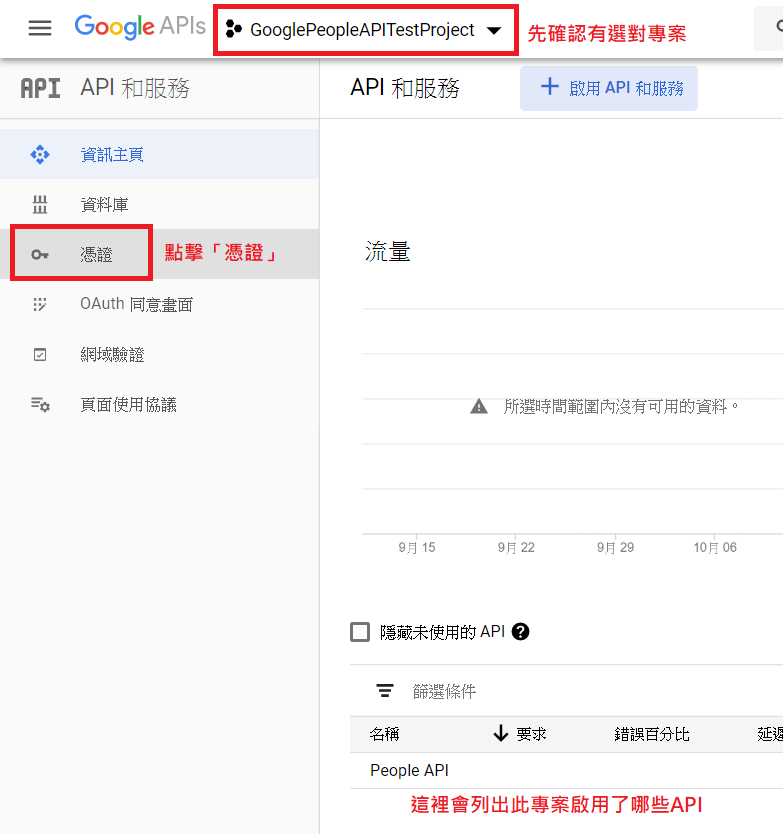
先進入Google Developer Console https://console.developers.google.com/,確保已建立一個專案
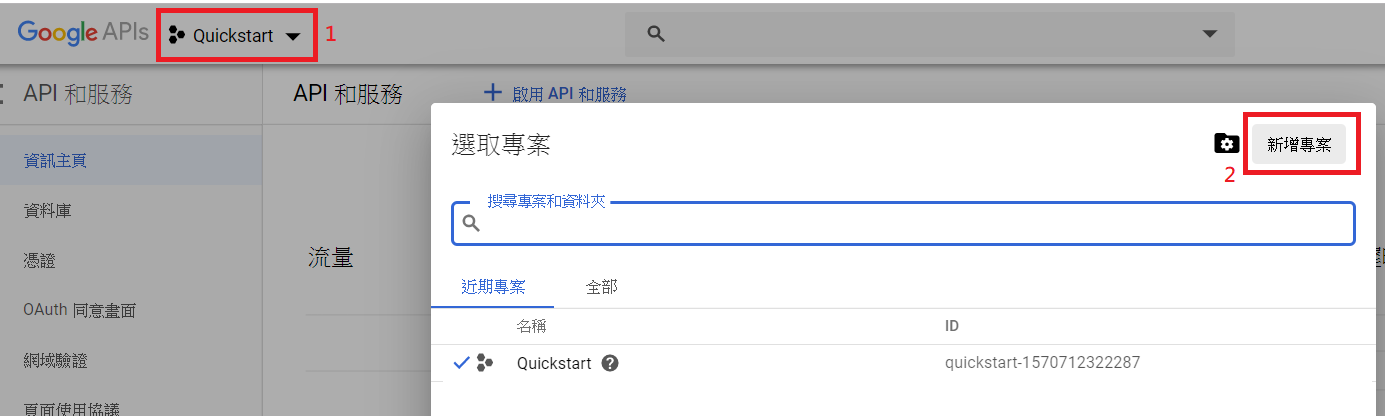
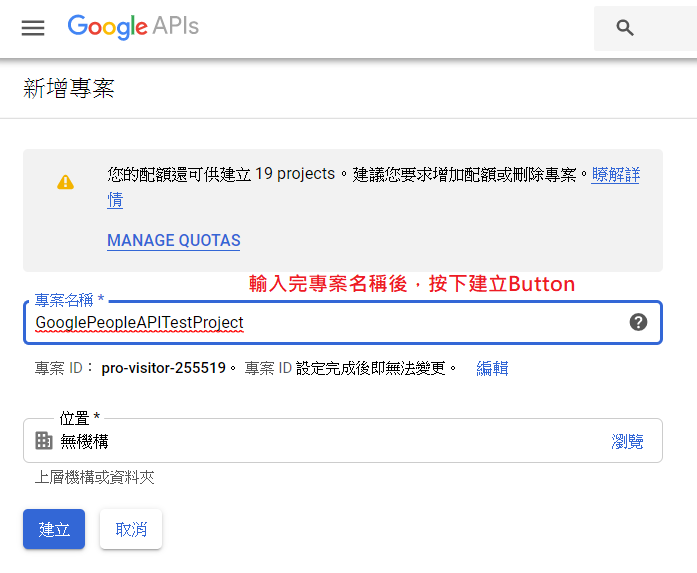
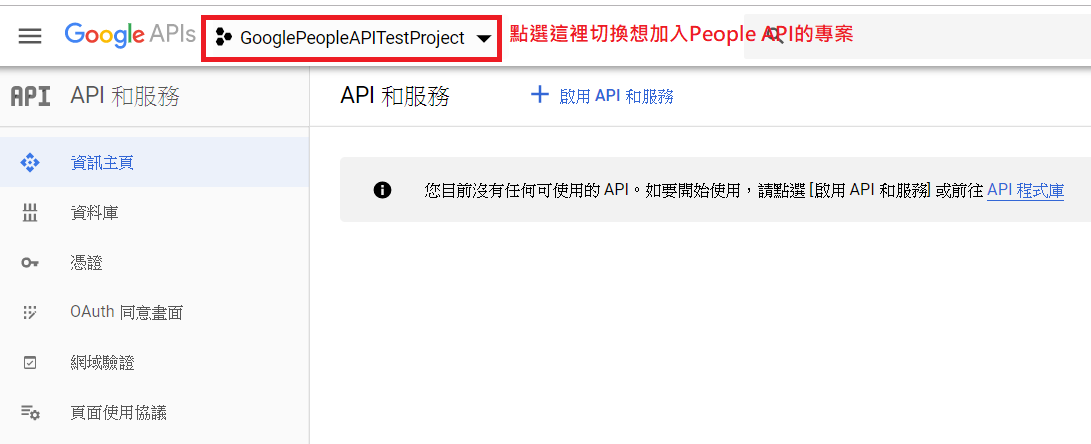
一個專案可以啟用多個API、擁有多個憑證,如果你已經有現成的Google專案,可以考慮使用現成的,不用每次建立新的API就新開一個專案
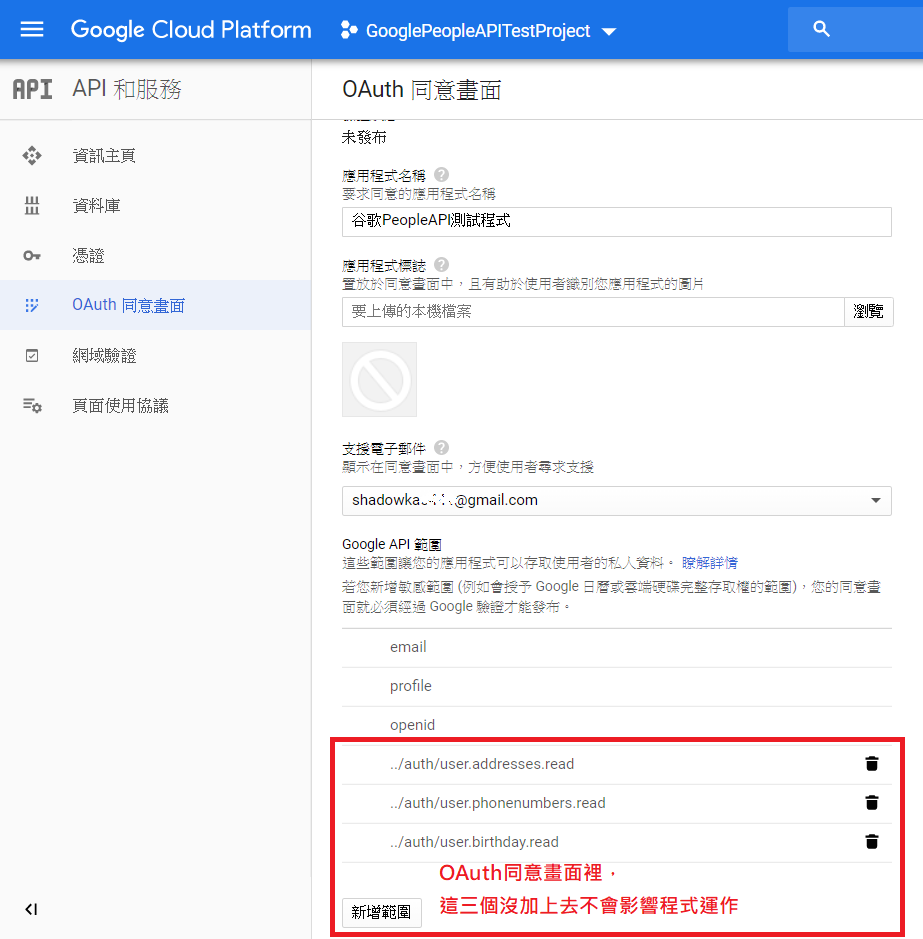
接著要確保「OAuth 同意畫面」有設定,才能建立憑證
從 Google Developer Console首頁進去找:https://console.developers.google.com/
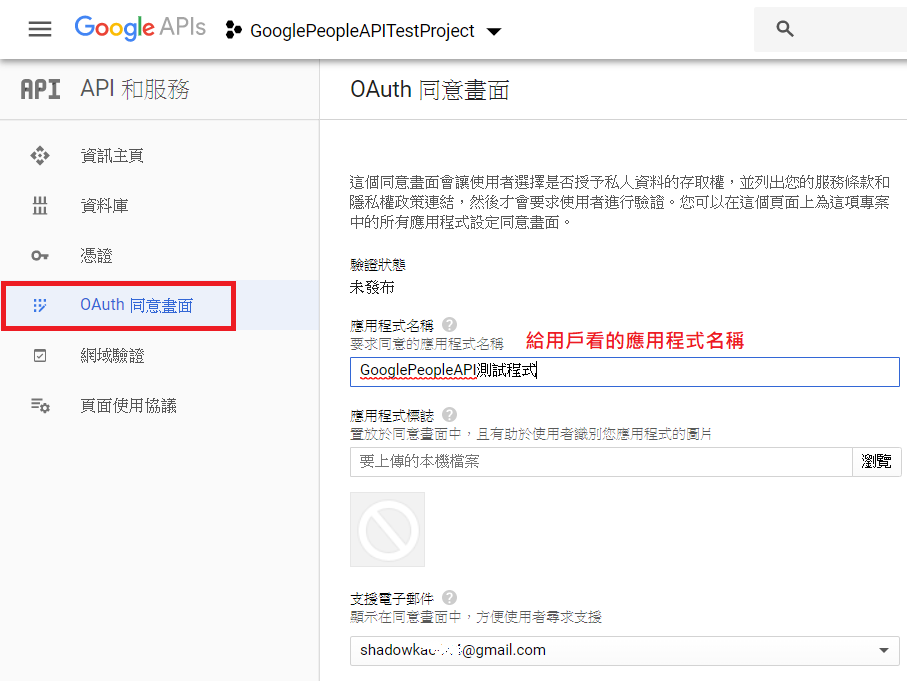
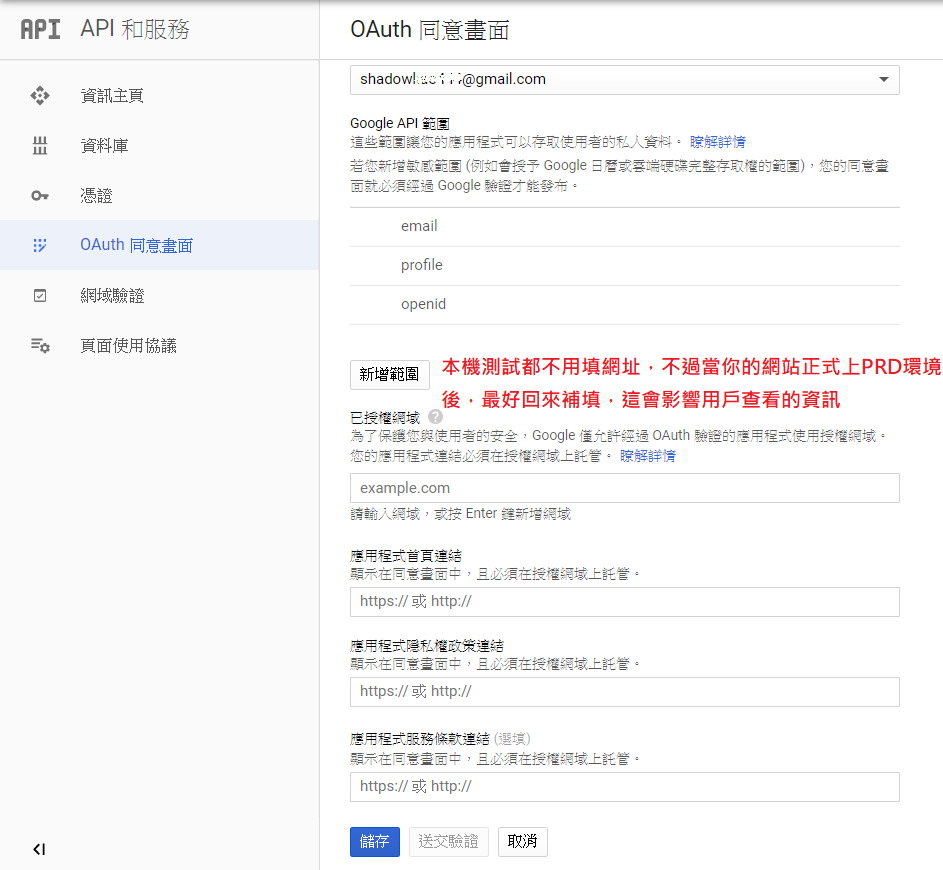
OAuth 同意畫面的「應用程式名稱」設定好後,便可以建立憑證ClientID
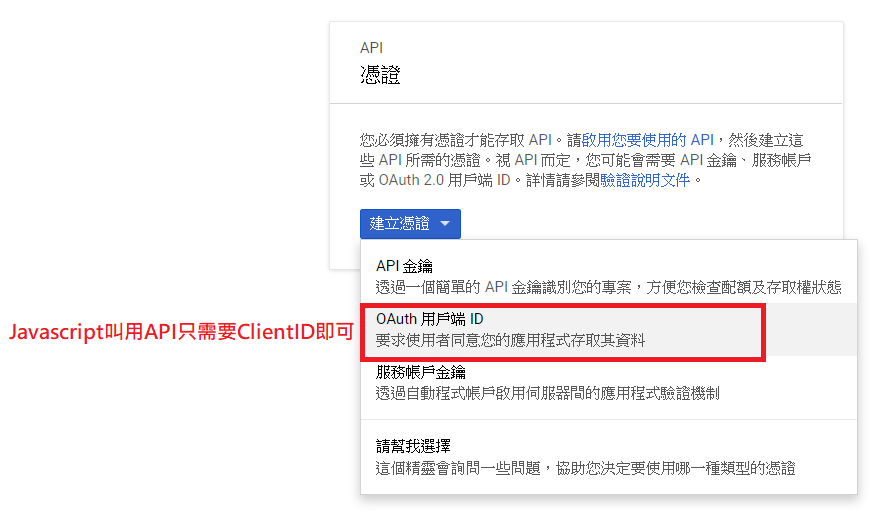
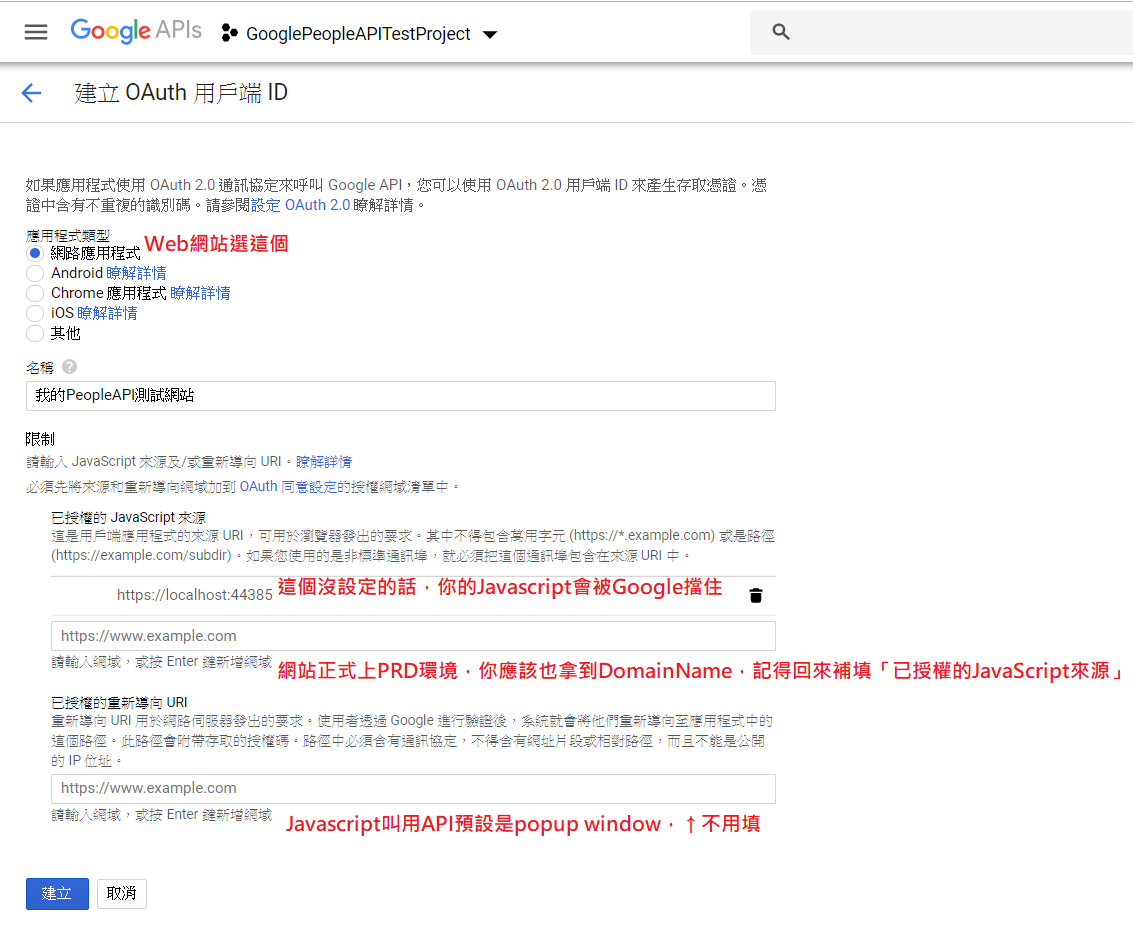
↑按下「建立」按鈕後,產生ClientID(用戶端ID)

開始寫程式碼
<!DOCTYPE html>
<html>
<head>
<meta name="viewport" content="width=device-width" />
<title>Test Google People API</title>
</head>
<body>
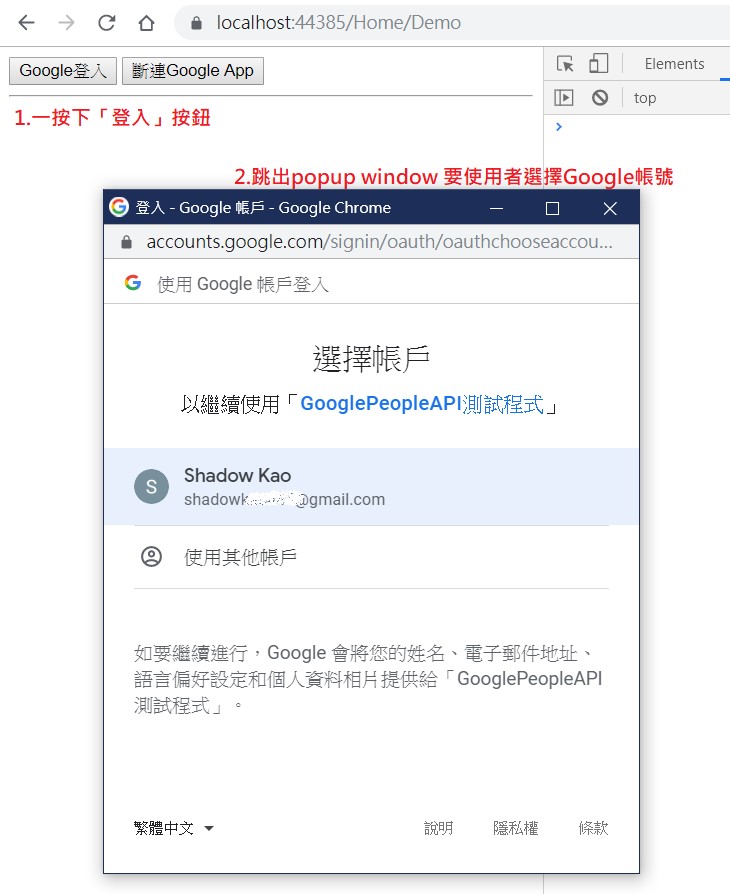
<!--用戶一鍵Google登入或綁定Google帳戶時使用↓-->
<button type="button" id="btnSignIn">Google登入</button>
<!--用戶解除Google帳戶綁定時使用↓-->
<button type="button" id="btnDisconnect">斷連Google App</button>
<hr />
<!--顯示結果↓-->
<div id="content"></div>
<!-- 引用jQuery-->
<script type="text/javascript" src="https://code.jquery.com/jquery-3.3.1.js"></script>
<!--CLIENT_ID請自己改成從 後端組態檔讀取,例如:ASP.net的Web.config-->
<script type="text/javascript">
let CLIENT_ID = "剛剛複製的用戶端ID";
//let API_KEY = '';//Javascript SDK無須 API 金鑰
// Array of API discovery doc URLs for APIs
let DISCOVERY_DOCS = ["https://www.googleapis.com/discovery/v1/apis/people/v1/rest"];
</script>
<!--執行Google API必須的.js,callback function名稱請自訂 -->
<!--↓https://apis.google.com/js/platform.js 或 https://apis.google.com/js/api.js 兩者網址都行得通 這裡採用跟官網寫法一樣-->
<script async defer src="https://apis.google.com/js/api.js"
onload="this.onload=function(){};GoogleClientInit()"
onreadystatechange="if (this.readyState === 'complete') this.onload()">
</script>
<!--以下請另外放置到 *.js檔案-->
<script type="text/javascript">
//jQuery處理button click event 當畫面DOM都載入時....
$(function () {
$("#btnSignIn").on("click", function () {
$("#content").html("");//清空顯示結果
GoogleLogin();//Google 登入
});
$("#btnDisconnect").on("click", function () {
Google_disconnect();//和Google App斷連
});
});
function GoogleClientInit() {
//官網範例寫client:auth2,但本人實測由於待會要呼叫gapi.client.init而不是gapi.auth2.init,所以給client即可
gapi.load('client', function () {
gapi.client.init({
//client_id 和 scope 兩者參數必填
clientId: CLIENT_ID,
//scope列表參考:https://developers.google.com/people/api/rest/v1/people/get
//"profile"是簡寫,要用完整scope名稱也可以
scope: "profile",//"https://www.googleapis.com/auth/userinfo.profile",
discoveryDocs: DISCOVERY_DOCS
});
});//end gapi.load
}//end GoogleClientInit function
function GoogleLogin() {
let auth2 = gapi.auth2.getAuthInstance();//取得GoogleAuth物件
auth2.signIn().then(function (GoogleUser) {
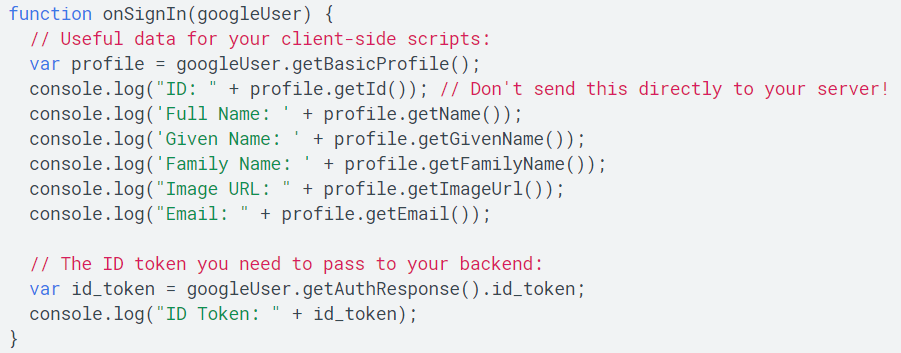
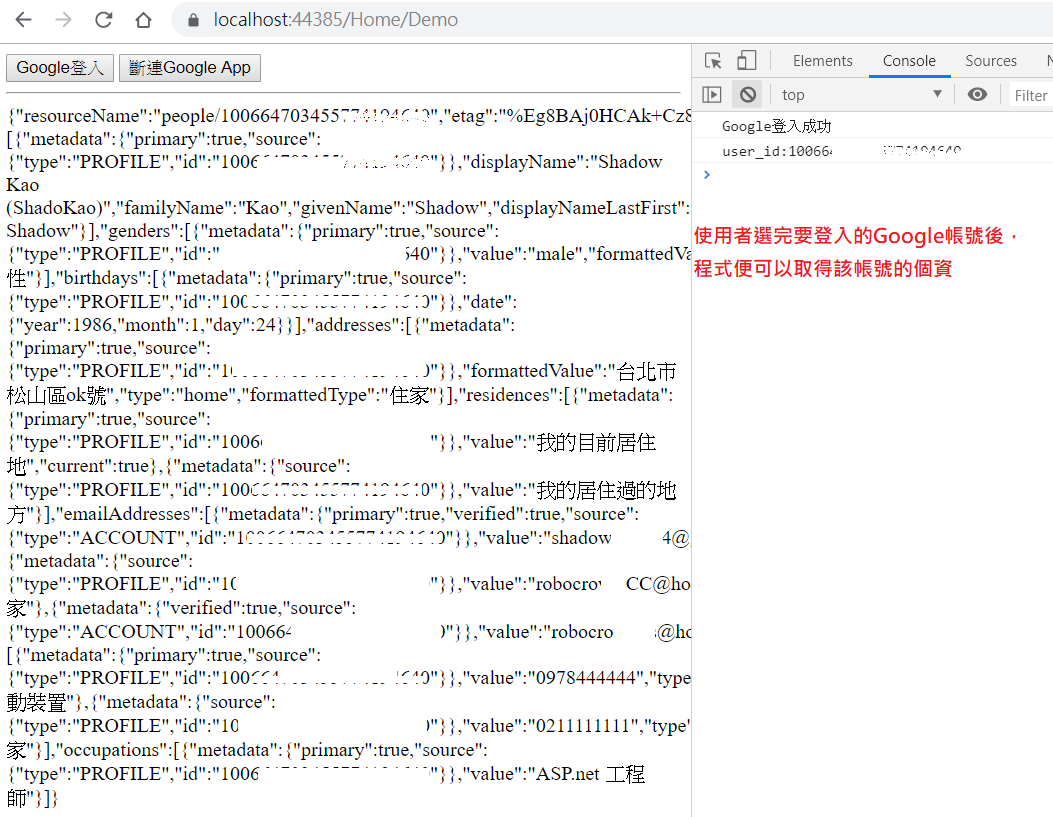
console.log("Google登入成功");
let user_id = GoogleUser.getId();//取得user id,不過要發送至Server端的話,為了資安請使用id_token,本人另一篇文章有範例:https://dotblogs.com.tw/shadow/2019/01/31/113026
console.log(`user_id:${user_id}`);
let AuthResponse = GoogleUser.getAuthResponse(true) ;//true會回傳包含access token ,false則不會
let id_token = AuthResponse.id_token;//取得id_token
//people.get方法參考:https://developers.google.com/people/api/rest/v1/people/get
gapi.client.people.people.get({
'resourceName': 'people/me',
//通常你會想要知道的用戶個資↓
'personFields': 'names,phoneNumbers,emailAddresses,addresses,residences,genders,birthdays,occupations',
}).then(function (res) {
//success
let str = JSON.stringify(res.result);//將物件列化成string,方便顯示結果在畫面上
//顯示授權你網站存取的用戶個資
document.getElementById('content').innerHTML = str;
//↑通常metadata標記primary:true的個資就是你該抓的資料
//請再自行Parse JSON,可以將JSON字串丟到線上parse工具查看:http://json.parser.online.fr/
//最終,取得用戶個資後看要填在畫面表單上或是透過Ajax儲存到資料庫(記得是傳id_token給你的Web Server而不是明碼的user_id喔),本範例就不贅述,請自行努力XD
});
},
function (error) {
console.log("Google登入失敗");
console.log(error);
});
}//end function GoogleLogin
function Google_disconnect() {
let auth2 = gapi.auth2.getAuthInstance(); //取得GoogleAuth物件
auth2.disconnect().then(function () {
console.log('User disconnect.');
});
}
</script>
</body>
</html>
執行結果
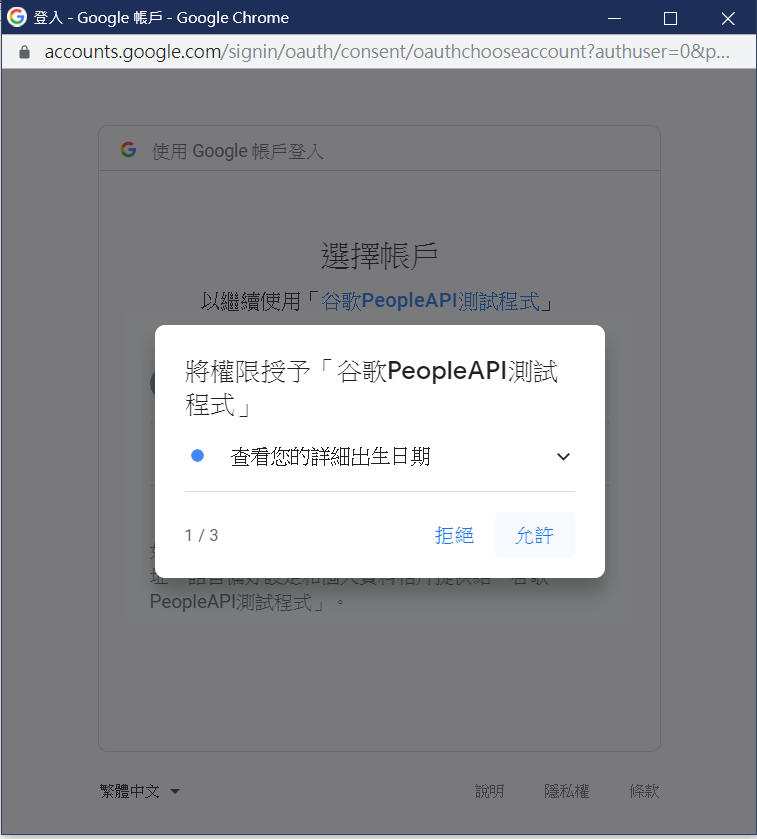
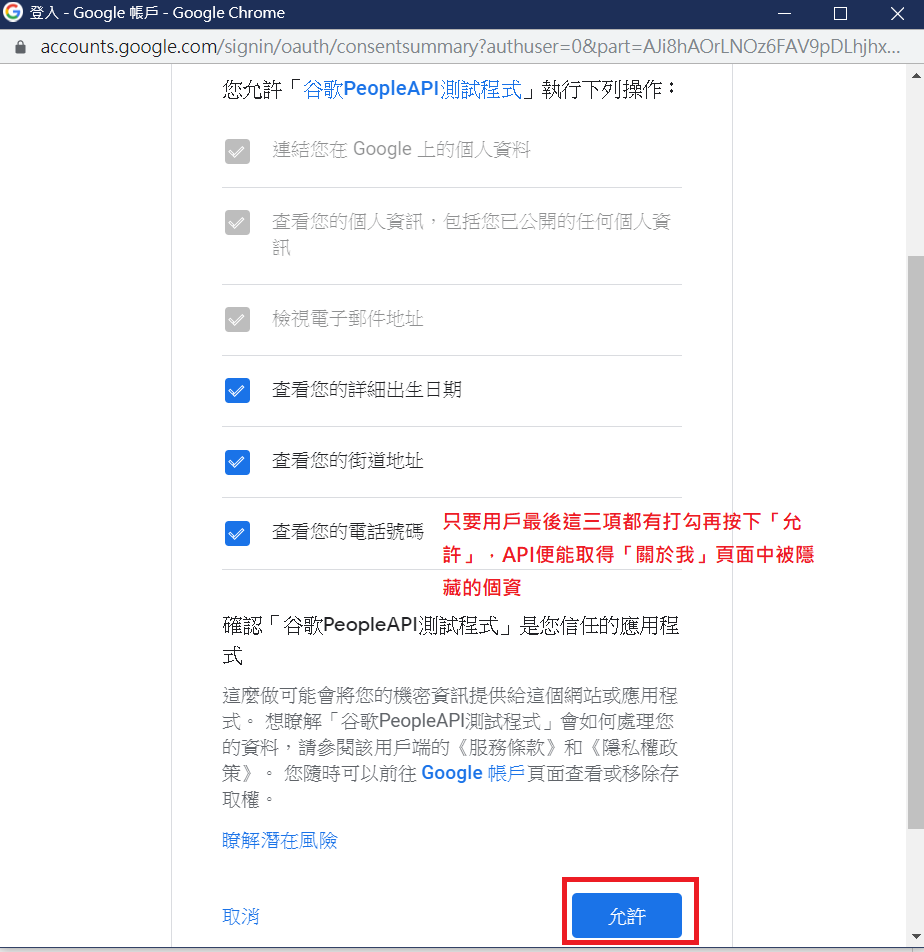
※2019-10-11追記:如果用戶在 Google 關於我頁面個人聯絡資訊隱藏起來,生日的年份未顯示或生日隱藏
其實可以改變傳遞的Scope參數:https://developers.google.com/people/v1/how-tos/authorizing 來取得個資
程式碼參考這段↓
function GoogleClientInit() {
gapi.load('client', function () {
gapi.client.init({
//client_id 和 scope 兩者參數必填
clientId: CLIENT_ID,
//scope參考:https://developers.google.com/people/api/rest/v1/people/get
//"profile"可以取得用戶的names和Primary Email,↓這裡可以省略profile不用填
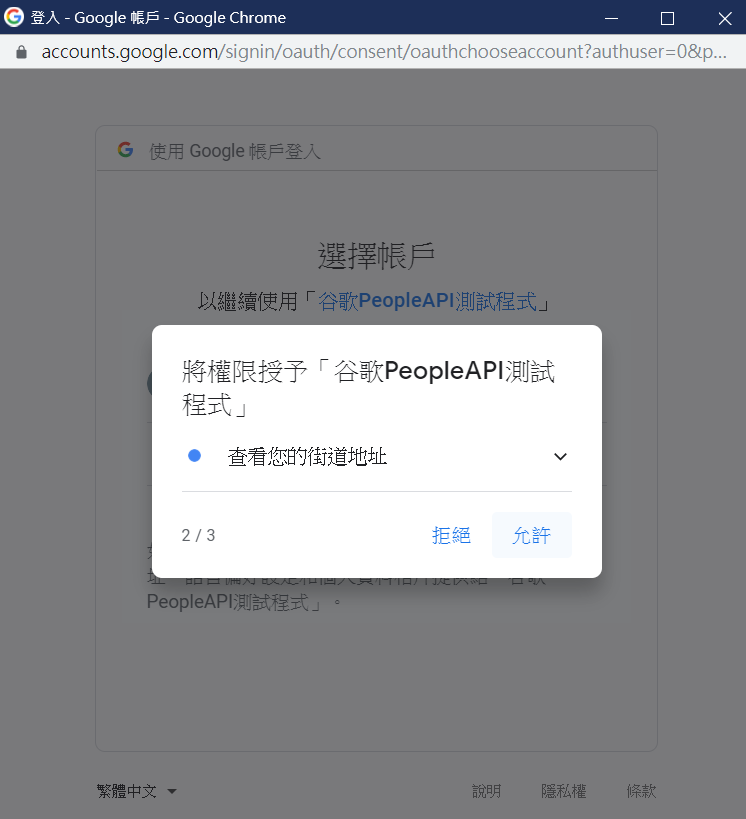
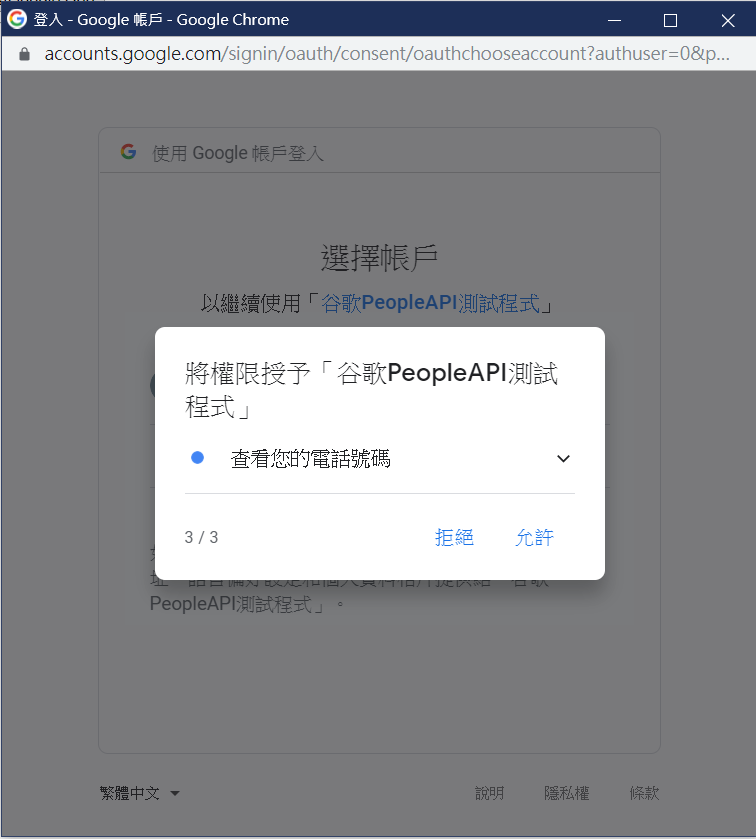
scope: "https://www.googleapis.com/auth/user.addresses.read https://www.googleapis.com/auth/user.birthday.read https://www.googleapis.com/auth/user.phonenumbers.read",
discoveryDocs: DISCOVERY_DOCS
});
});//end gapi.load
}//end GoogleClientInit function
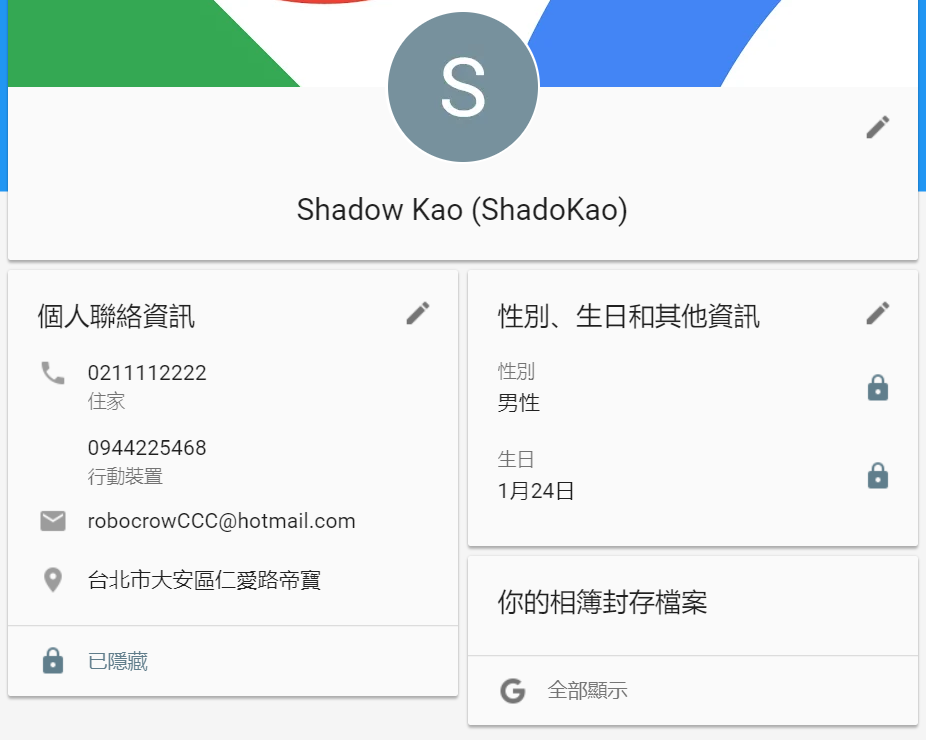
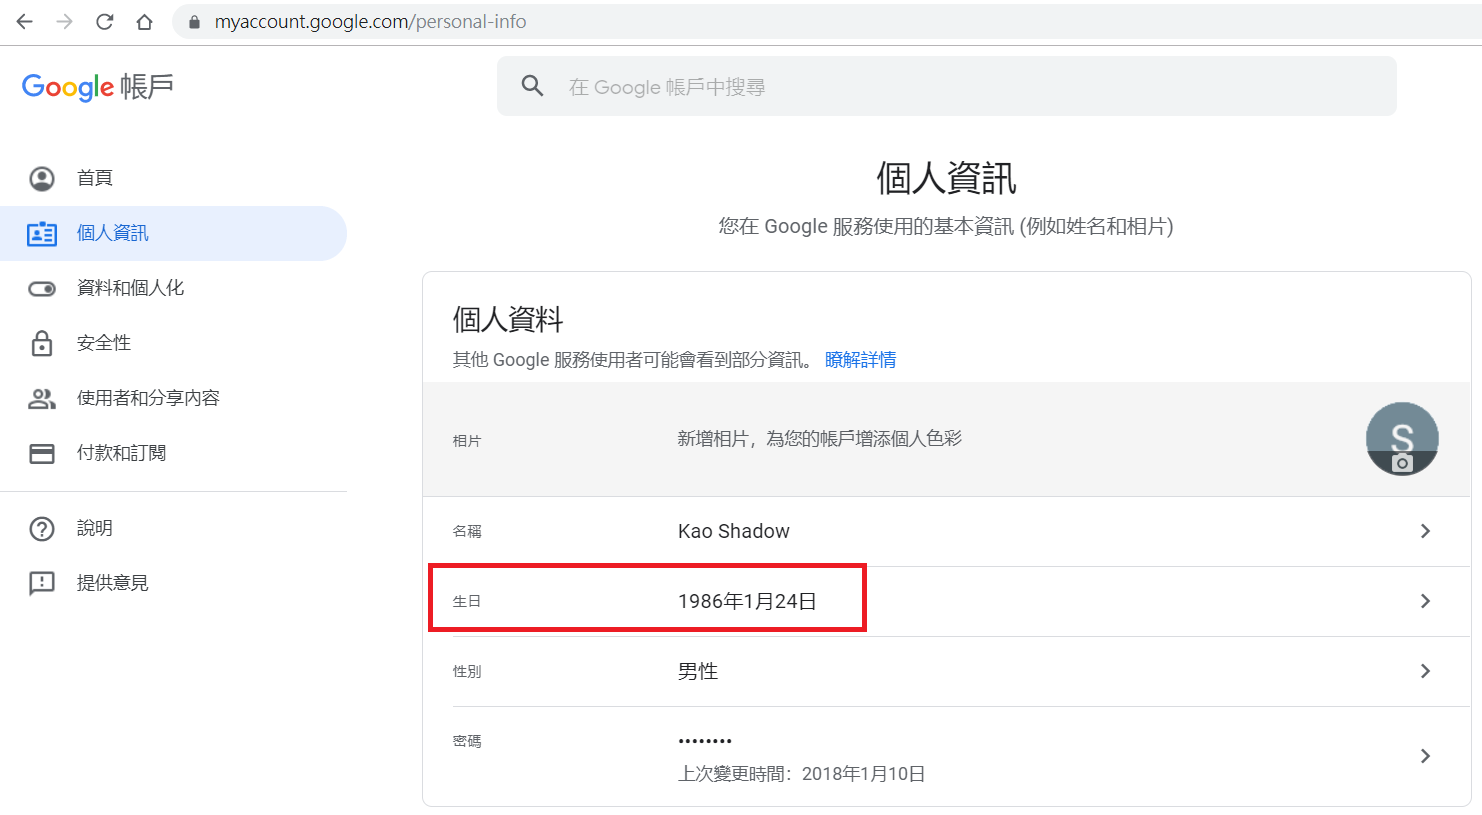
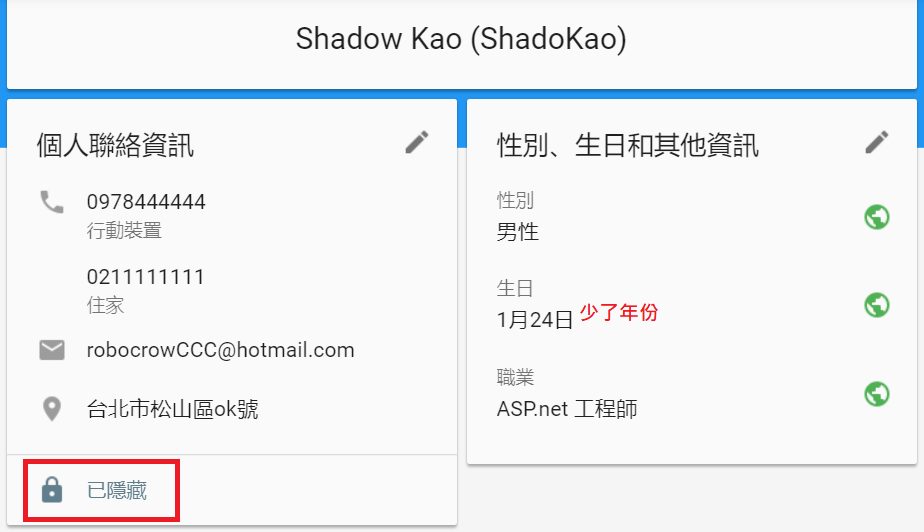
↑上述程式碼執行結果↓
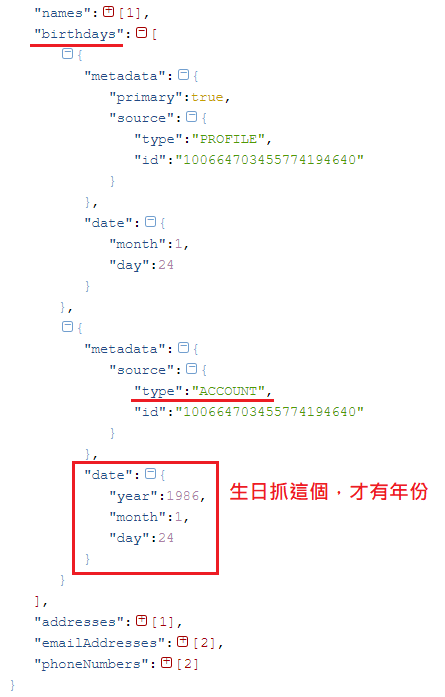
上述的帳號生日,資料來源在這:https://myaccount.google.com/personal-info
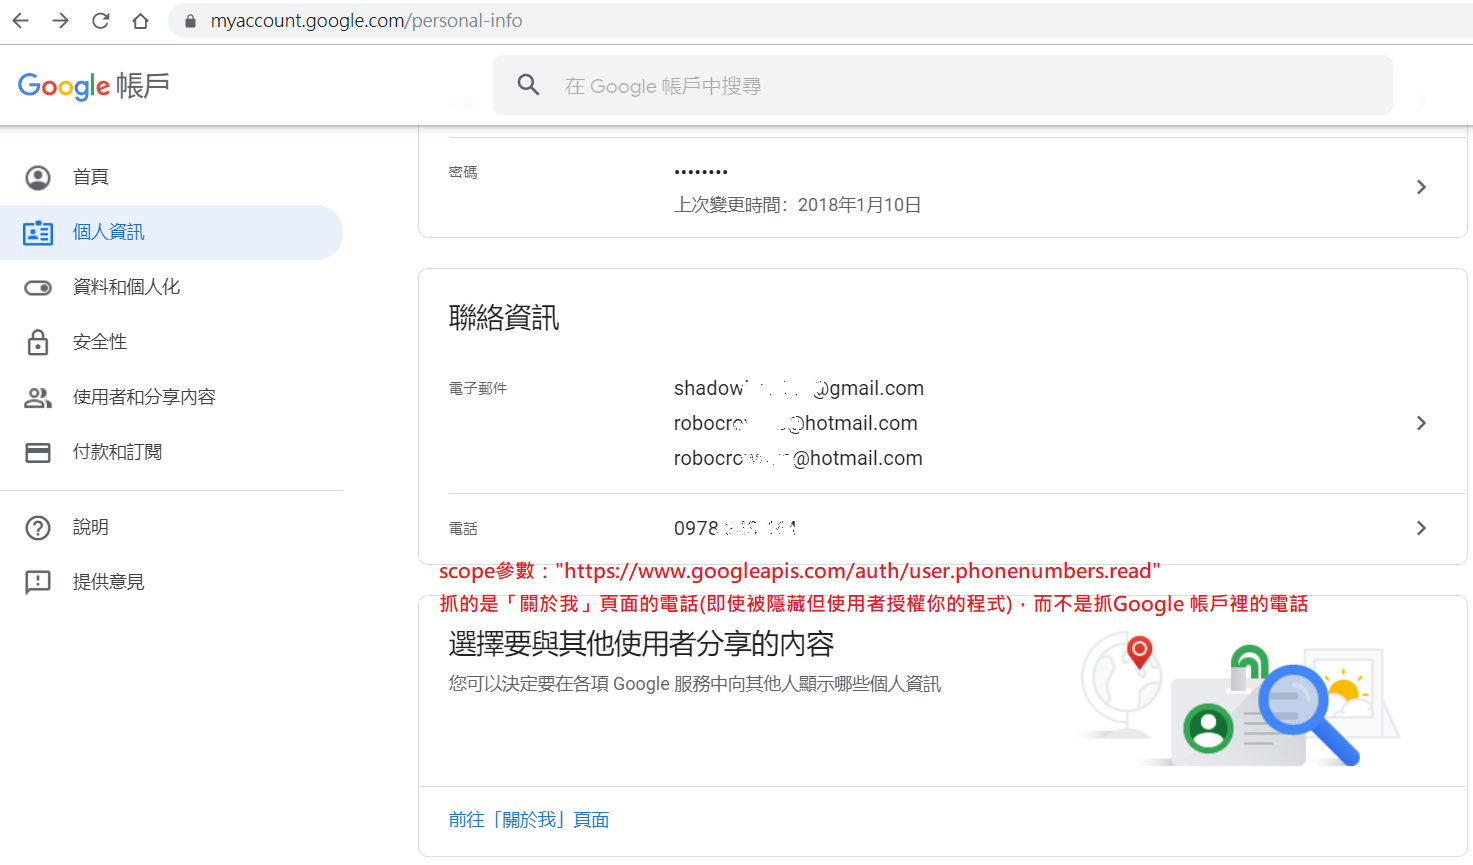
但如果用戶在「關於我」頁面 > 「個人聯絡資訊」沒有填寫地點、電話
即使你加上scope參數:"https://www.googleapis.com/auth/user.addresses.read https://www.googleapis.com/auth/user.phonenumbers.read"
仍然不會取得到用戶的地點、電話個資(連Google 帳戶裡的驗證電話也不給抓)
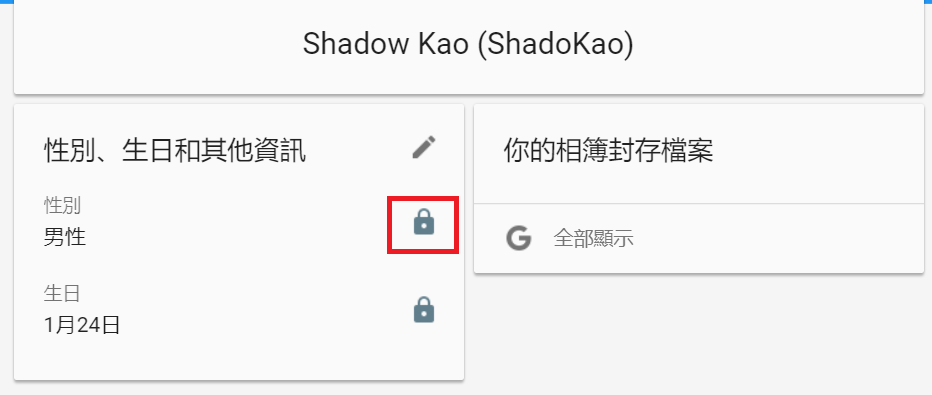
至於「關於我」頁面中被用戶隱藏起來的性別,目前官網API我看來看去還沒有提供特殊的scope可以讓程式存取
這只好認命,端看用戶自己設定公開,程式的profile scope才抓得到被公開的性別
其它有用資訊
程式擷取的用戶個資在這頁:https://aboutme.google.com/
↓personFields參數的中英對照圖,程式碼裡scope預設參數"profile"只能取得用戶公開顯示的個資
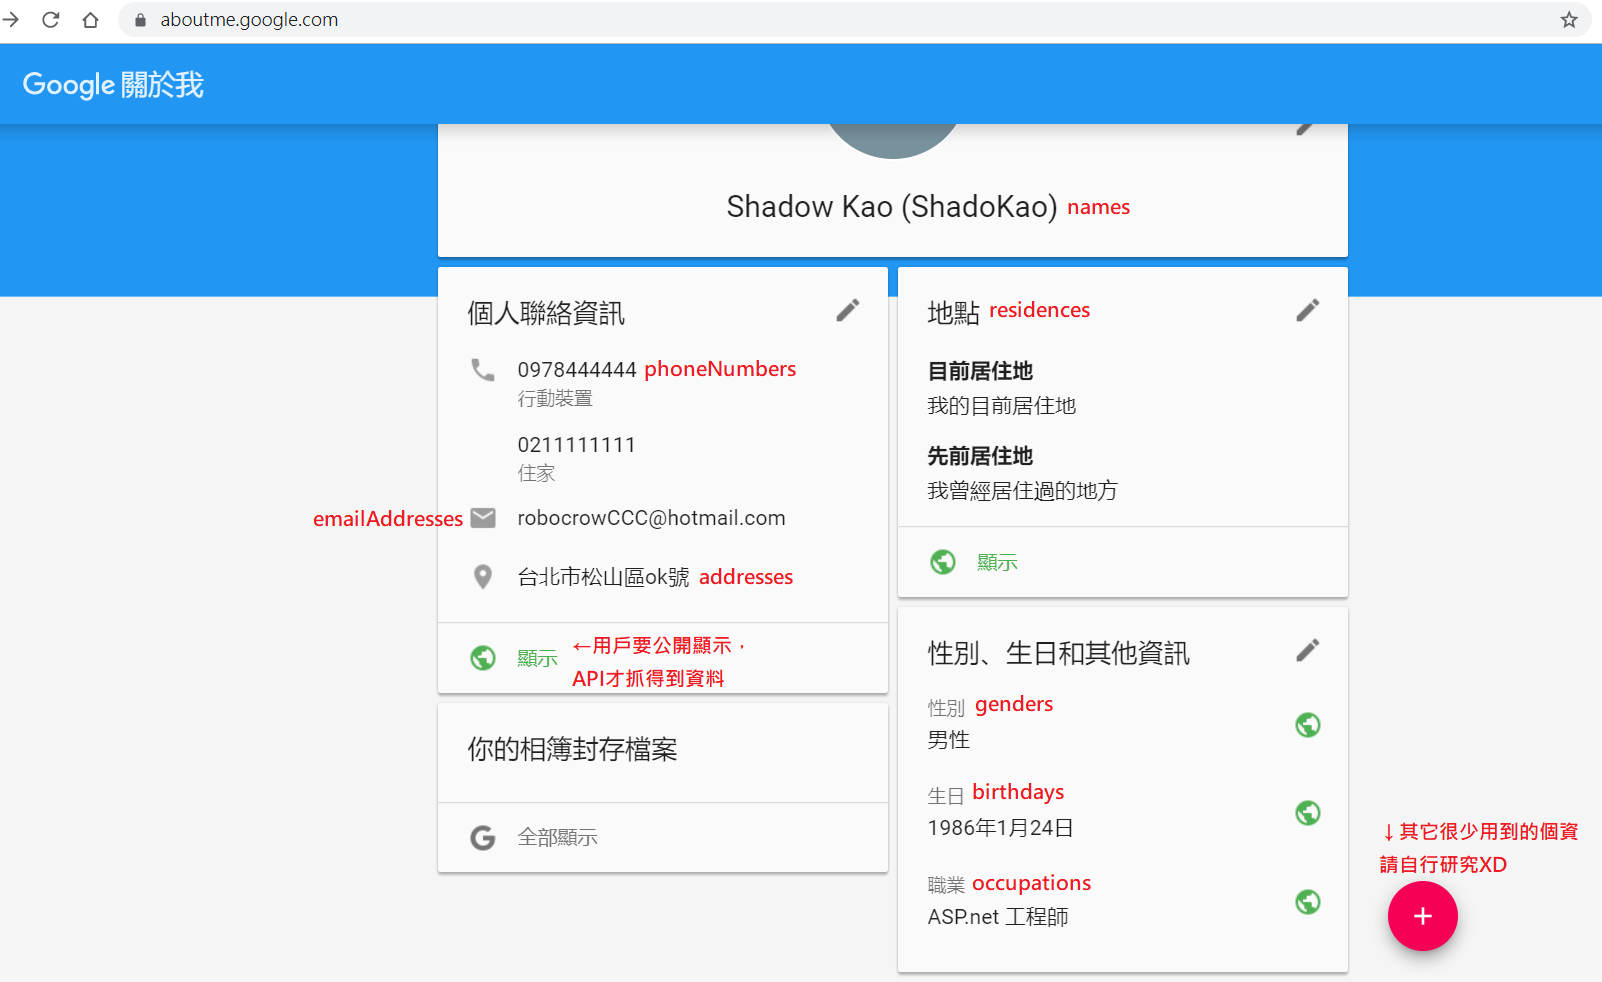
關於 addresses、residences兩者差異:addresses給我感覺是戶籍地,residences則是通訊地址,但大部份用戶應該都是亂填混用吧XD
如果用戶有一些欄位隱藏或沒填寫而且程式碼裡scope只傳遞"profile"參數的話↓
如此API的回傳結果↓
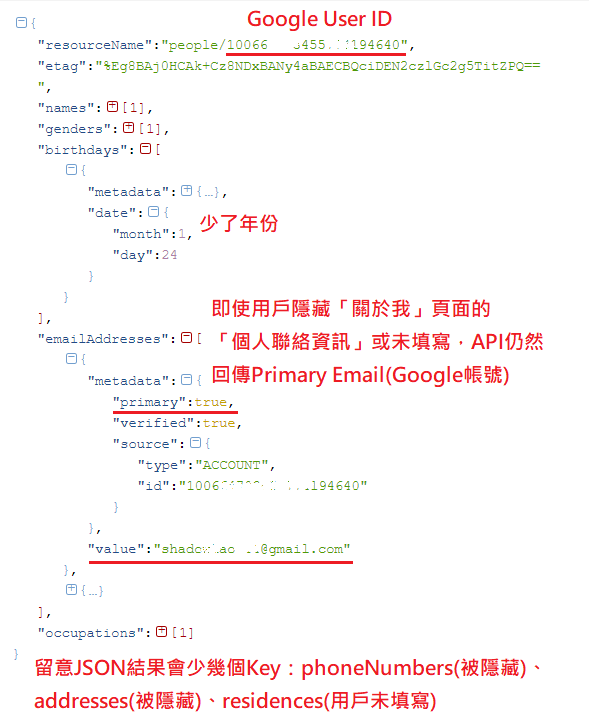
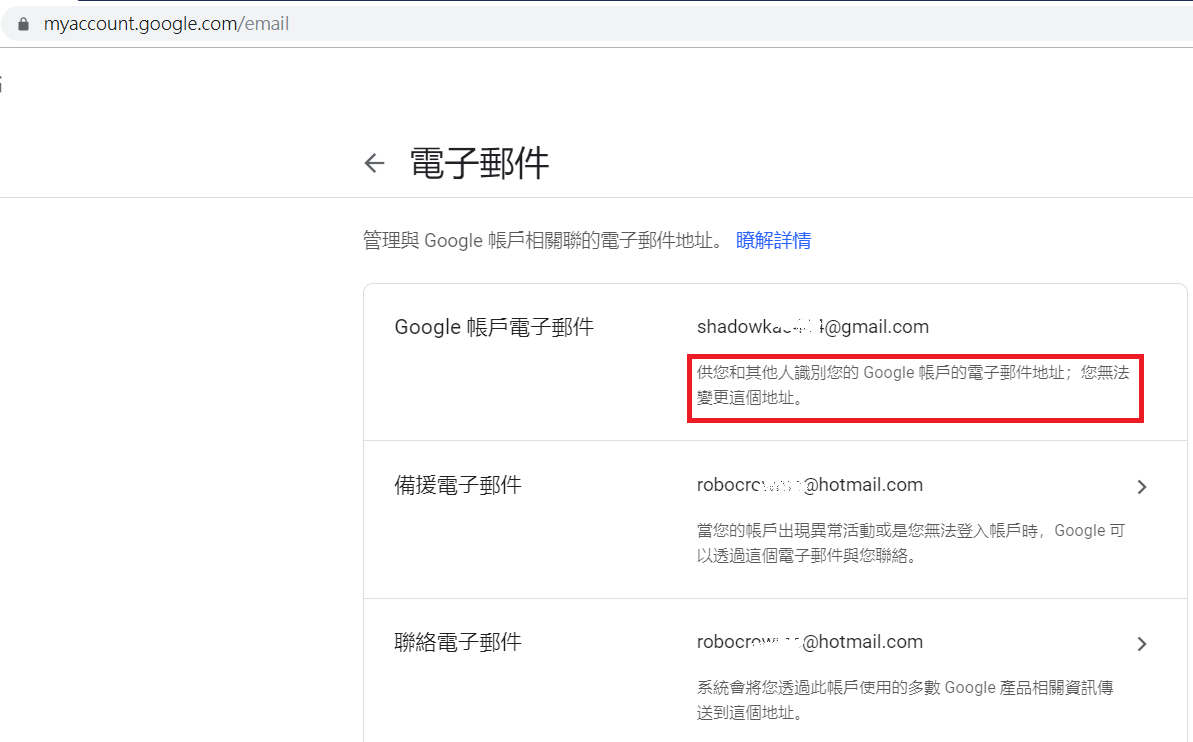
↑ 注意Primary Email通常為用戶的Google 帳戶:https://myaccount.google.com/email
如果明明「已授權的 JavaScript 來源」都填寫正確,仍然發生以下錯誤
{
  "error": "idpiframe_initialization_failed",
  "details": "Not a valid origin for the client: https://localhost:44385 has not been whitelisted for client ID.
   Please go to https://console.developers.google.com/ and whitelist this origin for your project's client ID."
}
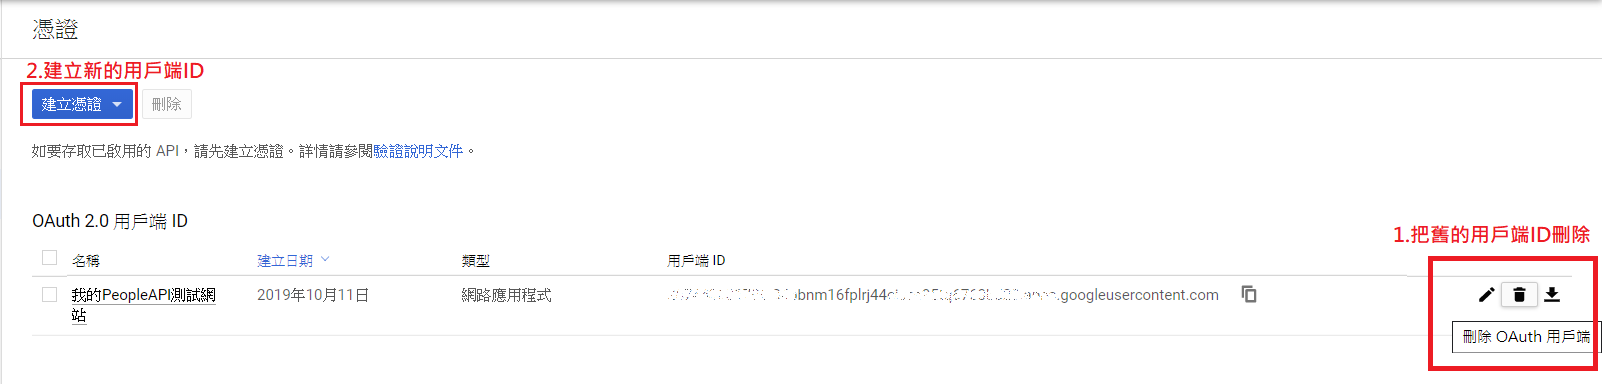
貌似「OAuth 2.0 用戶端 ID」的設定無法太快生效,這時直接建立全新一個ClientID比較快
本文章程式碼要求的scope參數為:https://www.googleapis.com/auth/userinfo.profile (簡寫:profile)
如果類似官網範例程式碼(https://developers.google.com/people/quickstart/js)使用scope參數:https://www.googleapis.com/auth/contacts.readonly
想取得用戶聯絡人這種更敏感個資的話,則當用戶選擇完他的Google帳號後,有可能遇到 這個應用程式未經驗證 的訊息 ↓
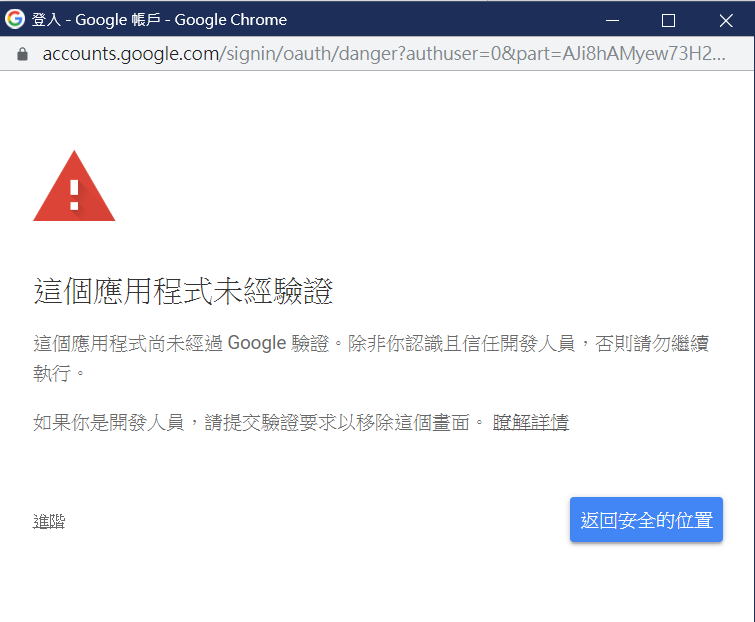
本機開發測試中,還無須驗證應用程式↓
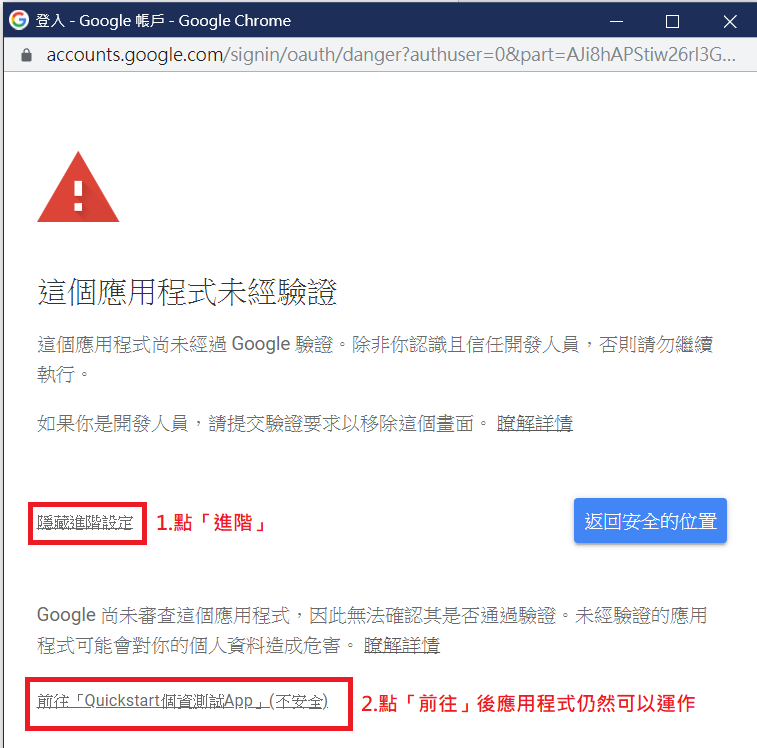
如果網站正式上線到PRD環境就得要再多填一些設定,請參考官網文件(Verification for apps)解決↓
Unverified apps:https://support.google.com/cloud/answer/7454865
2019-10-22 補充
在Google Developer Console裡,相同專案底下兩個不同憑證(不同的用戶端 ID),同一位用戶取得的UserID是相同的
而不同專案各自不同憑證(不同的用戶端 ID),同一位用戶登入後取得的UserID也是相同的
Google這樣設計......真怕哪天它改成和FB、Line一樣嚴格XD
文件參考
REST Resource: people 認識回傳值的定義:https://developers.google.com/people/api/rest/v1/people
結語
如果你的網站會員只需要簡單的綁定Google帳號、整合Google登入功能,可以參考這篇:
[Google Sign-In for Websites] 整合Google帳號登入 Javascript SDK 的使用方式,範例程式碼 with ASP.net MVC
但如果你的網站會員除了要可以綁定Google帳號、整合Google登入外,還想額外取得用戶個資,本篇文章值得參考看看
不管是上述文章還是本篇文章,用戶個資一定至少抓得到names、emailAddresses(Google帳號Email)、user_id這三項