透過 toastr 統一訊息輸出方式
讓系統訊息顯示具有美觀及一致性的呈現
前言
toastr 是提供一種非阻斷式的訊息呈現方式,在訊息呈現的時候不會阻擋用戶操作行為,並且可以依需求選擇訊息呈現的方式、時間與關閉方式,是一種不錯的訊息呈現方式,以下介紹。
安裝
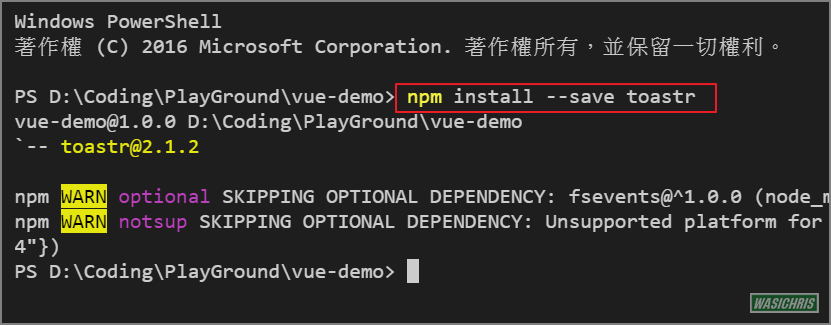
此套件的運作相依於 jQuery,因此需要先安裝 jQuery 後再透過以下語法安裝 toastr 套件。
$ npm install --save toastr
Import toastr 模組
為了讓 main.js 比較乾淨,因此筆者建立 setup 資料夾來放置其他需要設定引用的相關 js 檔。
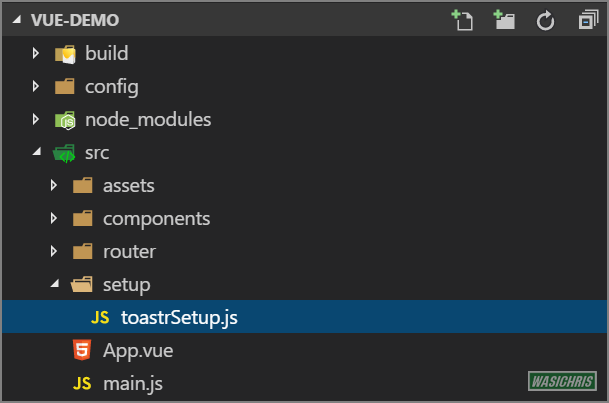
首先於 setup 資料夾中建立 toastrSetup.js 檔案如下,主要就是引用 toastr 及其 scss 檔案,並且對 toastr 做一些全域設定。
// 其中 import 'toastr/toastr.scss'
// 可透過 module resolve 至 node_modules 資料夾找尋對應模組
// 因此與自行透過相對路徑引用模組的作用相同
// import '../../node_modules/toastr/toastr.scss'

// [webpack.base.conf.js]
//  modules: [
//       resolve('src'),
//       resolve('node_modules')  // ****
//     ],

import toastr from 'toastr'
import 'toastr/toastr.scss'

export default function () {

    // global toastr setting
    toastr.options.closeButton = true
    toastr.options.timeOut = 3000
    toastr.options.progressBar = true

}
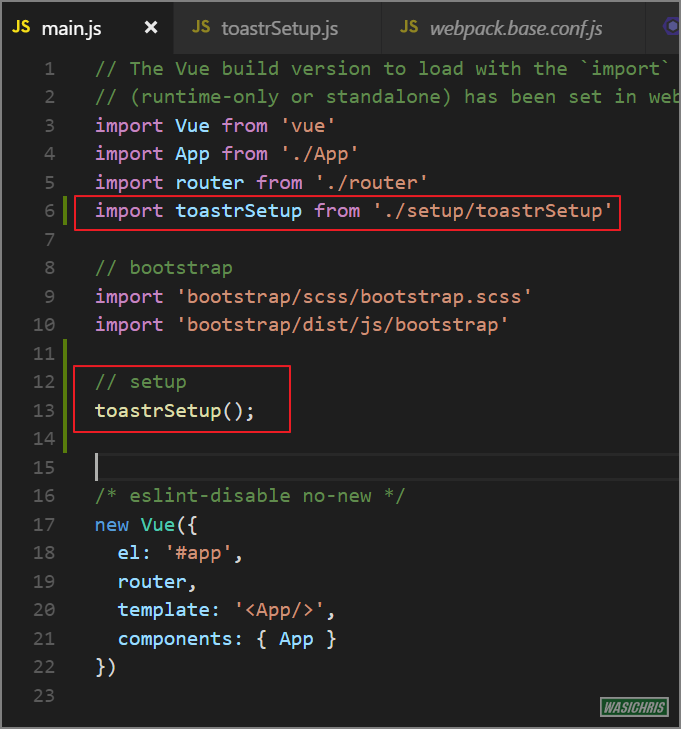
最後在 main.js 引用並執行該 function 即可。
本地使用 (manually import)
使用前可以先透過 import toastr 後,直接調用。

<template>
    <div class="hello">

        <h1>{{ msg }}</h1>

        <!-- Provides extra visual weight and identifies the primary action in a set of buttons -->
        <button type="button" class="btn btn-primary" @click="showToastr">Show Toastr</button>

        <!-- Secondary, outline button -->
        <button type="button" class="btn btn-warning" @click="hideToastr">Hide Toastr</button>

    </div>
</template>


<script>

import toastr from 'toastr'

export default {
    name: 'hello',
    data() {
        return {
            msg: 'Welcome to Vue 2 App'
        }
    },
    methods: {
        showToastr: function() {
            // Display a warning toast, with no title
            toastr.warning('My name is Inigo Montoya. You killed my father, prepare to die!')

            // Display a success toast, with a title
            toastr.success('Have fun storming the castle!', 'Miracle Max Says')

            // Display an error toast, with a title
            toastr.error('I do not think that word means what you think it means.', 'Inconceivable!')

            // Override global options
            toastr.success('We do have the Kapua suite available.', 'Turtle Bay Resort', {
                timeOut: 5000
            })
        },
        hideToastr: function() {
            // Remove current toasts using animation
            toastr.clear()

            // Immediately remove current toasts without using animation
            // toastr.remove()
        }
    }
}
</script>


<!-- Add "scoped" attribute to limit CSS to this component only -->
<style scoped>

</style>
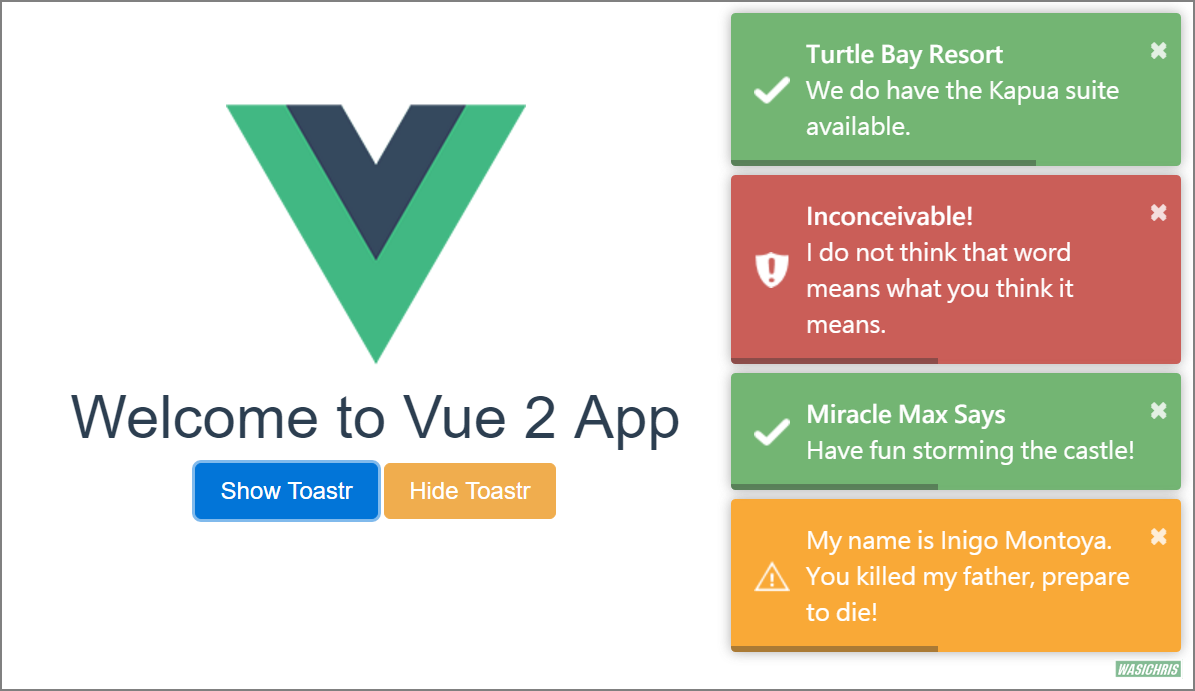
畫面如下,點選 show Toastr 後互動正常,可顯示欲輸出資訊讓用戶了解。
全域使用 (automatically import )
如果這個 module 有機會被許多組件(component) 使用,此時若需要不斷的在四處 import toastr 模組好像有點累;這時就可以考慮在 webpack 中設定自動 import modules,設定方式如同前篇文章設定 jQuery 方式一樣,請開啟 webpack.base.conf.js 參考以下設定。
// ...
var webpack = require('webpack')

module.exports = {
    // ...
    plugins: [
        new webpack.ProvidePlugin({
            // Automatically loads modules
            toastr: 'toastr'
        })
    ]
}
$ npm run dev 才會生效喔!設定後就不需要在每個地方都 import toastr 模組,可以直接使用了。

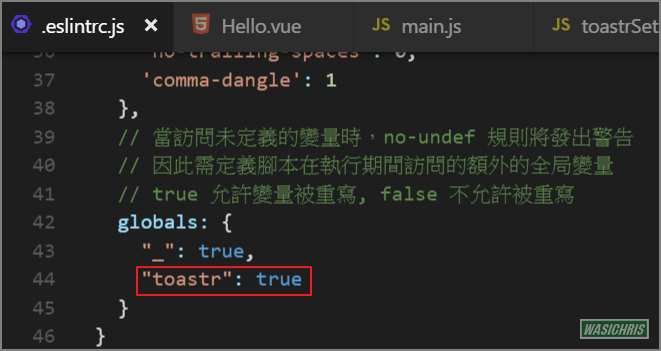
最後如果有使用 ESLint 的朋友會發現一直報錯,那是因為 ESLint 根本不知道 toastr 是什麼,所以會發出錯誤訊息,因此可以在 .eslintrc.js 中加入 globals 變數即可避免此問題發生。
參考資訊
若有更好的建議或做法再請不吝指導一下囉! 感謝!
希望此篇文章可以幫助到需要的人
若內容有誤或有其他建議請不吝留言給筆者喔 !