Specflow 3 正式版釋出,支援 .NET Core,連帶改變 .NET Framework 的設定
https://specflow.org/2019/specflow-3-is-here/?fbclid=IwAR0shtvllisAYgTPefKvwkTLQhPDxTU87rrd_A2knjn_Gho7xzgaHJXAW6M
上週教育訓練時,Live Demo 卡關被弄到,要記錄一下...
開發環境
VS 2019
.NET Framework 4.7.2
SpecFlow for Visual Studio 2019
https://marketplace.visualstudio.com/items?itemName=TechTalkSpecFlowTeam.SpecFlowForVisualStudio
NUnit VS Templates
https://marketplace.visualstudio.com/items?itemName=NUnitDevelopers.NUnitTemplatesforVisualStudio
MsTest2
1.新增測試專案

2.從 nuget 安裝套件
Install-Package SpecFlow
Install-Package SpecFlow.MsTest
Install-Package SpecFlow.Tools.MsBuild.Generation
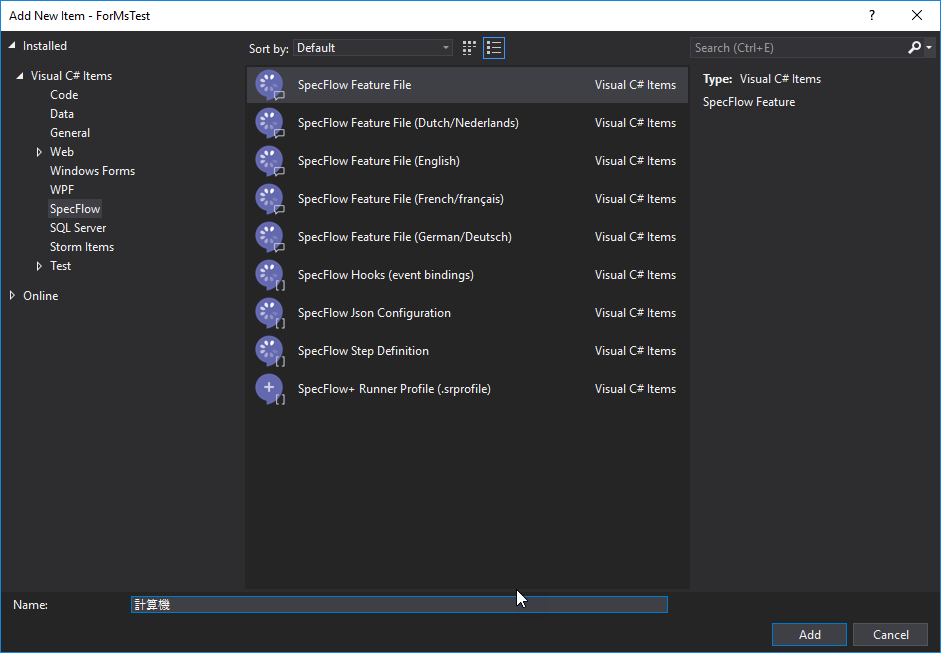
3.加入 *.feature file
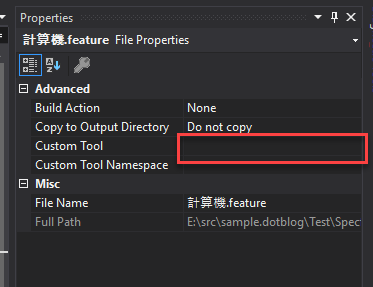
4.刪除 Custom Tool
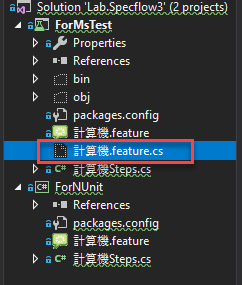
5.在專案檔 加入以下
<Target Name="AfterUpdateFeatureFilesInProject">
    <!-- include any generated SpecFlow files in the compilation of the project if not included yet -->
    <ItemGroup>
        <Compile Include="**\*.feature.cs" Exclude="@(Compile)" />
    </ItemGroup>
</Target>
這個是 SpecFlow.Tools.MsBuild.Generation 的功能﹑主要是讓 Specflow GenCode 的檔案不用加入專案,採取資料夾掃描方式建置測試案例
6.重啟 VS
7.產生測試步驟

NUnit3
1.新增測試專案

2.從 nuget 安裝套件
Install-Package SpecFlow
Install-Package SpecFlow.Tools.MsBuild.Generation
接下來,步驟就跟 MsTest2 一樣,就不再描述
參考
https://specflow.org/getting-started/
專案位置
https://github.com/yaochangyu/sample.dotblog/tree/master/Test/Specflow3/Lab.Specflow3
若有謬誤,煩請告知,新手發帖請多包涵

Microsoft MVP Award 2010~2017 C# 第四季
Microsoft MVP Award 2018~2025 .NET
