ASP.NET Core 9,微軟終於把 OpenAPI 文件生成納入框架內建功能,推出了 Microsoft.AspNetCore.OpenApi。這代表我們不再需要額外的第三方套件,就能直接在專案中生成 OpenAPI 文件,並且支援最新的 OpenAPI 3.1 與 JSON Schema draft 2020-12。
在過去的 ASP.NET Core 專案中,微軟預設使用 Swashbuckle.AspNetCore 來建立 OpenAPI 文件。它確實好用,但也帶來一些隱憂:
- 額外的套件依賴
- 在 Native AOT 下的相容性問題
- JSON Schema 版本落後
本文將分兩個部分來說明:
- 如何使用 Microsoft.AspNetCore.OpenApi
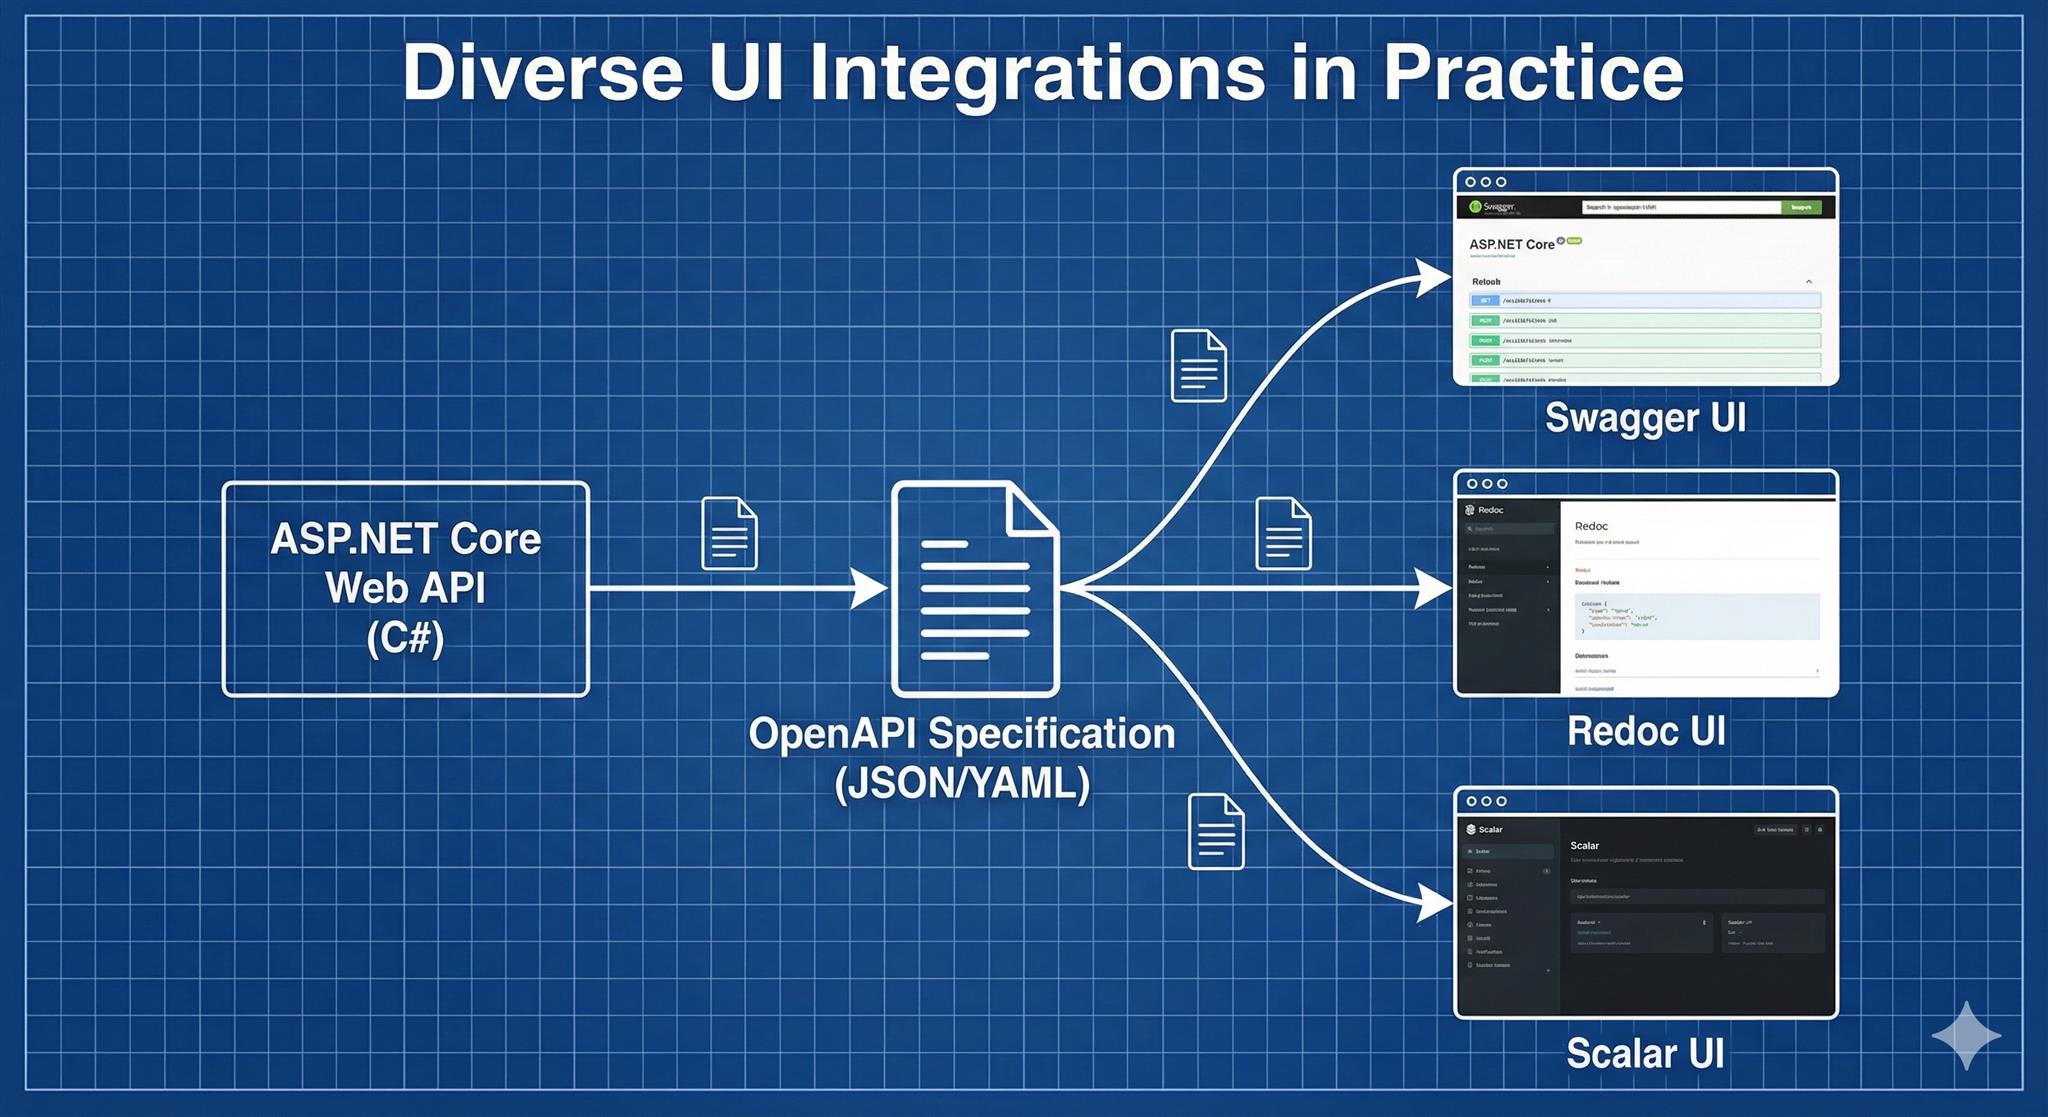
- 如何整合多種第三方 UI 工具,讓 API 文件不只是 JSON,而是能夠被開發者與使用者友善地瀏覽。
開發環境
- Windows 11 Pro
- ASP.NET Core 9
- Microsoft.AspNetCore.OpenApi 9.0.8
- Rider 2025.2
Microsoft.AspNetCore.OpenApi 使用方式
套件安裝
建立一個新的 Web API 專案,並安裝套件:
dotnet new webapi -n Lab.AspNetCoreOpenApi
cd Lab.AspNetCoreOpenApi
dotnet add package Microsoft.AspNetCore.OpenApi
基本程式碼
在 Program.cs 中加入以下設定:
var builder = WebApplication.CreateBuilder(args);

// 註冊 OpenAPI 服務
builder.Services.AddOpenApi();

var app = builder.Build();

if (app.Environment.IsDevelopment())
{
    // 對應 /openapi/v1.json
    app.MapOpenApi();
}

app.MapGet("/weatherforecast", () =>
{
    var summaries = new[]
    {
        "Freezing", "Bracing", "Chilly", "Cool", "Mild",
        "Warm", "Balmy", "Hot", "Sweltering", "Scorching"
    };

    return Enumerable.Range(1, 5).Select(index =>
        new WeatherForecast(
            DateOnly.FromDateTime(DateTime.Now.AddDays(index)),
            Random.Shared.Next(-20, 55),
            summaries[Random.Shared.Next(summaries.Length)]
        )
    ).ToArray();
})
.WithName("GetWeatherForecast")
.WithOpenApi();

app.Run();

record WeatherForecast(DateOnly Date, int TemperatureC, string? Summary)
{
    public int TemperatureF => 32 + (int)(TemperatureC / 0.5556);
}
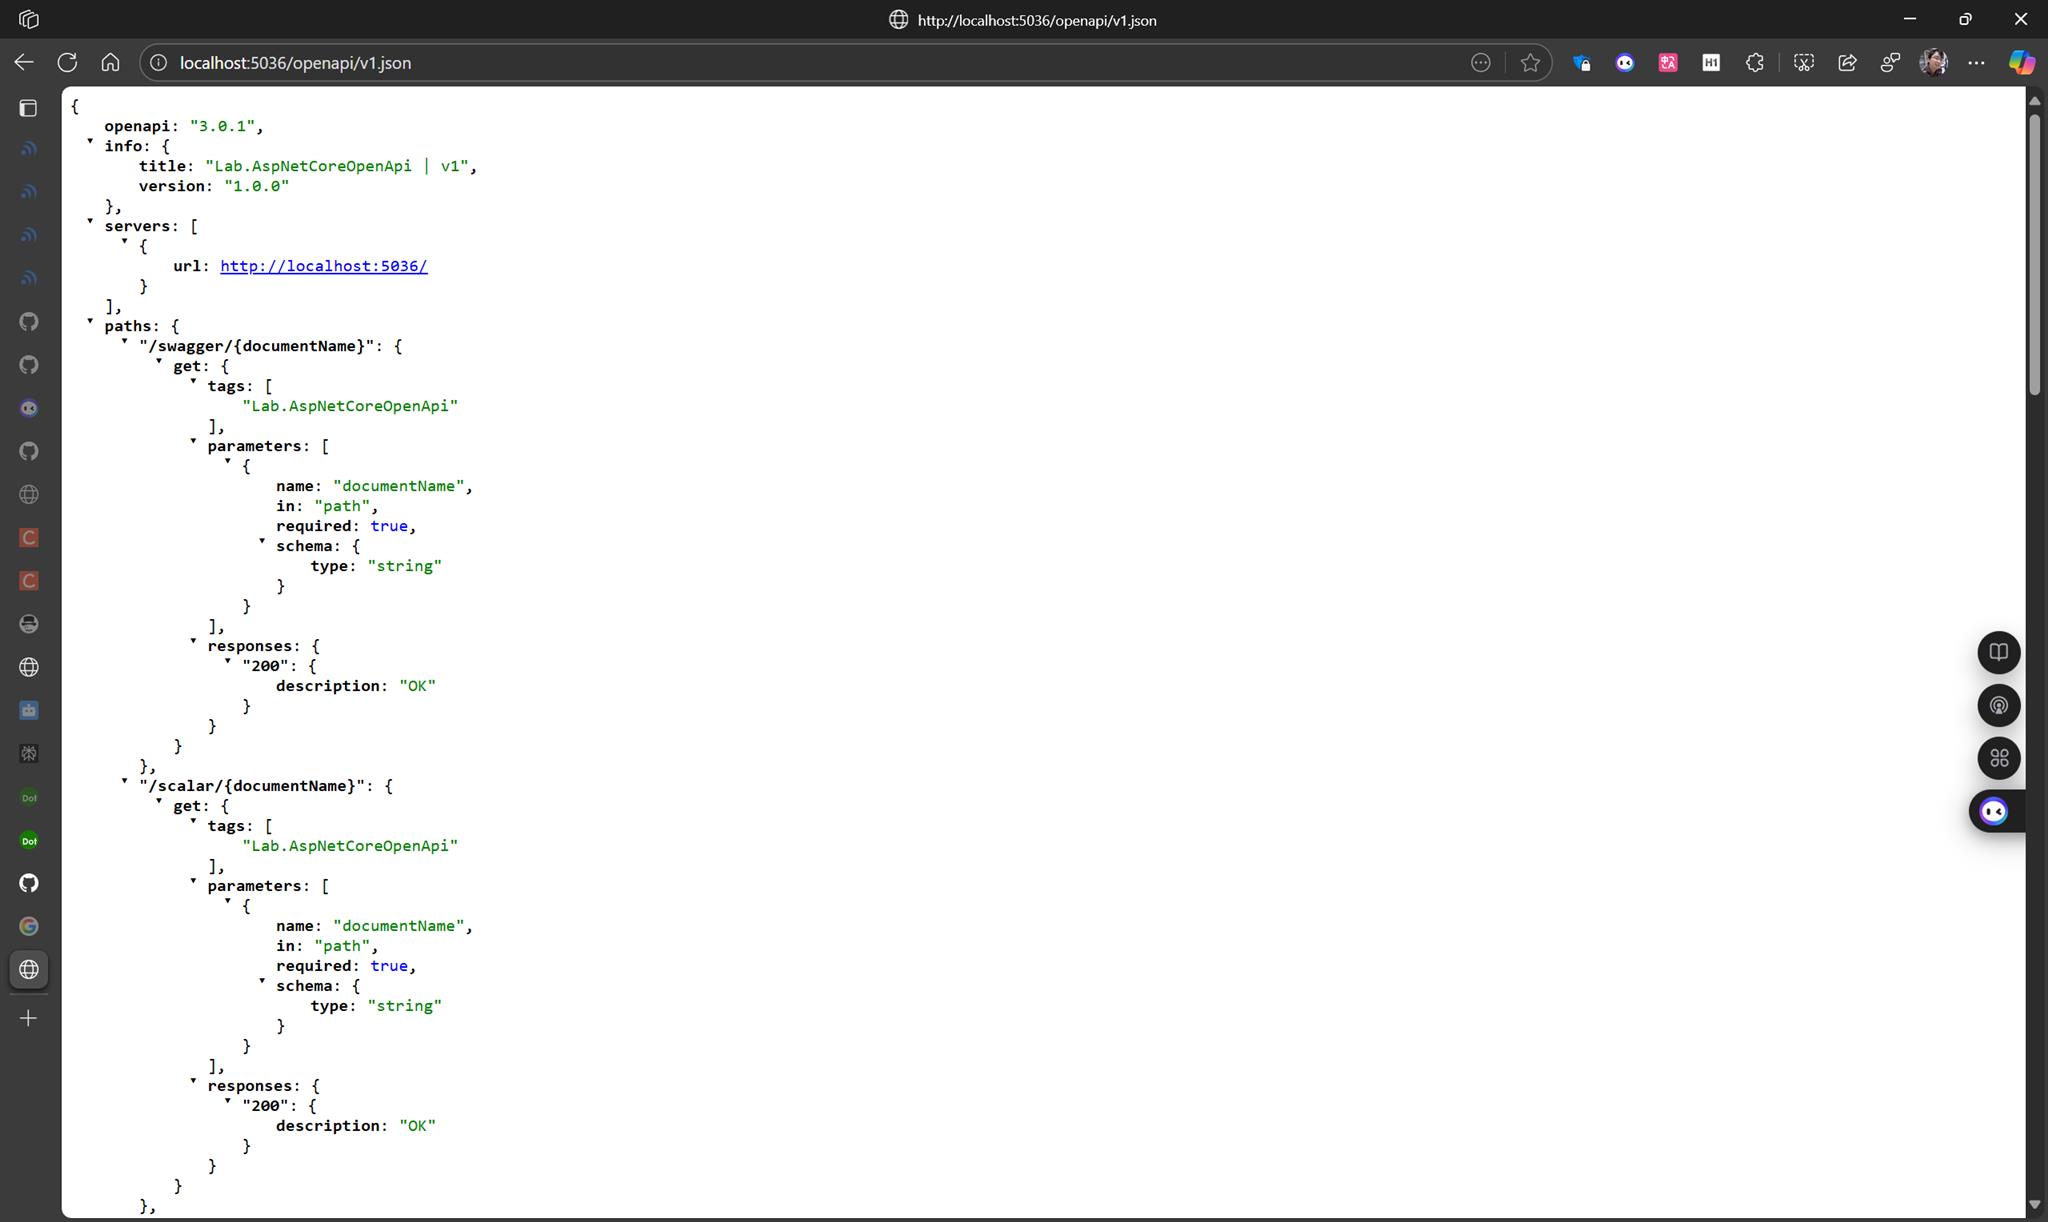
執行後,訪問 http://localhost:5036/openapi/v1.json 就能看到完整的 OpenAPI 文件。
優勢
- 零依賴:不需要 Swashbuckle 或 NSwag
- 效能更佳:與 ASP.NET Core 深度整合
- 支援最新標準:OpenAPI 3.1、JSON Schema 2020-12
- 原生 AOT 相容
整合第三方 UI 的使用方式
雖然 Microsoft.AspNetCore.OpenApi 幫我們解決了文件生成,但它並沒有內建 UI。
這時候,我們就需要自己整合 UI 工具。以下示範如何一次整合 6 種不同的 UI。
建立擴展方法
新增 Extensions/OpenApiUiExtensions.cs,集中管理 UI:
public static class OpenApiUiExtensions
{
    public static IEndpointConventionBuilder MapSwaggerUI(this IEndpointRouteBuilder endpoints) =>
        endpoints.MapGet("/swagger", () =>
            Results.Content(GenerateSwaggerHtml(), "text/html; charset=utf-8"));

    public static IEndpointConventionBuilder MapScalarUi(this IEndpointRouteBuilder endpoints) =>
        endpoints.MapGet("/scalar/{documentName}", (string documentName) =>
            Results.Content(GenerateScalarHtml(documentName), "text/html; charset=utf-8"));

    public static IEndpointConventionBuilder MapRedocUi(this IEndpointRouteBuilder endpoints) =>
        endpoints.MapGet("/redoc/{documentName}", (string documentName) =>
            Results.Content(GenerateRedocHtml(documentName), "text/html; charset=utf-8"));

    public static IEndpointConventionBuilder MapRapiDocUi(this IEndpointRouteBuilder endpoints) =>
        endpoints.MapGet("/rapidoc/{documentName}", (string documentName) =>
            Results.Content(GenerateRapiDocHtml(documentName), "text/html; charset=utf-8"));

    public static IEndpointConventionBuilder MapElementsUi(this IEndpointRouteBuilder endpoints) =>
        endpoints.MapGet("/elements/{documentName}", (string documentName) =>
            Results.Content(GenerateElementsHtml(documentName), "text/html; charset=utf-8"));

    public static IEndpointConventionBuilder MapOpenApiExplorerUi(this IEndpointRouteBuilder endpoints) =>
        endpoints.MapGet("/explorer/{documentName}", (string documentName) =>
            Results.Content(GenerateExplorerHtml(documentName), "text/html; charset=utf-8"));
}
實作的方式很簡單,就是載入 https://unpkg.com 公用 CDN所提供的 css/js 或使用官網提供的 css/js
private static string GenerateScalarHtml(string documentName)
{
    return $$"""
    <!doctype html>
    <html lang="zh-TW">
    <head>
        <meta charset="UTF-8">
        <meta name="viewport" content="width=device-width, initial-scale=1.0">
        <title>API Documentation - Scalar UI</title>
    </head>
    <body>
        <script
            id="api-reference"
            data-url="/openapi/{{documentName}}.json"
            data-configuration='{"theme":"purple"}'
        ></script>
        <script src="https://cdn.jsdelivr.net/npm/@scalar/api-reference"></script>
    </body>
    </html>
    """;
}
更多的內容到這裡看
參考
aspnetcore/src/OpenApi/sample/EndpointRouteBuilderExtensions.cs at main · dotnet/aspnetcore
Program.cs 整合
using Lab.AspNetCoreOpenApi.Extensions;
var builder = WebApplication.CreateBuilder(args);
builder.Services.AddOpenApi();
var app = builder.Build();
if (app.Environment.IsDevelopment())
{
app.MapOpenApi();
app.MapSwaggerUI();
app.MapScalarUi();
app.MapRedocUi();
app.MapRapiDocUi();
app.MapElementsUi();
app.MapOpenApiExplorerUi();
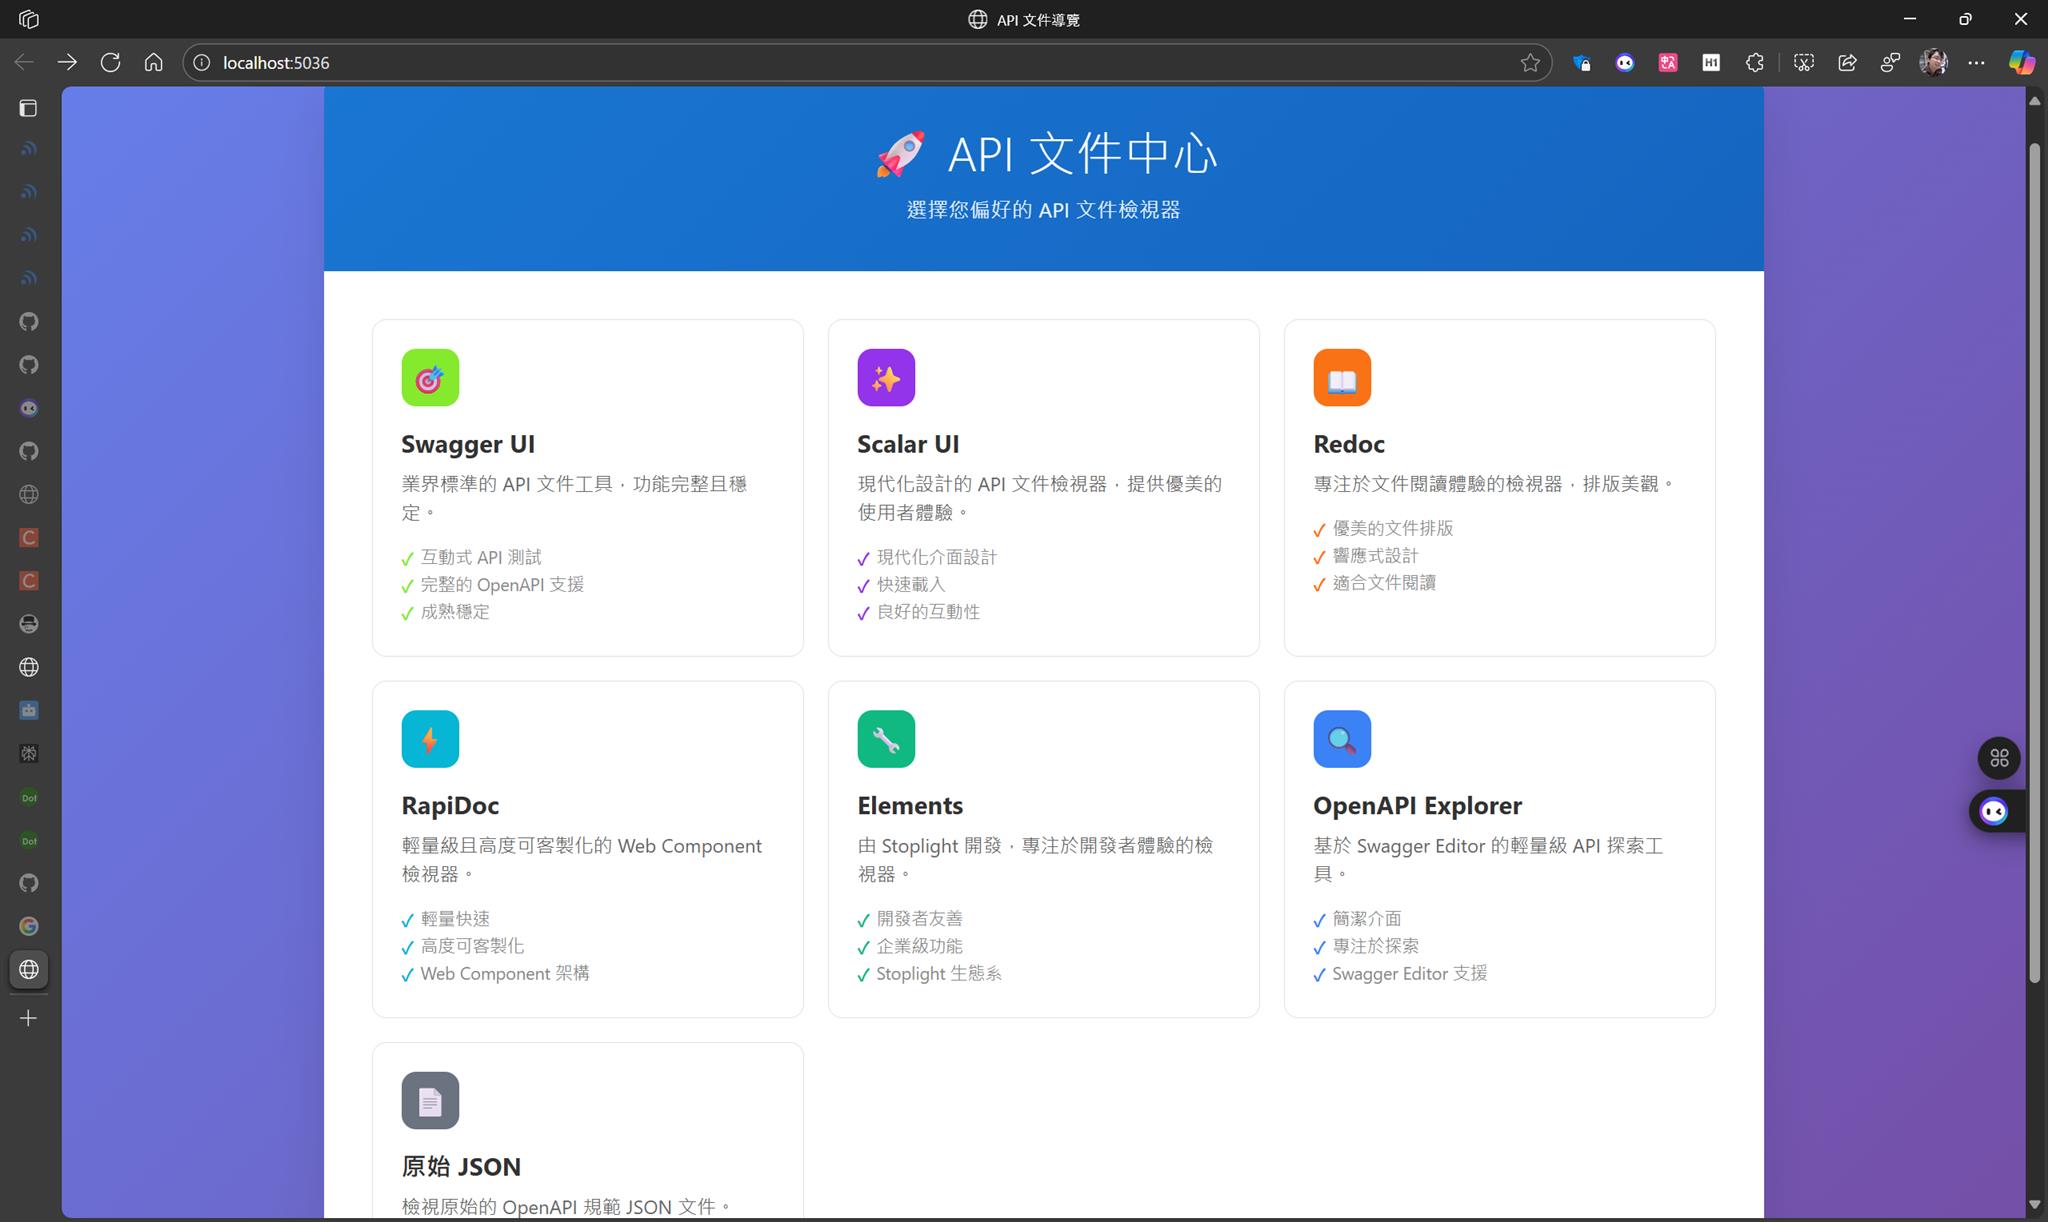
// 導覽首頁
app.MapApiDocsNavigator(); // 根路徑
}
app.Run();
UI 工具
| 工具 | 路由 | 特色 | 適用場景 |
|---|---|---|---|
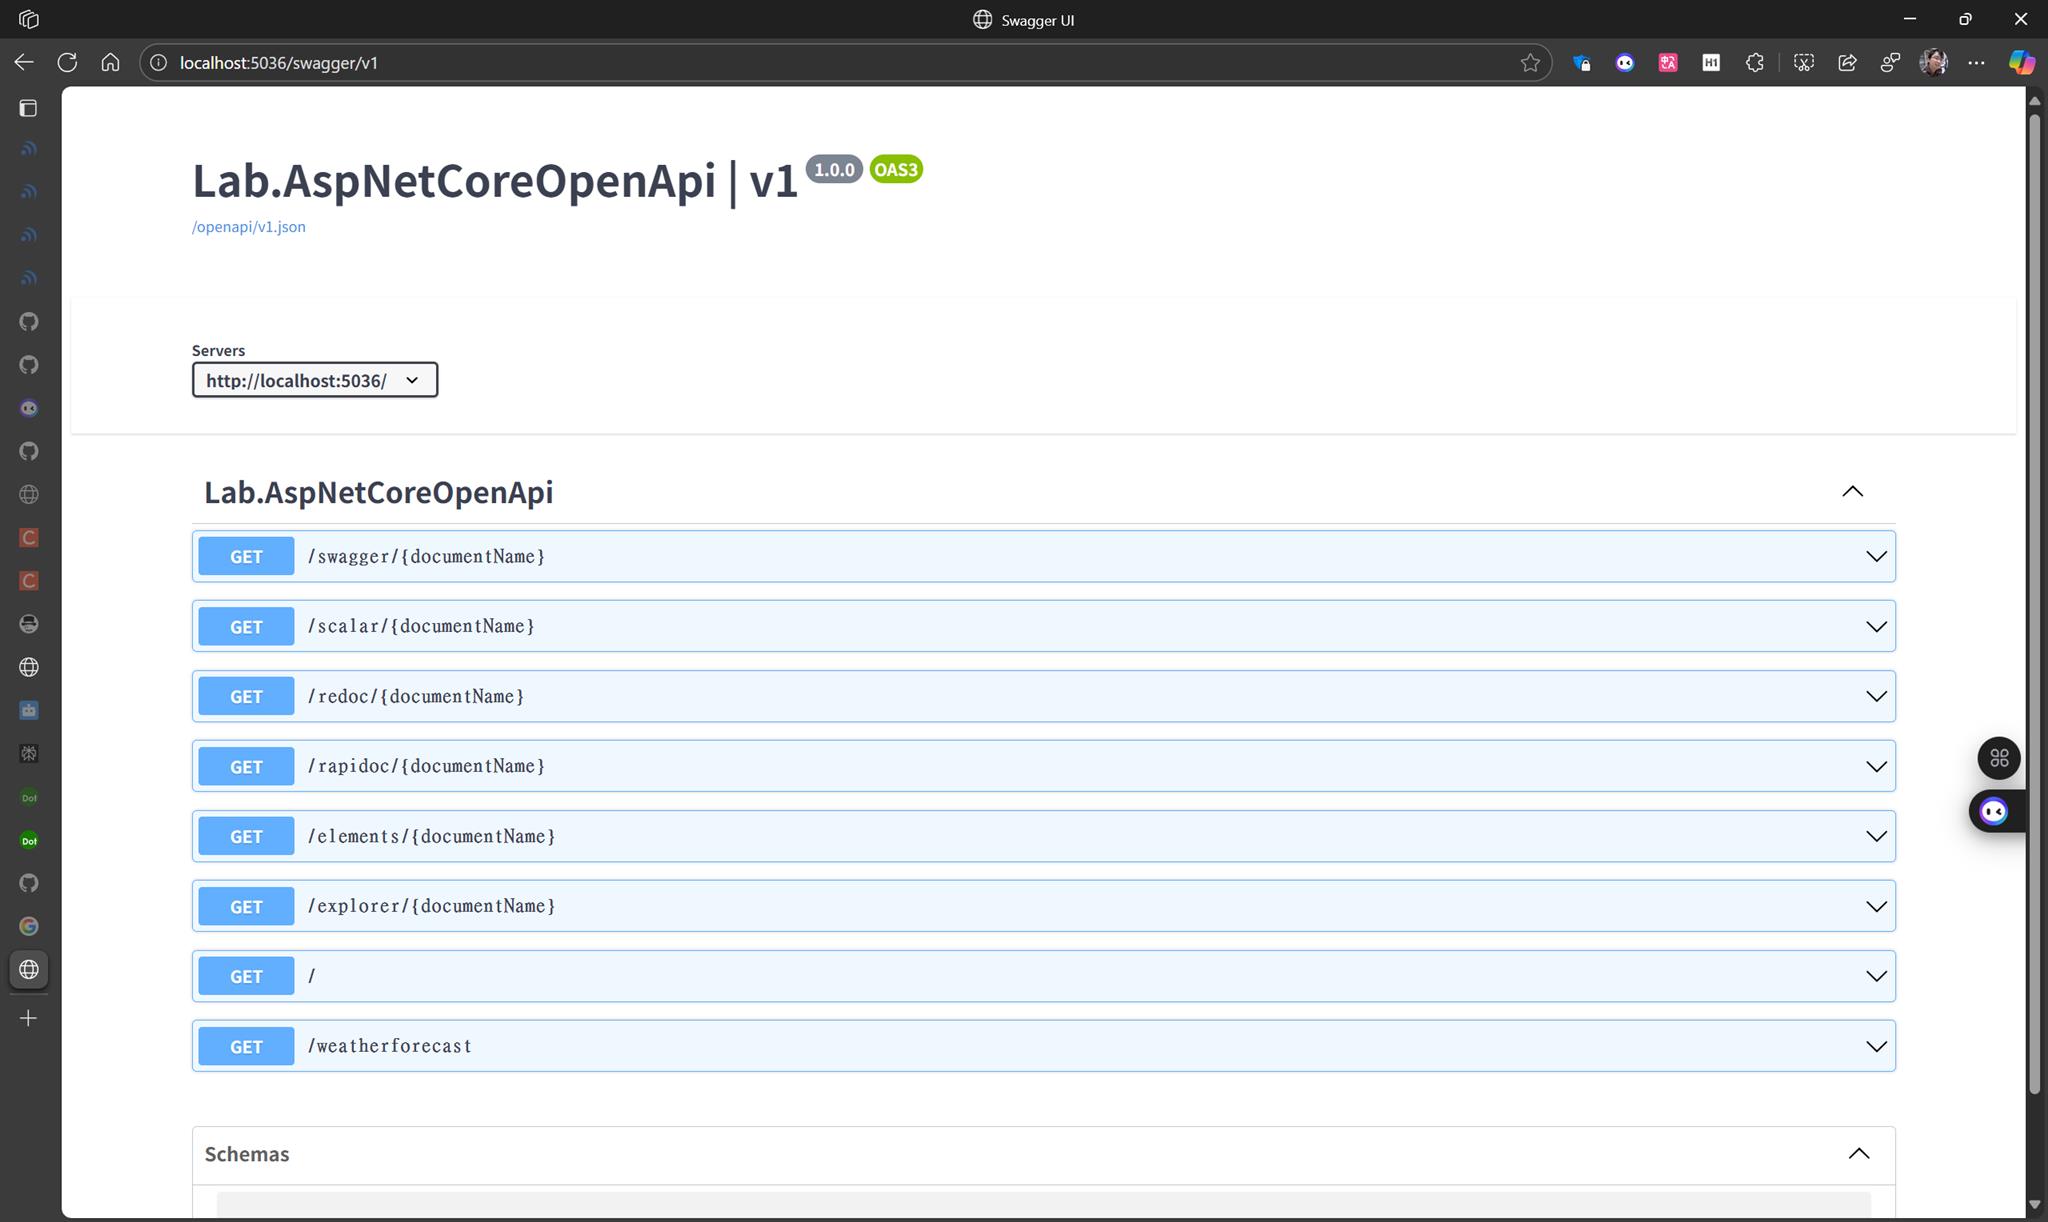
| Swagger UI | /swagger/v1 | 業界標準,互動式測試 | 日常開發 |
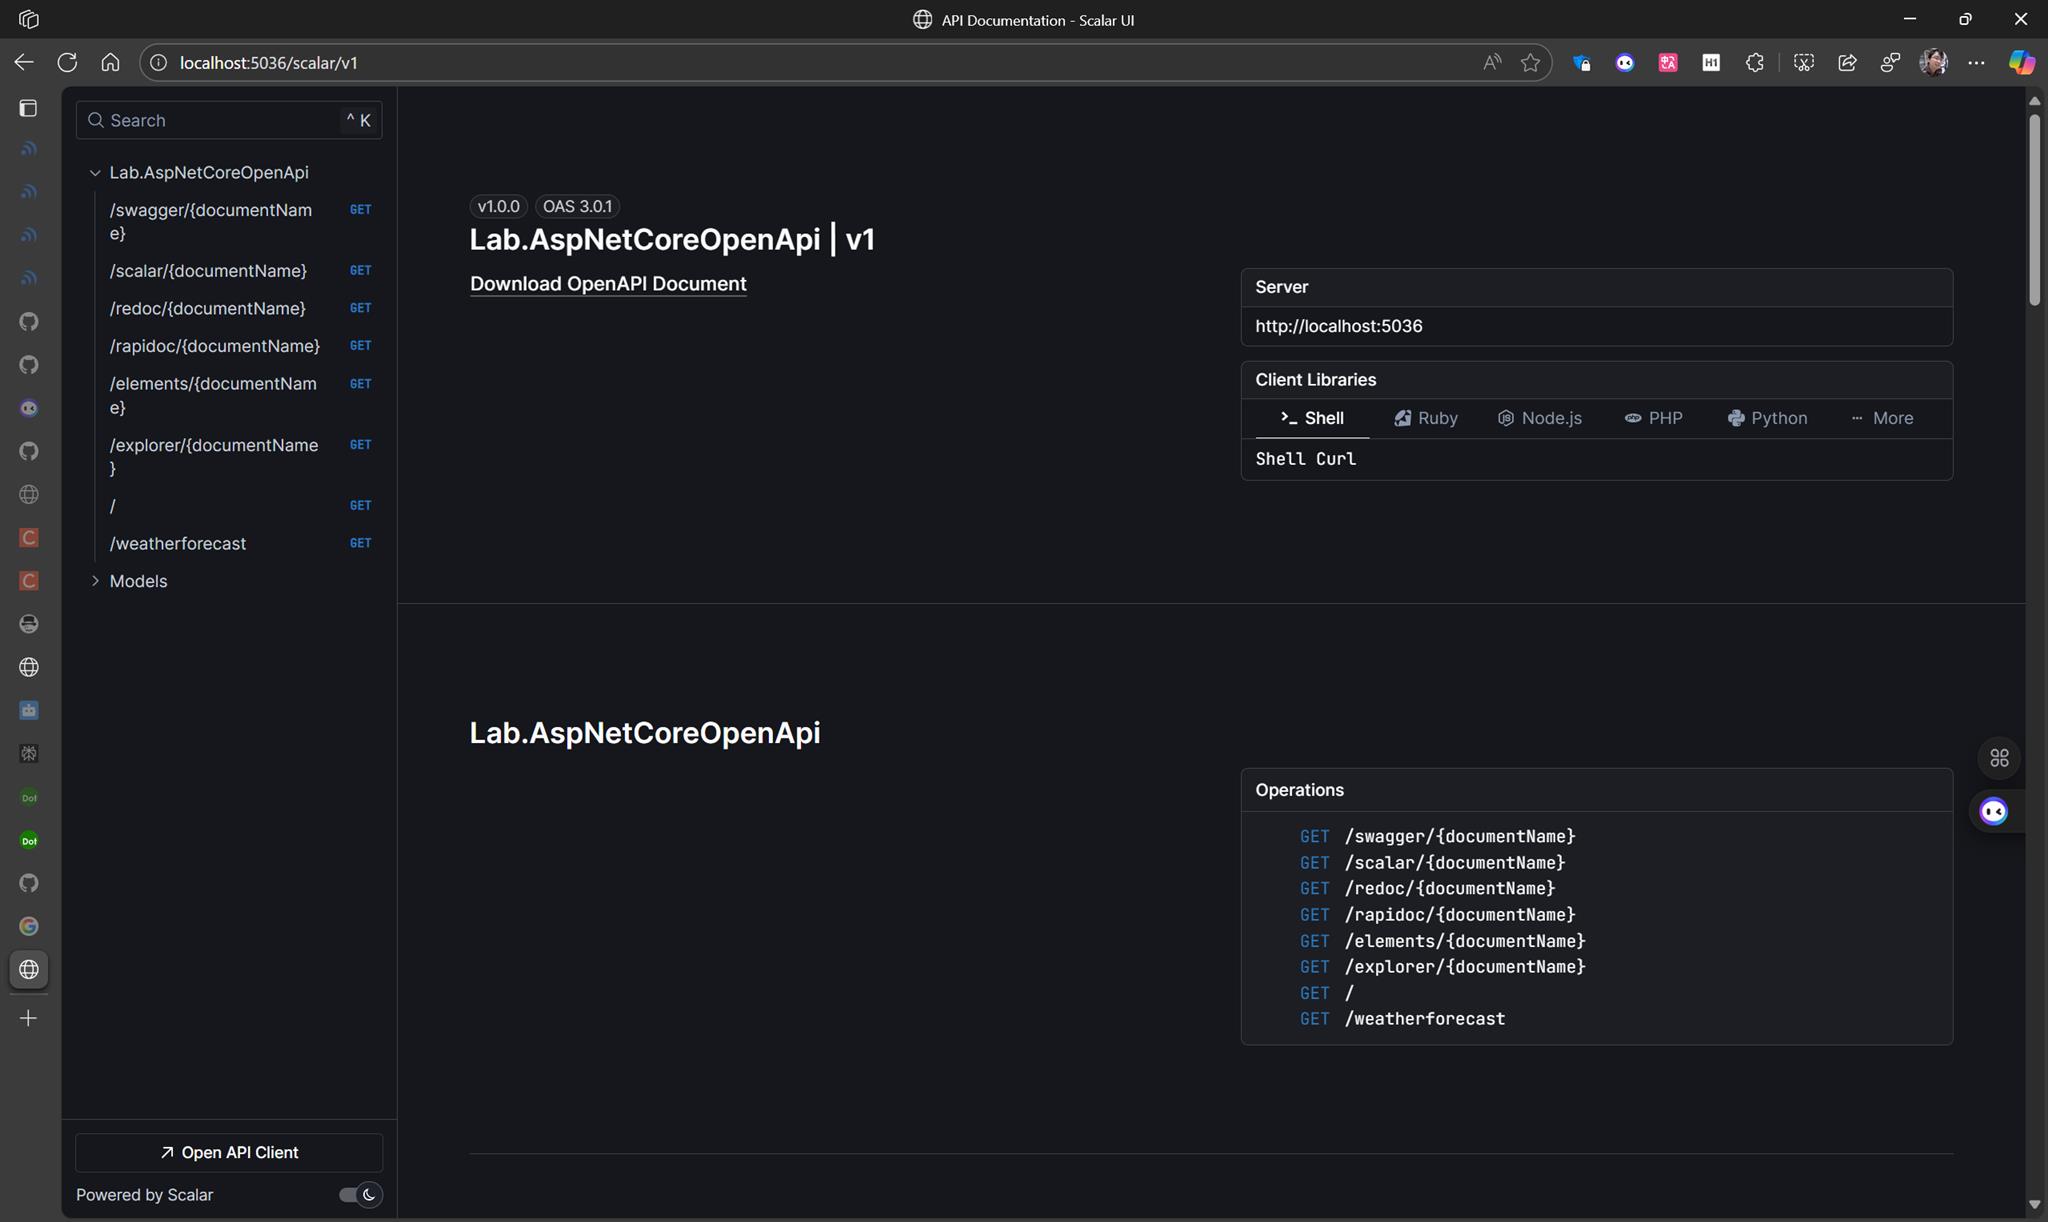
| Scalar UI | /scalar/v1 | 現代化設計,紫色主題 | 展示專案 |
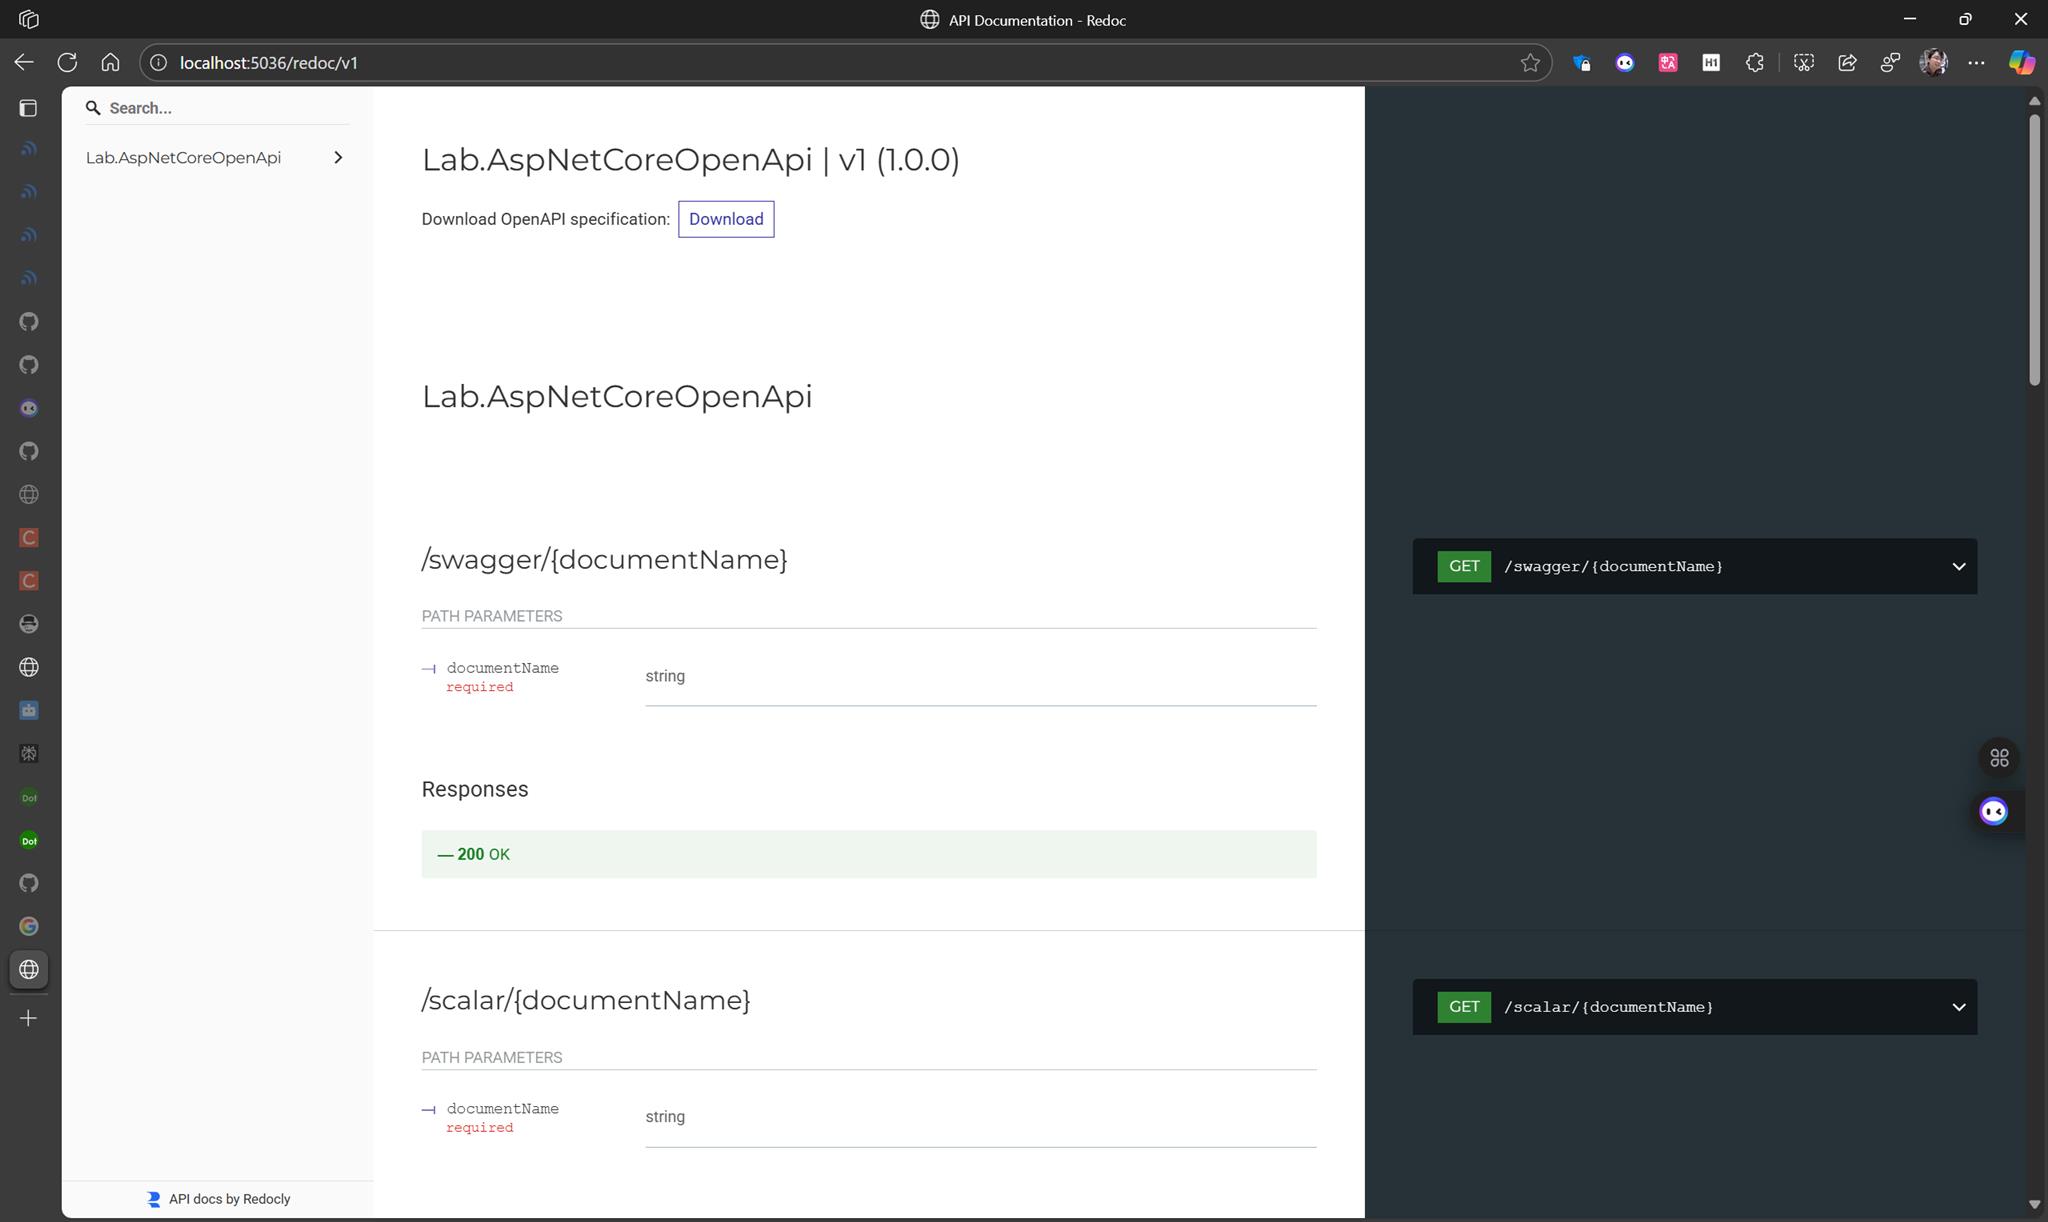
| Redoc | /redoc/v1 | 文件導向,優美排版 | 文件閱讀 |
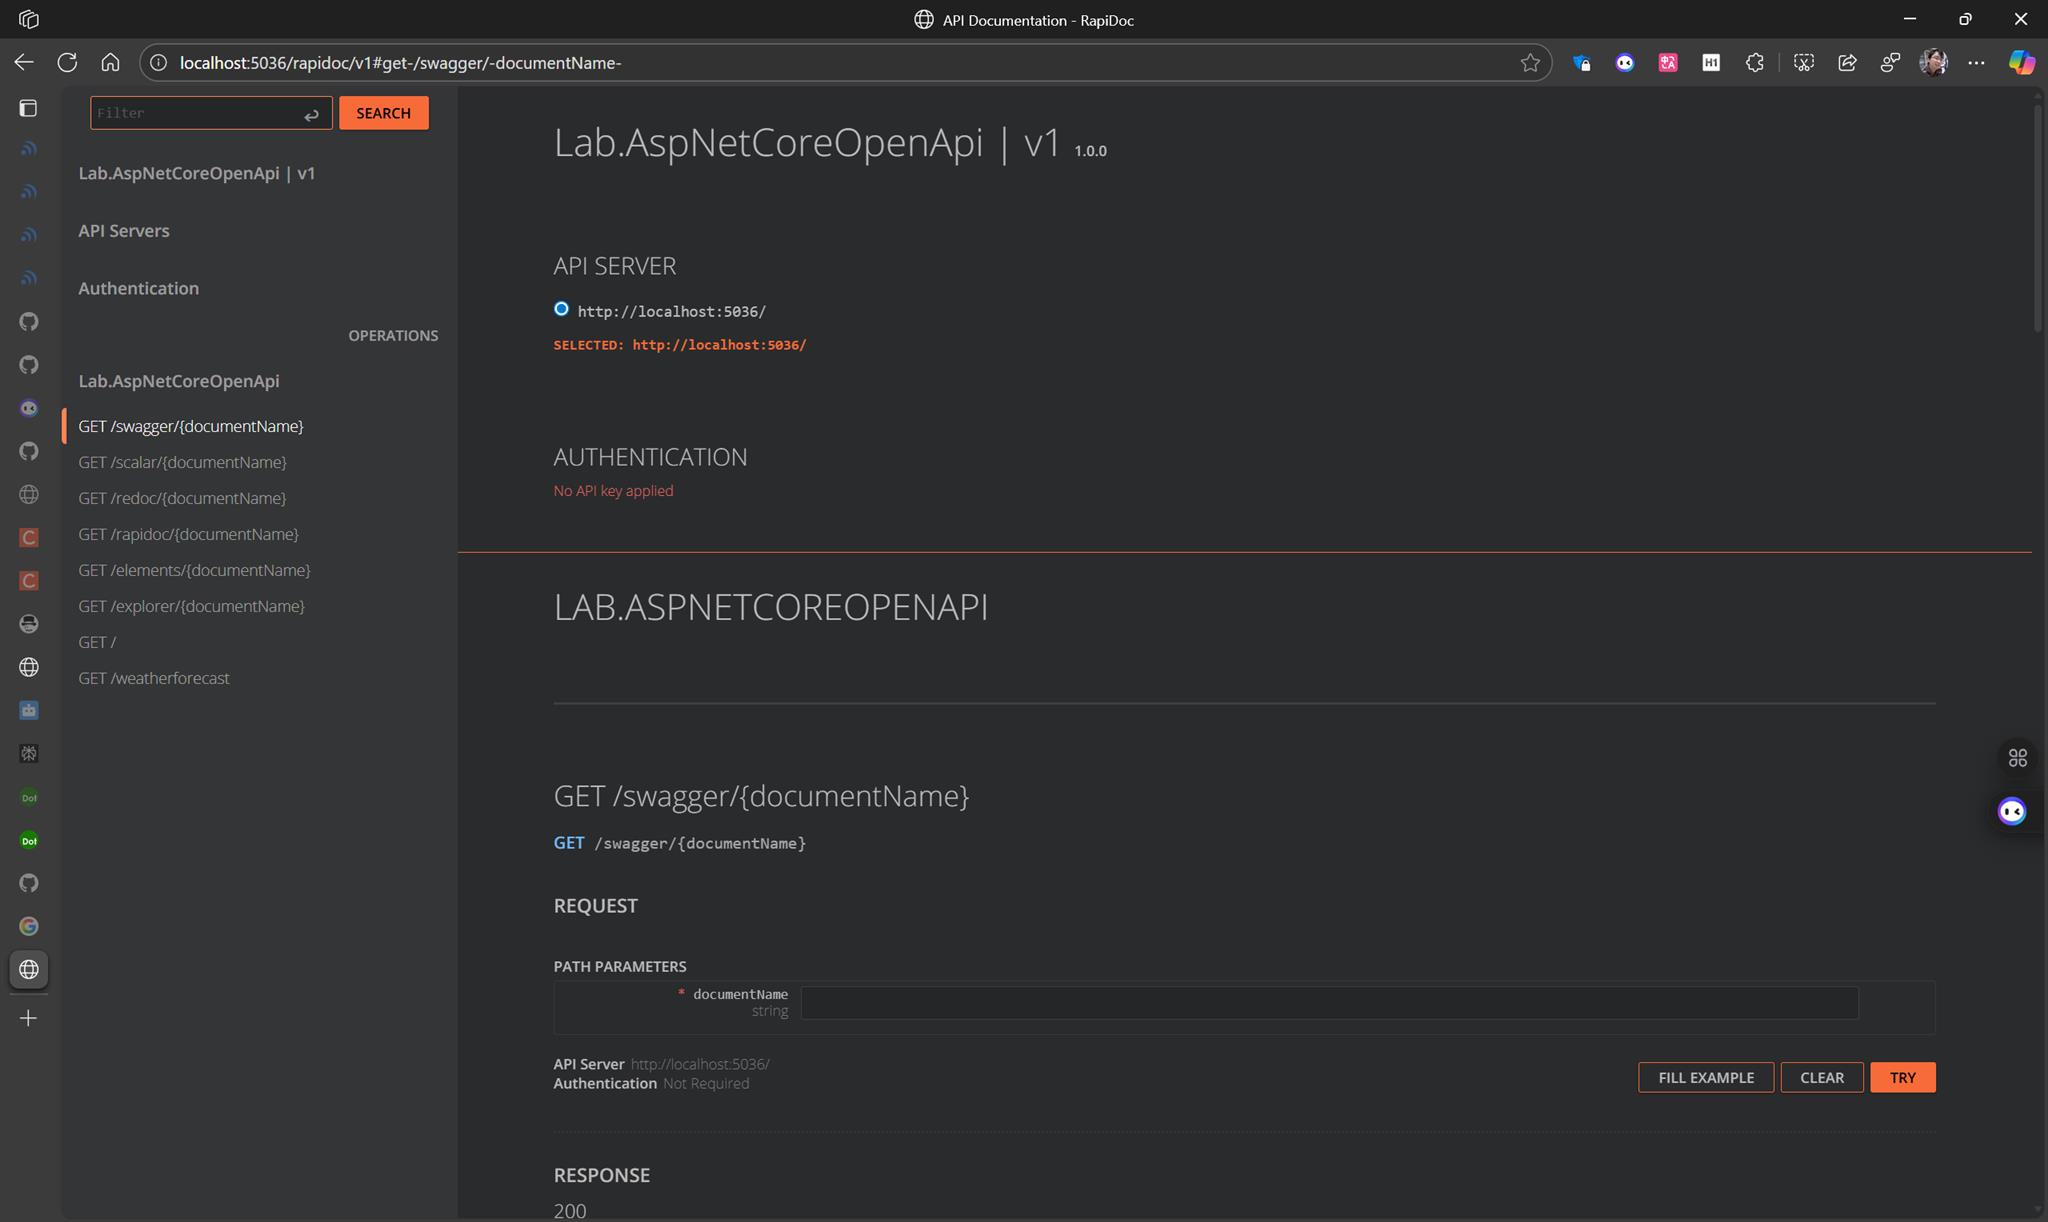
| RapiDoc | /rapidoc/v1 | Web Component,深色主題 | 輕量整合 |
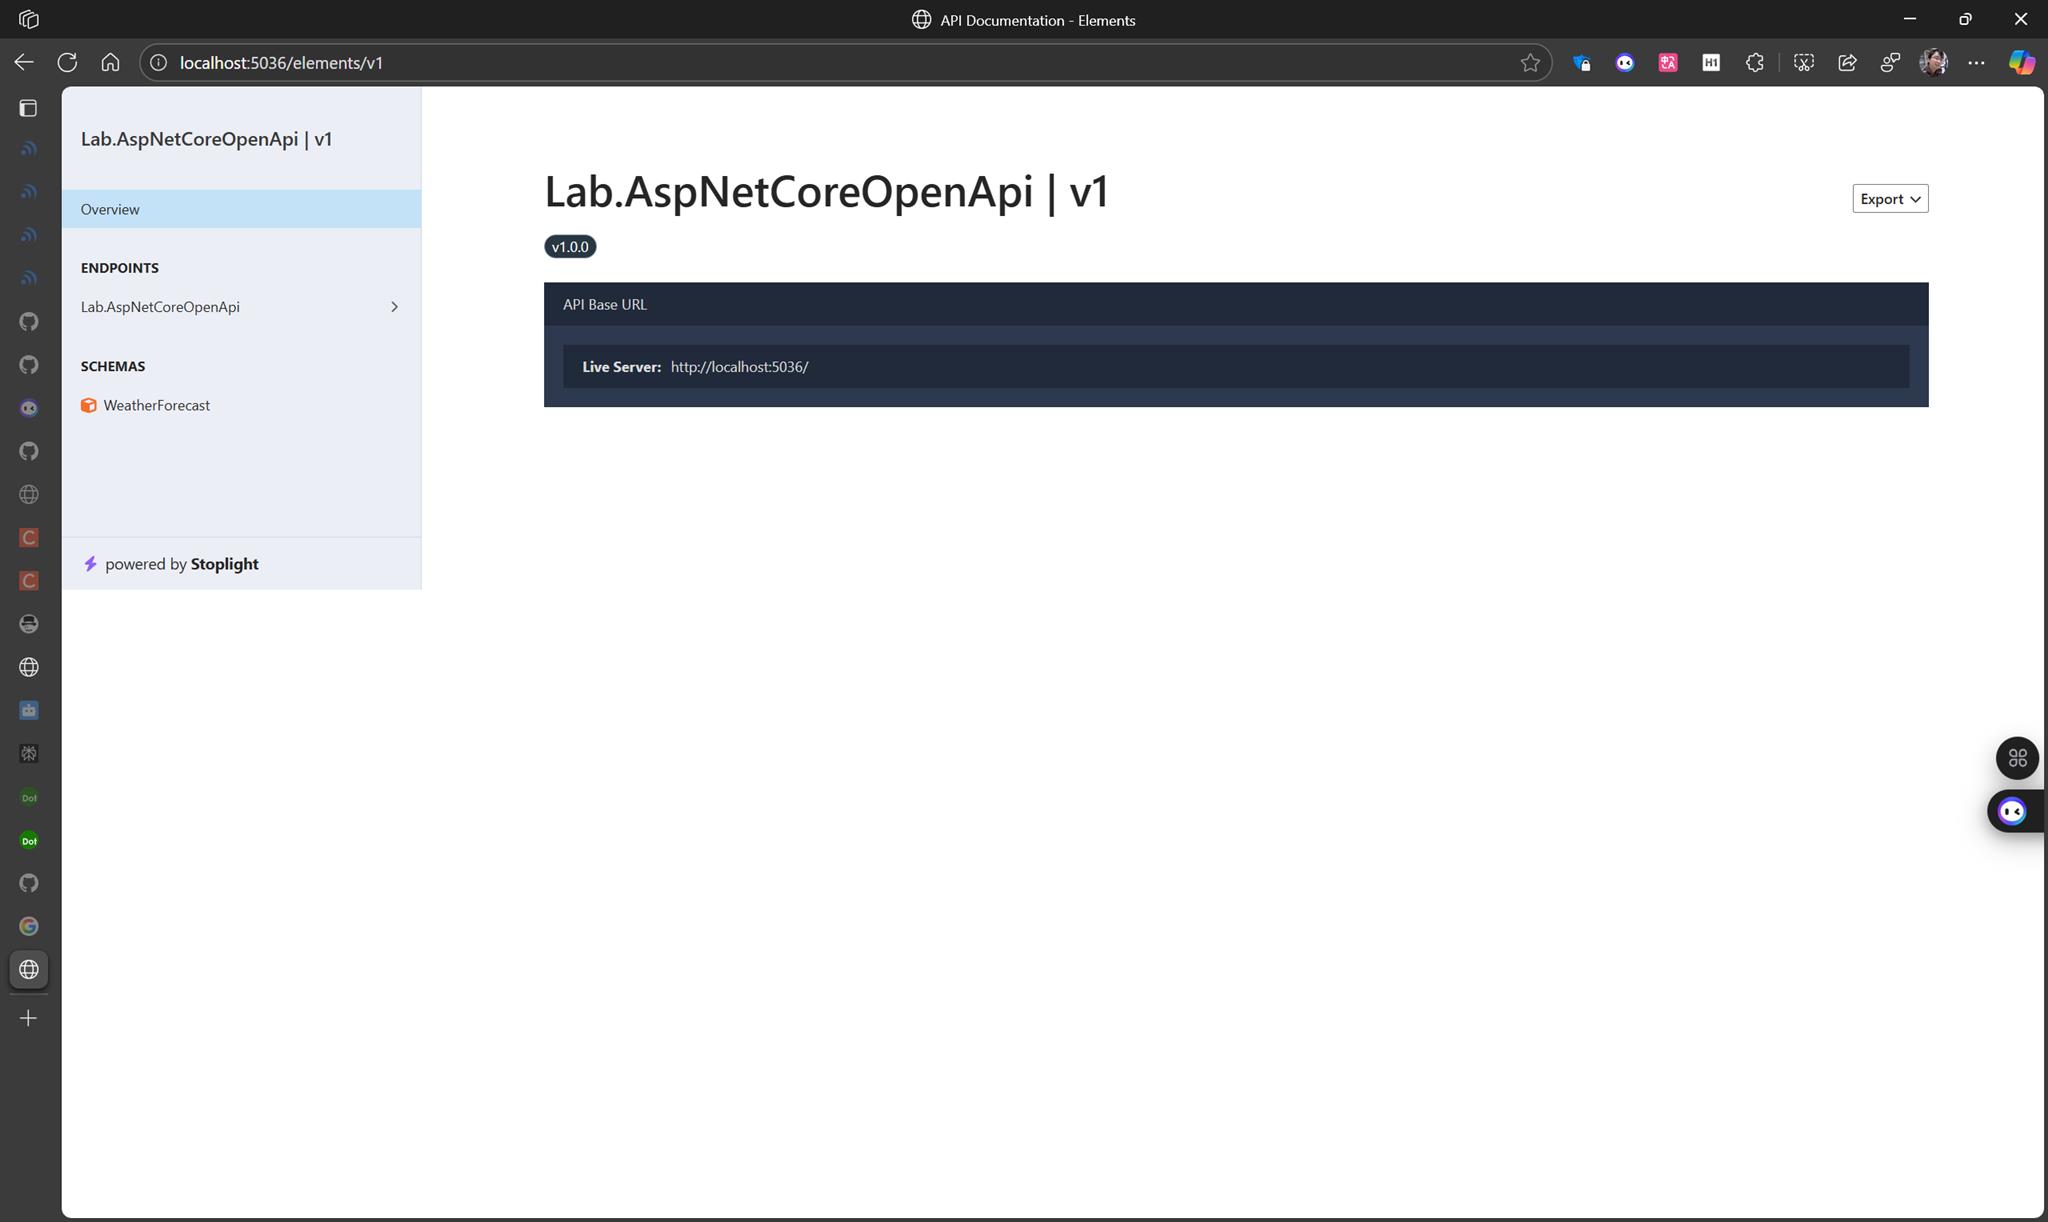
| Elements | /elements/v1 | Stoplight 生態系,企業級 | 企業應用 |
根路徑
Swagger UI
Scalar
Redoc
Elements
RapiDoc
OpenApi 文檔
心得
這次實作下來,我有幾個感想:
- 微軟終於補上了缺口,內建 OpenAPI 文件,讓 ASP.NET Core 更完整。
- UI 工具百花齊放,不同團隊可以依需求選擇合適的 UI。
範例位置
sample.dotblog/WebAPI/Lab.AspNetCoreOpenApi at master · yaochangyu/sample.dotblog
若有謬誤,煩請告知,新手發帖請多包涵

Microsoft MVP Award 2010~2017 C# 第四季
Microsoft MVP Award 2018~2022 .NET

